Teachers' toolkit for creating and re-purposing OER using FOSS/Publishing OER
In the previous chapters of this toolkit, you have accessed existing text, image, audio and video OER from the Web, to create and re-purpose OER. You have so far retained your OER in your personal digital library (PDL), in your own computer. This is accessible only to you. You can create a concept map of your PDL automatically using Freeplane, and use this map to navigate your PDL.
However if you publish your OER on the world wide web, it will be available to anyone, any time. Publishing content on-line is making available a copy of your personal digital library on the the web, which is like a global digital library.
The power of OER is in its re-use, for various learning and teaching needs. It is important for you to publish the OER you create, so that it is available to others for re-use or re-purposing, to sustain a virtuous cycle of receiving-giving (access->create->publish->access). It is also important to access existing OER, revise them to make them more valuable (including by improving their accuracy or comprehensiveness or by contextualising them or by translating them), and publish the revised OER. Such re-purposing and publishing is also a virtuous cycle (access->re-purpose->publish->access).
You can publish your content in one of two ways (or both):
- Contributing your creations to existing OER repositories
- Maintaining your own personal web space and making available all your OER at a single location
Contributing your creation to existing repositories
You can publish your OER in popular repositories, some of which have been mentioned earlier in this toolkit. This chapter briefly these discusses repositories where you could publish the OER you create or re-purpose. (Note that some repositories will only allow you to upload OER, such as Wikipedia, while others accept both OER and non OER content, such as Youtube. In either case, you should specify your resource as an OER). It also provides an example for each section, by uploading the OER that we have created in this toolkit on 'Learning Digital Story Telling', on these repositories.
Publishing your text OER on an OER repository
There are OER repositories for uploading your text resources. WikiEducator is an OER repository specially for sharing educational Academia.edu is a repository for sharing articles and academic papers.
SlideShare is a popular web site where you can upload your presentation slides and text documents in different formats.

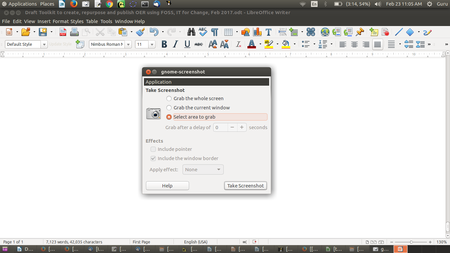
We have uploaded our slide presentation on our SlideShare account. You too can create your account on SlideShare and upload your slide presentation and your text document. You should specify 'Public' in the 'Privacy' settings, to make the document available to all (image 1).
It is important to note here that even if you are contributing your resource to a repository that is not OER, you may be able to make your resources OER, for anyone to access. Remember always to specify the license of the OER you upload. If you do not specify any license, then the default license 'all rights reserved' will apply, which will make your content a 'non-OER'. You can choose from a variety of Creative Commons licenses.
Contributing to collaborative text OER
You can also contribute your content to Wikipedia, the most visited OER in the world. You can either create a new web-page or edit an existing page on Wikipedia. This encyclopedia has grown to be the most referred-to encyclopedia, by the collaborative efforts of a world-wide community of Wikipedia editors. Contributing to Wikipedia is even more important if you are creating an OER in a language other than English. Most languages of the world, especially languages spoken in the developing countries, are not well represented on Wikipedia (see List of Wikipedias). Since Wikipedia is a popular encyclopedia, if you could regularly contribute your OER to Wikipedia, it would be useful to many others. You will need to follow the editing guidelines of Wikipedia.
OER commons is another repository where you can join and create text OER, enriched with media OER; this site also allows you to build lessons and modules.
As we saw earlier, you should publish in formats that are open and easier to edit. A web page is usually in the .html format which is an open format. In case you are uploading a document (file) on-line, you should prefer an odt over a pdf format (editable v/s non-editable format) for publishing a text document. Again you should prefer an odt over a docx format (open v/s closed formats).
Publishing your image and audio visual OER
We saw in the earlier chapters different repositories for image, audio and video files. Wikimedia commons is one of the largest repositories of media OER of different kinds - image, audio and video files. See the image of the digital story that we have uploaded on Wikimedia commons here. Other options for image repositories include include pixabay and Flickr.
Audio OER can be uploaded on Soundcloud. We have uploaded our audio file on Soundcloud

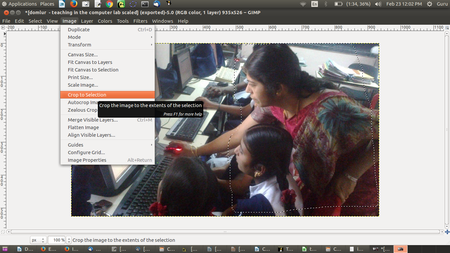
Video OER can be uploaded on Youtube. You should ensure to select the Creative Commons license when you upload your video OER (image 2), to ensure that it is available freely to others. We have uploaded our video files on Youtube, see one of these Youtube videos here.
Vimeo is another popular site for uploading OER videos.
OER commons is another repository for sharing your image, audio and video OER.
List of publishing spaces by format of OER
| No | Category | Site for publishing OER on-line |
| 1 | Text OER | Wikipedia, WikiEducator |
| 2 | Text OER – Presentations | Slideshare and Academia.edu |
| 3 | Image OER | Wikimedia commons, Flickr, pixabay |
| 4 | Audio OER | Soundcloud, Yourlisten |
| 5 | Video OER | Youtube, Vimeo |
Note
- Before uploading your OER, you will need to register or create a login id on the site
- You need to ensure that you have not used any non-open (copyright) materials in making your OER.
Creating your own web space and publishing OER
You can create your own (blog) site on Wordpress. If you would like to upload all your OER in a single place to make it available to others, this is a good option. Wordpress is a simple software for you to manage your web content. You could also maintain your own blogs with an organized collection of all OER created by you.
.png)
We have uploaded the text document content and the concept map image on our Wordpress site . You can upload your text and image OER on your Wordpress blog. You need a premium account in Wordpress to upload audio and video. However, you can upload your audio and video files on the audio and video repositories discussed earlier and provide a hyper-link to those pages on WordPress, to create your complete OER.
Providing metadata for your OER
Metadata is defined as 'data about data'. In our context, it means additional information about the OER, which will be useful for others. It will include the following data elements
- Name of the file
- Name of the author
- License information (you may chose any of the Creative Commons licenses)
- Document date (may be creation date and or publishing date)
It is a useful convention to provide metadata for any OER you create or re-purpose. You can provide this information at the beginning or end of the document.
OER created as part of this toolkit on 'learning digital story telling'
As a part of the toolkit, we worked on creating an OER for the topic 'Learning Digital Story Telling', to demonstrate to you how we could use FOSS applications to create and re-purpose OER. The OER is available on the different pages for text, image and animation, audio and video OER, it is shown below for reference at a single location:
- Freeplane - Concept Map
- LibreOffice Writer - Text document
- LibreOffice Impress - slide presentation
- Images
- Image edited using GIMP
- Audio recordings using Audacity
- Audio recording of interview - original
- Audio recording (edited) - Moving part of the audio
- Audio recording (edited) - background music added
- Audio recording (edited) - background music Amplification
- Video recordings using RecordMyDesktop
- Video Editing using OpenShot
We have copied the text from the LibreOffice text document onto the WordPress page and inserted the concept map. The web address of an audio and a video OER has been linked on this page. The aim is to demonstrate how you can bring together text, image, audio and video resources relating to one topic on one page on your WordPress site. This will allow all your OER on a topic to be strung together providing greater coherence and quality. You can create any number of such pages on different topics that you are creating and re-purposing OER on.
Our purpose in this exercise has been only to demonstrate to you, how to go about creating, re-purposing and publishing OER. The OER created is not in its final or mature form, for that much more work is required add content to complete the text document and the slide presentation. Work is also required to bring together and refine the text, image, audio and video resources together to make a final OER set on 'learning digital story telling'. Preparing a quality OER is time and effort intensive exercise, you will also need to work quite a bit to revise, refine and finalise your OER. This is likely to be a iterative effort. The applications we have learnt will enable you to go back to the specific OER (file) you are working on, and continue editing the same for further revising and maturing.
Toolkit created as OER, using MediaWiki
This toolkit is created as an OER using MediaWiki, including an extension called Wikibooks. This toolkit has been created in a collaborative manner by members of the IT for Change, the author of this toolkit. The toolkit has OER in different formats (text, image, animation, audio and video) and internal and external hype-links as well.
While you can use WordPress to create your own web site, where you can host all the OER you create, MediaWiki is a candidate platform to host OER, which is sought to be collaboratively produced. MediaWiki allows multiple users to edit the same content, it allows embedding of image, animation, audio and video resources. It stores the history of edits, so that at any time, you can roll back to a previous version. It has several reports to give you information about the data and metadata on the OER. It is also possible to define processes of creation-review-curation-publishing on MediaWiki. The power of MediaWiki is what enables the world's most popular OER repository Wikipedia, to support collaboration amongst thousands of creators-editors-reviewers across the world, to create OER in more than a hundred languages.
MediaWiki is thus, most suitable for cases where a group or a community of teachers (could be teachers belonging to one institution or one school system) want to come together to co-create OER. Hence if your institution is keen (or you can persuade your institution) to create a platform for all faculty / teachers to collaborate and create, re-purpose and publish OER, then it should install MediaWiki on its web-space, on which all the institution's and its faculty requirement for OER, could be attempted to be met.
OER to build communities of practice
One of the great challenges that teachers face is isolation in their practice. Communities of practice (COP) has been seen as a method of supporting teacher professional development and reducing isolation. When teachers are supported to interact in a free and open technology environment, they are able to support one another in the creation of open educational resources using multiple tools and processes. Such an environment, supported by online and virtual methods, can build collaboration amongst teachers, thus supporting the community as well. OER creation and re-purposing could thus be the purpose and the output of teacher communities. A free and open technology environment is essential to make this a reality. OER is the 'What', COP is the 'Who' and FOSS is the 'How' of this paradigm.
Wikipedia is an example of a MediaWiki based OER that seeks to meet the information needs of all. The Karnataka Open Educational Resources (KOER) MediaWiki based OER aims to meet the needs of teachers of Karnataka. Created by the COP of Government high school teachers across the state, the KOER MediaWiki portal has the contributions from the COP in the subject areas of Mathematics, Science, Social Science and Languages. Thus COP and OER can have a symbiotic relationship and this model of OER creation and re-purposing by a COP can be adopted by other institutions or education systems.
Creating a graphic view of your PDL
The files created by us as part of the OER creation and re-purposing are stored in folders in our computer. Normally we access these files in a hierarchical manner, by drilling down the folders, sub-folders and sub sub-folders till we reach our files. Freeplane has a feature by which we can import the entire folder/file structure into a concept map. This concept map will show the hierarchy of folders and files through the child nodes and sibling nodes. Each node will display a pink arrow to the left of the name of the folder or file. Clicking on this arrow will open the folder (or the file, using the relevant application). This way you can easily navigate your PDL using a single concept map.

We have created a concept map of our PDL on 'learning digital story telling' using Freeplane, to automatically import the folders, sub-folders and files relating to the text, image, animation, audio and video OER created and re-purposed by us. You too can create a similar concept map of your PDL folders. You can refresh this concept map once in a while. You can also create a concept map by importing the entire folder structure on your computer by including all your folders and files! This will give you an easy overview of the folders and files on your computer and you can navigate your folders and files using this map.