Difference between revisions of "Teachers' toolkit for creating and re-purposing OER using FOSS/Audio and Video OER"
| Line 1: | Line 1: | ||
| + | {{Navigate|Prev=Text OER|Curr=Audio and Video OER|Next=File formats}} | ||
| + | |||
In this chapter, you will learn how to create and re-purpose audio and video OER. You will learn | In this chapter, you will learn how to create and re-purpose audio and video OER. You will learn | ||
# about popular repositories for accessing audio and video OER | # about popular repositories for accessing audio and video OER | ||
Revision as of 08:00, 27 February 2017
In this chapter, you will learn how to create and re-purpose audio and video OER. You will learn
- about popular repositories for accessing audio and video OER
- how to create audio resources using your audio recorder (in your mobile phone)
- how to edit audio resources using an audio editor (Audacity)
- how to create video resources using your video recorder (in your mobile phone)
- how to create simple video resource using a screen-casting tool (RecordMyDesktop)
- how to edit video resources using a video editor (OpenShot)
- how to embed / insert links to audio and video resources in a text document (LibreOffice Writer)
- Inserting links to audio and video resources in a ‘slide presentation’ (LibreOffice Impress)
Accessing audio OER repositories
Freesound is an audio OER repository. You can search for sounds in this repository. Soundcloud is also an audio repository. You will need to check the copyright of the audio you want to re-use.
You can use a search engine such as Google search engine or DuckDuckGo search engine, using a FOSS web browser such as Mozilla Firefox
When you visit the site or check a specific resource, you need to look for copyright information to ascertain that the audio resource is OER and you can re-use it. If the resource is not explicitly declared to be an OER (allowing you to re-use), you should not use it in creating your OER.
The search for audio OER is can be made easier by providing OER as a criteria in your search itself.
Accessing video OER repositories
Youtube is a popular repository for videos, it contains both OER and non OER videos. It is the largest collection of videos in the world.
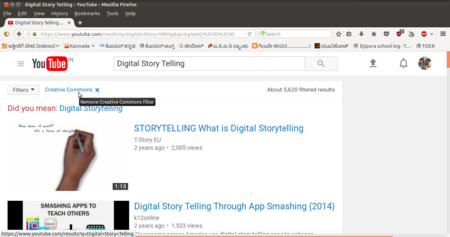
You can enter your topic name in the search bar in Youtube to search for videos on that topic. To get videos which you can re-use, you need to click on the ‘Filter’ link on the Youtube page and select ‘Creative Commons’, with this step you will see videos that have the CC license (are OER).
Image - Selection of CC videos in Youtube

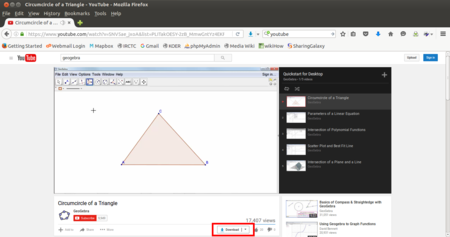
You can click on the video, this will open the video and it will begin playing. You can download the video by clicking on the download link below the video. You can download in different formats
Image showing downloading of videos in Youtube

There are other OER video sources too, you can visit, such as Vimeo . Wikipedia has a list of educational video websites. A google search on ‘OER Videos’ will also give you a list of sites to explore.
Creating image audio resources using your audio recorder (in your mobile phone)
You can record an audio clip using your mobile phone itself, using any audio recording app, such as ‘Audio Recorder’. You can copy the audio file from your phone to your computer for editing and re-mixing to create OER. While recording, make sure that no copyright music or sound is playing in the background.
We have recorded a short interview with a teacher on why Digital Storytelling is important, using a mobile phone. We have copied this audio clip to our computer, by connecting the mobile phone to the computer with a data cable and renamed the file as ‘Interview - why Digital Storytelling.’
Edit audio resources using audio editor (using Audacity)
You can use Audacity to edit your audio clips. Audacity is a simple yet powerful application for audio editing. You can also use it to record audio.
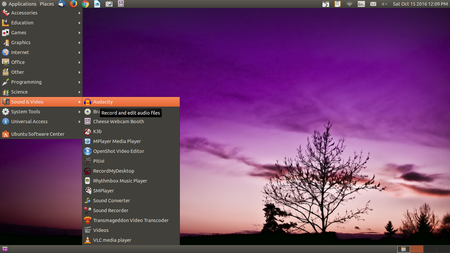
Open Audacity on your computer, through Applications → Sound and Video → Audacity
Image - Opening Audacity

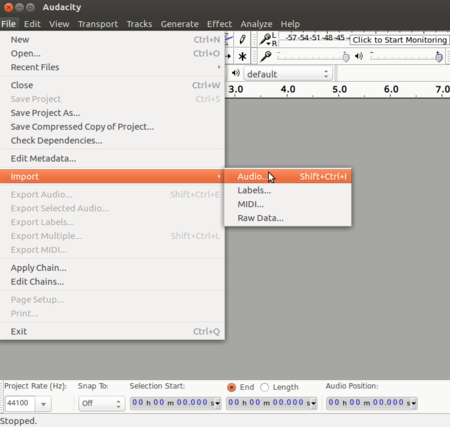
We will need to ‘import’ the audio we have (of the teacher interview) into Audacity.
In Audacity, create a new track, choose Track → Add new → Stereo track
Import your audio into Audacity through File → Open and select your audio file
Image - Importing audio file into Audacity

You should also import your audio clip which you want to edit. You can add tracks to the audacity file.
Audacity is very powerful audio editor, with many sophisticated features. For advanced features, refer to the user manual and tutorials . However, we will learn a few commonly used functions, in audio editing, which are useful to teachers in creating and re-purposing OER:
- Moving a selection of audio
- Adding a background music track
- Reducing background noise levels
Moving a selection of audio
Just like you can cut (or copy) paste a selection of text in a text document, you can cut (copy) and paste a selection of audio in an audio file. You can use this function to remove any part of the audio clip you do not want. You can move a part of a clip from one place to another (for instance if you want to re-order responses in an interview). You can also delete a part of the clip also using the same functionality.
Image - Moving a selection of audio
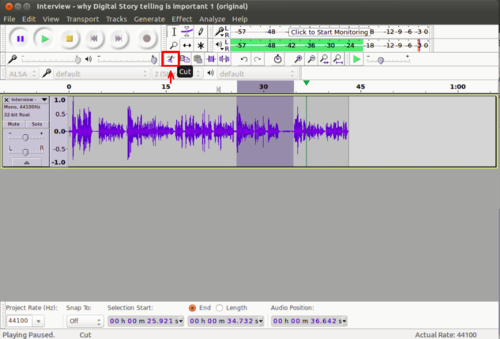

Hear the original audio file
Hear the edited audio file Using audacity we have selected a part of the audio track and moved this part.
Adding background music
You may want to add background music to an audio recording. It is easy to do this with Audacity. You will add a second track, to which you will add the background music. We can add as many tracks as we want, with one audio file per track.

Adding a track in Audacity for background music |

Audacity - Add_New_track |

Audacity - Multiple_Track |
Audio with background music added :-
Amplifying sound
You can use the ‘amplify’ function to increase or reduce the sound level in a track.
Select Effect -> Amplify. Reduce the amplification by moving the slider leftward. Increase the amplification by moving the slider rightward.
Image - Reducing sound amplification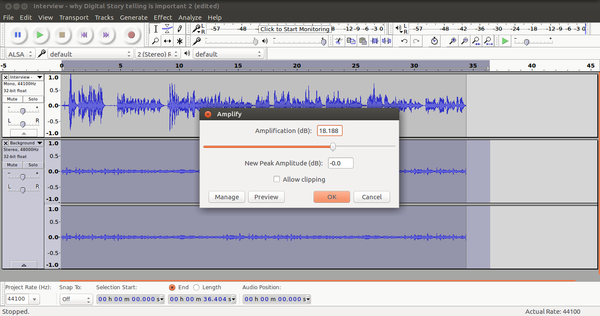
_the_background_music.png)
Audio file with amplification (sound reduced)
You may have an audio recording where there is some unwanted disturbance throughout, such as traffic sounds. You can use the ‘Noise Reduction’ function in Audacity to reduce the background noise.
Exporting the Audacity project to create audio output file
After completing your editing tasks, select File → Export and select the file format as MP3 and click export, to create an output audio file in the .mp3 format.
You can also save the Audacity project, for this select File → Save.
This will save the work done as an Audacity project. You can go back to this file (using File -> Open) to continue editing
Image exporting Audacity project to create audio output file


Audacity is particularly useful for a language teacher to create audio resources for language learning.
Creating video resources using your video recorder (on your mobile phone)
You can record a video clip using your mobile phone itself, using the camera on the phone. While recording the video, take care to ensure that you are not shooting copyright materials or private spaces. You can copy the video file from your phone to your computer for editing and re-mixing to create OER.
Creating a video resource using a screen-casting tool (RecordMyDesktop)
Screen casting is also a very simple yet powerful way of creating a video resource. The RecordMyDesktop software records the computer output display as the video and audio. Additional audio spoken or played during the recording is also recorded as a part of the video.
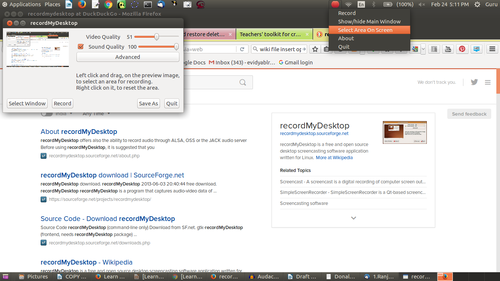
Open RecordMyDesktop, select Applications → Sound & Video → RecordMyDesktop
Image - RecordMyDesktop main window
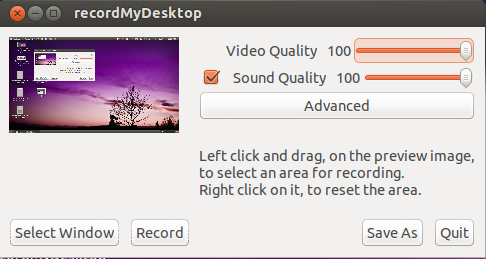

You can use RecordMyDesktop to create videos OER. Make sure you are not displaying copyright material on the screen when recording the video. If you record any copyright material in the video, it will be a copyright violation.
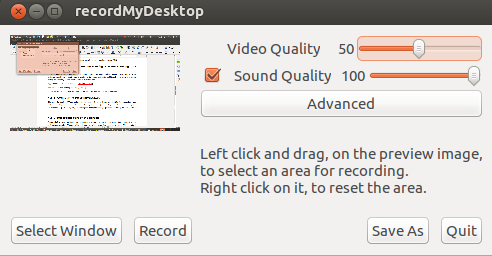
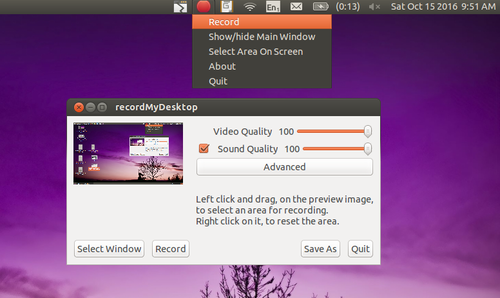
Configuring recordmydesktop
The better the quality of video and audio, the bigger will be the size of recorded file. You can adjust video and audio quality (and consequently size of the output video file) by adjusting the slider near the top right of this window. (Tip - Video Quality of 50% is good enough for most purposes and will keep file size lower).
Image - Adjusting video quality in RecordMyDesktop

Recording part of the screen
You can also select the window of the screen which you want to record. Click on Select window, you will be asked to grab the area to select. You can select only that part of the screen that you want to record. This is useful if you are opening photos or playing a video on only part of your screen and want to record that part only.
Image - RecordMyDesktop select area to record

Recording
When you click on Record button, desktop recording will start
Image - Recording video using RecordMyDesktop

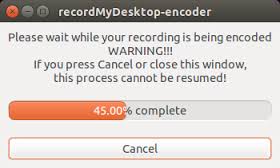
The recording can be paused and resumed at any time, by right clicking on the RecordMyDesktop icon in the top panel and selecting Pause (and later Resume when you want to continue recording). Clicking on ‘Stop’ will stop the recording and initiate the export of the video output.
We need to wait till the export is completed, to get the output file. If we close the process before, we will lose the output file. The output file will be saved in your "Home" folder by default, with .OGV format. The file will usually have a name like ‘out.ogv’, however you can use the ‘save as’ button on the RecordMyDesktop screen to give a file name.
Image - Show exporting output file on RecordMyDesktop

As a teacher, one of the ways you can make resources is to use RecordMyDesktop to create a video file by combining your voice narration with a set of slides or pictures or a video (or a combination of these) on your screen. You can simply play a slide show of your slide presentations or images in your folder, or a video, recording these through RecordMyDesktop and providing the audio with your explanation / lecture. This can be used to create lessons for reinforcing learning or for students who have missed a class, to catch up.
Dubbing a video
You can use this tool to provide voice dubbing for a video. For instance, you may find many OER videos in American English and you may want to change the language of narration to your own native language, to make the video more useful to your students.
You should to prepare the script for your narration in the language you want to dub the video in.
You need to set the sound settings on your computer to ‘mute’ (no output). Then start recordmydesktop application and play the video. As the video plays, read out your script. The audio read out by you will be combined with the video being shown on the screen to create the video in your language.
We have taken a video of a teacher speaking in Kannada about a program he has been a part of, and dubbed it in English.
** Video – Original video in Kannada and dubbed video in English
You could try this with any OER video you like, which is in accented English spoken in the USA or UK and dub it with your own voice, in English or your native language.
Editing video resources using video editor (OpenShot)
You can use OpenShot video editor to edit your video clips. OpenShot is a simple yet powerful application for video editing.
Open OpenShot on your computer, through Applications → Sound and Video → OpenShot
Image - Video editing using OpenShot
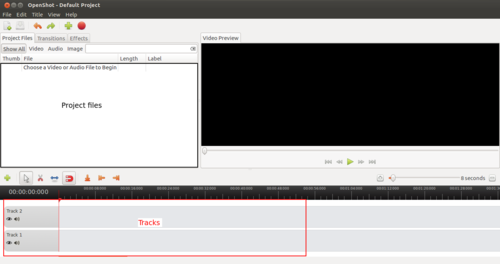

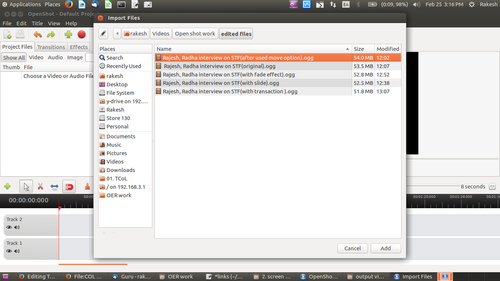
We will need to ‘import’ the video we have into OpenShot. You can also import photos and audio files and combine images, audio and video files to create a video output.
Import your video into OpenShot through File → Open and select your video file
Image - import video into OpenShot

Publishing_OER#FOSS_applications_used_in_the_tool-kit
You should also import your video clip which you want to edit. You can add tracks to the OpenShot project.
This software is very powerful with many sophisticated features (for advanced features, refer to the user manual and tutorials) . However, we will learn a few commonly used functions, in video editing, which are useful to teachers in creating and re-purposing OER:
- Moving a selection of video
- Adding a slide (this can be used for sub-titling as well)
- Adding fade in and fade
- Adding a transition
We will edit a video where two teachers (one male and second female) are discussing their work in integrating ICT in their subject teaching. (Author of video - IT for Change)
Video - See the video
Moving a selection of video
Just like you can cut, paste a selection of text in a text document, you can cut and paste a part of the video by using drag and drop option of the video file. You can use this function to remove any part of the video clip you do not want. You can move a part of a clip from one place to another (for instance if you want to re-order responses in an interview). You can also delete a part of the clip also using delete key from the keyboard(or right click and remove clip).
| Image – Cutting video clip by using cut tool
|
Image – Moving a video clip by dragging and draping
|
|---|


In our video, of the interview of two teachers, we have used this option to move the interview of the male teacher after the interview of the female teacher.
Video - See video where interviews are interchanged
Adding a slide
Here, we can add multiple image slides into video clips in different time frames.
Image - Adding image slide into video track
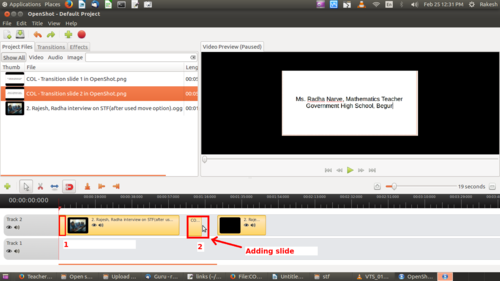

In our video, we have added a title slide introducing each teacher before they begin speaking. You can add slides as required to introduce your own narrative in the video
Subtitling existing videos
Sub-titles or provide your native language text as sub-titles to this video clip. First we have to create our new subtitle file by clicking on Tittle (from menu bar) --> create new title.
Image - Opening title creation window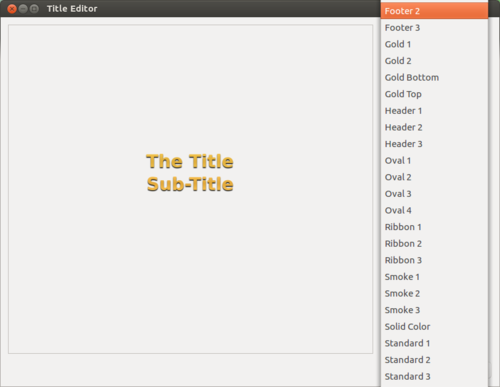
Here, in the left side select style of your sub tittle (we have selected footer3 - it will give my subtitle in the footer area) and click on create new title.

Give a name for your subtitle file, after this just Enter the text you want it in the subtitle, click Apply.This sub title text file will automatically added to your project file. 
Add this subtitle text file into the new track(second track).

Video -
Adding fade in and fade out
By adding fade-in and fade-out for the clips, it will smoothly changing the slides from one to next.
Just right click on slide and fade -> select fade in or fade out as per the requirement. This fade will effect for both audio and video.
Image - Adding fade in, fade out for slides and for video clips.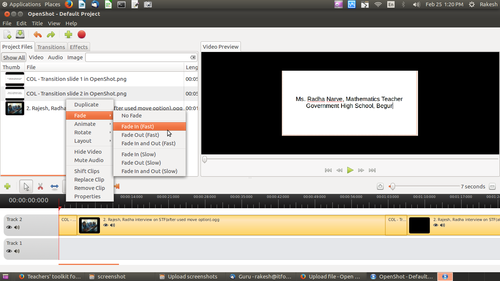

Adding a transition
In openshot video editors have some default transactions in the transaction tab, select a transaction and drag-drop it on the video.
Image - Adding transaction (different effects) into the track.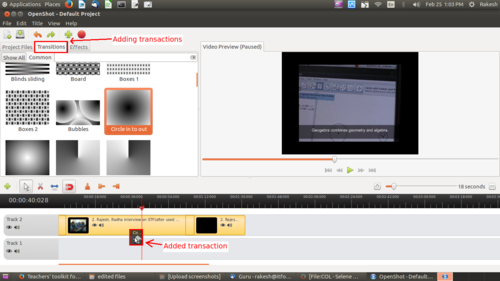

Video -
Inserting links to audio and video resources in a text document (LibreOffice Writer)
Inserting links in a ‘slide presentation’ format (LibreOffice Impress)
Alternative applications - audio
Ocenaudio and Wavosaur are alternative FOSS audio editors
Alternative applications - video
SimpleScreenRecorder and Kazam are alternative screen recorders on GNU/Linux
Kdenlive is a sophisticated video editing software application on GNU/Linux.