Difference between revisions of "Learn Stellarium"
m |
|||
| (6 intermediate revisions by 5 users not shown) | |||
| Line 1: | Line 1: | ||
| − | + | ''[http://karnatakaeducation.org.in/KOER/index.php/%E0%B2%B8%E0%B3%8D%E0%B2%9F%E0%B3%86%E0%B2%B2%E0%B3%8D%E0%B2%B2%E0%B2%BE%E0%B2%B0%E0%B2%BF%E0%B2%AF%E0%B2%AE%E0%B3%8D_%E0%B2%95%E0%B2%B2%E0%B2%BF%E0%B2%AF%E0%B2%BF%E0%B2%B0%E0%B2%BF ಕನ್ನಡದಲ್ಲಿ ನೋಡಿ]'' | |
| − | + | {{Template:Book-sidebar}} | |
| − | |||
| − | |||
| − | |||
=Introduction= | =Introduction= | ||
| − | Stellarium is a free open source | + | Stellarium is a free and open source software that converts your computer into a planetarium. It shows a realistic sky in 3 Dimension, just like what you would see with the naked eye, binoculars or a telescope.<br>It can be projected onto domes to simulate a planetarium. |
| − | It | ||
==Educational application and relevance== | ==Educational application and relevance== | ||
| Line 12: | Line 8: | ||
Stellarium Version - 0.12.4 | Stellarium Version - 0.12.4 | ||
==Configuration== | ==Configuration== | ||
| − | + | There is no need to configure Stellarium, it is bundled with Ubuntu Kalpavriksha. To launch it - | |
Application - Education - Stellarium | Application - Education - Stellarium | ||
==Overview of Features== | ==Overview of Features== | ||
| − | + | Stellarium has default catalogue of over 600,000 stars, extra catalogues with more than 210 million stars and illustrations of the constellations, constellations for 20+ different cultures, images of nebulae (full Messier catalogue), realistic Milky Way, very realistic atmosphere and sunrise and sunset. | |
| − | |||
| − | |||
| − | |||
| − | |||
| − | |||
| − | |||
| − | |||
| − | |||
| − | |||
| − | |||
| − | |||
| − | |||
| − | |||
| − | |||
| − | |||
| − | |||
| − | |||
| − | |||
| − | |||
| − | |||
| − | |||
| − | |||
| − | |||
| − | |||
| − | |||
| − | |||
| − | |||
| − | |||
| − | |||
| − | |||
| − | |||
| − | |||
| − | |||
| − | |||
==Other similar applications== | ==Other similar applications== | ||
| − | Kstar | + | Kstar |
==Development and community help== | ==Development and community help== | ||
| − | + | [http://www.stellarium.org/ Official Website] | |
| − | |||
| − | |||
| − | |||
| − | |||
| − | |||
=Working with the application= | =Working with the application= | ||
| Line 69: | Line 26: | ||
{| class="wikitable" | {| class="wikitable" | ||
|- | |- | ||
| − | |style="width: 50%;|[[File:Stellarium_1.png|450px]] | + | | style="width: 50%;" |[[File:Stellarium_1.png|450px]] |
| − | |style="width: 50%;|[[File:Stellarium_2.png|450px]] | + | | style="width: 50%;" |[[File:Stellarium_2.png|450px]] |
|- | |- | ||
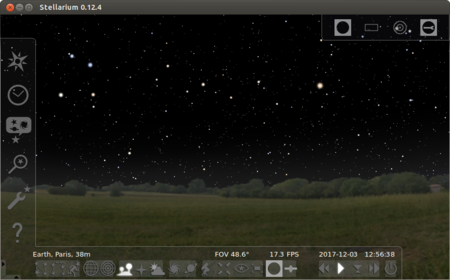
| − | |style="width: 50%;|On opening a new installation of Stellarium, you will be presented with a 60° view of | + | | style="width: 50%;" |On opening a new installation of Stellarium, you will be presented with a 60° view of |
the sky as currently seen from Paris. | the sky as currently seen from Paris. | ||
| − | |style="width: 50%;|At the bottom of the screen you can see additional information describing the | + | | style="width: 50%;" |At the bottom of the screen you can see additional information describing the |
location, date and time. | location, date and time. | ||
|- | |- | ||
| − | |style="width: 50%;|[[File:Stellarium_3.png|450px]] | + | | style="width: 50%;" |[[File:Stellarium_3.png|450px]] |
| − | |style="width: 50%;|[[File:Stellarium_4.png|450px]] | + | | style="width: 50%;" |[[File:Stellarium_4.png|450px]] |
|- | |- | ||
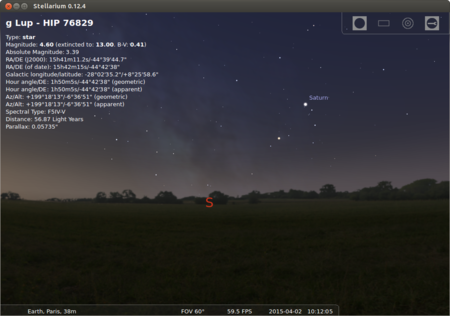
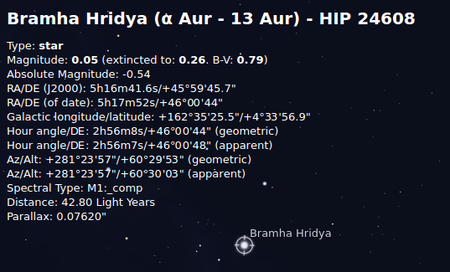
| − | |style="width: 50%;|Cardinal indicators located on the horizon show the direction you are facing. | + | | style="width: 50%;" |Cardinal indicators located on the horizon show the direction you are facing. |
| − | |style="width: 50%;|A left mouse click on any object on the screen will display additional information in | + | | style="width: 50%;" |A left mouse click on any object on the screen will display additional information in |
the top left hand corner of the screen. | the top left hand corner of the screen. | ||
Right mouse click to clear the selection | Right mouse click to clear the selection | ||
|- | |- | ||
| − | |style="width: 50%;|[[File:Stellarium_5.png|450px]] | + | | style="width: 50%;" |[[File:Stellarium_5.png|450px]] |
| − | |style="width: 50%;|[[File:Stellarium_6.png|450px]] | + | | style="width: 50%;" |[[File:Stellarium_6.png|450px]] |
|- | |- | ||
| − | |style="width: 50%;|Positioning your mouse at the lower left hand corner of the screen will reveal the main tool bars. They automatically disappear when the mouse is moved away. | + | | style="width: 50%;" |Positioning your mouse at the lower left hand corner of the screen will reveal the main tool bars. They automatically disappear when the mouse is moved away. |
Basic Moves | Basic Moves | ||
Moving around Stellarium can be accomplished using mouse and keyboard | Moving around Stellarium can be accomplished using mouse and keyboard | ||
| Line 98: | Line 55: | ||
Press the forward slash key “ / ” to quickly zoom in on a selected object. <br> | Press the forward slash key “ / ” to quickly zoom in on a selected object. <br> | ||
Press the back slash key ” \ “ to return quickly to a 60° field of view.<br> | Press the back slash key ” \ “ to return quickly to a 60° field of view.<br> | ||
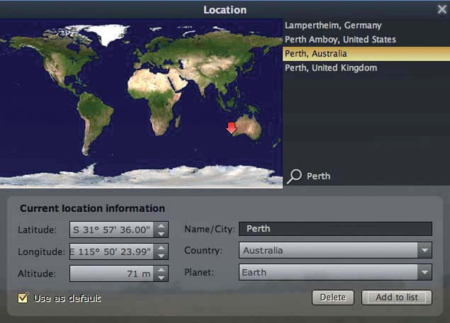
| − | |style="width: 50%;|'''Setting the Location and Time :''' <br> | + | | style="width: 50%;" |'''Setting the Location and Time :''' <br> |
Setting the correct location and time must be done before Stellarium can be used to | Setting the correct location and time must be done before Stellarium can be used to | ||
plan an evening’s observations. <br> | plan an evening’s observations. <br> | ||
| Line 106: | Line 63: | ||
if you wish to retain the setting the next time Stellarium starts. Close when finished. | if you wish to retain the setting the next time Stellarium starts. Close when finished. | ||
|- | |- | ||
| − | |style="width: 50%;|[[File:Stellarium_7.png|450px]] | + | | style="width: 50%;" |[[File:Stellarium_7.png|450px]] |
| − | |style="width: 50%;|[[File:Stellarium_8.png|450px]] | + | | style="width: 50%;" |[[File:Stellarium_8.png|450px]] |
|- | |- | ||
| − | |style="width: 50%;|The main display should reflect the new location details: | + | | style="width: 50%;" |The main display should reflect the new location details: |
| − | |style="width: 50%;|Press F5 to bring up the Date and Time window. Set the time to 8:30 PM. | + | | style="width: 50%;" |Press F5 to bring up the Date and Time window. Set the time to 8:30 PM. |
|- | |- | ||
| − | |style="width: 50%;|[[File:Stellarium_9.png|450px]] | + | | style="width: 50%;" |[[File:Stellarium_9.png|450px]] |
| − | |style="width: 50%;|[[File:Stellarium_10.png|450px]] | + | | style="width: 50%;" |[[File:Stellarium_10.png|450px]] |
|- | |- | ||
| − | |style="width: 50%;|Time | + | | style="width: 50%;" |Time |
Stellarium also allows us to manipulate time. <br> | Stellarium also allows us to manipulate time. <br> | ||
Press the “L” key 3 times to see the stars move across the sky. <br> | Press the “L” key 3 times to see the stars move across the sky. <br> | ||
| Line 127: | Line 84: | ||
Refer to the status bar at the bottom of the screen at any time to check on the date, | Refer to the status bar at the bottom of the screen at any time to check on the date, | ||
time, and simulation speed. | time, and simulation speed. | ||
| − | |style="width: 50%;|Controls for time can also be found on the lower tool bar: | + | | style="width: 50%;" |Controls for time can also be found on the lower tool bar: |
|- | |- | ||
| − | |style="width: 50%;|[[File:Stellarium_11.png|450px]] | + | | style="width: 50%;" |[[File:Stellarium_11.png|450px]] |
| − | |style="width: 50%;|[[File:Stellarium_12.png|450px]] | + | | style="width: 50%;" |[[File:Stellarium_12.png|450px]] |
|- | |- | ||
| − | |style="width: 50%;|'''Markings''' : | + | | style="width: 50%;" |'''Markings''' : |
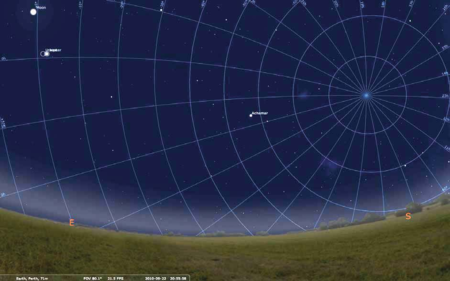
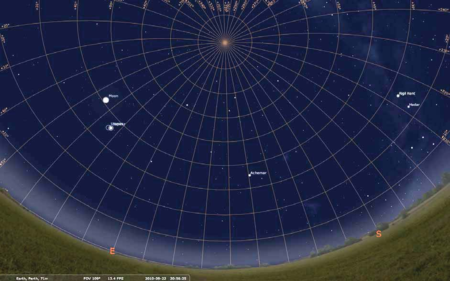
Various grids, lines and markings can be displayed on the celestial sphere. | Various grids, lines and markings can be displayed on the celestial sphere. | ||
Pressing “e” toggles an equatorial grid: | Pressing “e” toggles an equatorial grid: | ||
| − | |style="width: 50%;|Pressing “z” toggles the Altitude / Azimuth grid: | + | | style="width: 50%;" |Pressing “z” toggles the Altitude / Azimuth grid: |
|- | |- | ||
| − | |style="width: 50%;|[[File:Stellarium_13.png|450px]] | + | | style="width: 50%;" |[[File:Stellarium_13.png|450px]] |
| − | |style="width: 50%;|[[File:Stellarium_14.png|450px]] | + | | style="width: 50%;" |[[File:Stellarium_14.png|450px]] |
|- | |- | ||
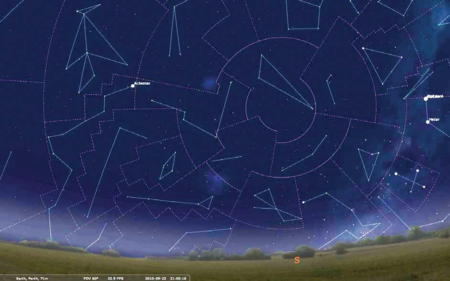
| − | |style="width: 50%;|Constellation lines and boundaries are toggled on and off using the “b” and “c” keys. | + | | style="width: 50%;" |Constellation lines and boundaries are toggled on and off using the “b” and “c” keys. |
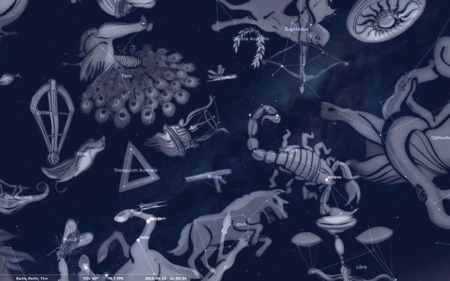
| − | |style="width: 50%;|Constellation art can be displayed by using the “r” key. | + | | style="width: 50%;" |Constellation art can be displayed by using the “r” key. |
|- | |- | ||
| − | |style="width: 50%;|[[File:Solar_eclips_time_set.png|450px]] | + | | style="width: 50%;" |[[File:Solar_eclips_time_set.png|450px]] |
| − | |style="width: 50%;|[[File:Solar_eclipse_(Sun_%26moon).png|450px]] | + | | style="width: 50%;" |[[File:Solar_eclipse_(Sun_%26moon).png|450px]] |
|- | |- | ||
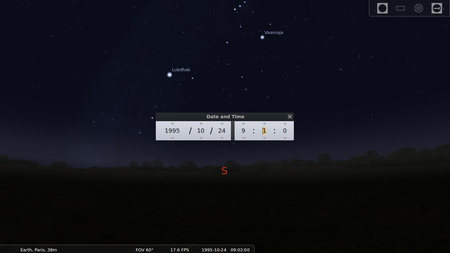
| − | |style="width: 50%;|'''Solar eclipse''' : | + | | style="width: 50%;" |'''Solar eclipse''' : |
I you know date , place and time you can check directly through stellarium . <br> | I you know date , place and time you can check directly through stellarium . <br> | ||
For example : <br> | For example : <br> | ||
Go-to Location window → type in search box Manado then select and close location window. <br> | Go-to Location window → type in search box Manado then select and close location window. <br> | ||
Go-to date and time window : 1995-10-24 – 09.05.00 <br> | Go-to date and time window : 1995-10-24 – 09.05.00 <br> | ||
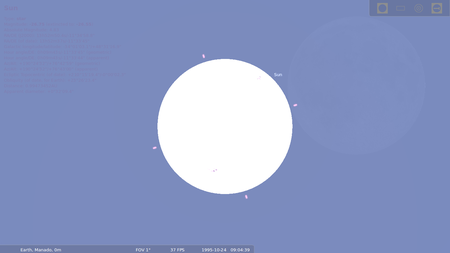
| − | |style="width: 50%;|Go-tp search Window : type in SUN | + | | style="width: 50%;" |Go-tp search Window : type in SUN |
then zoom in - cntrl+Up or Zoom In(scroll mouse key) | then zoom in - cntrl+Up or Zoom In(scroll mouse key) | ||
Just click on play button on below panel . | Just click on play button on below panel . | ||
If you need a increase the time speed click on forward button or L | If you need a increase the time speed click on forward button or L | ||
|- | |- | ||
| − | |style="width: 50%;|[[File:Solar_eclipse_half_jointed.png |450px]] | + | | style="width: 50%;" |[[File:Solar_eclipse_half_jointed.png |450px]] |
| − | |style="width: 50%;|[[File:Solar_full_eclipse.png|450px]] | + | | style="width: 50%;" |[[File:Solar_full_eclipse.png|450px]] |
|- | |- | ||
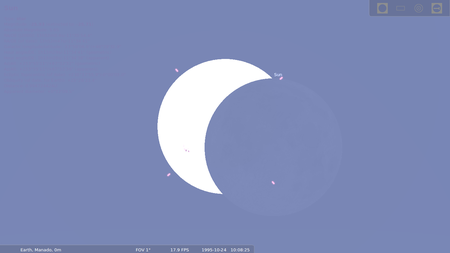
| − | |style="width: 50%;|observe to solar eclipse half sun covered . | + | | style="width: 50%;" |observe to solar eclipse half sun covered . |
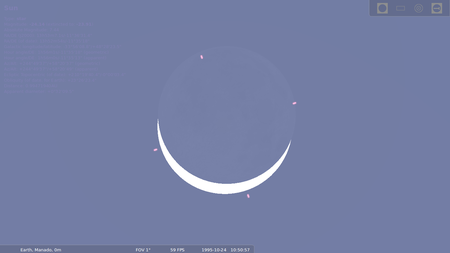
| − | |style="width: 50%;|Full solar eclipse : upto 12.15pm | + | | style="width: 50%;" |Full solar eclipse : upto 12.15pm |
Total duration of solar eclipse : 3 hours 10 min. | Total duration of solar eclipse : 3 hours 10 min. | ||
|- | |- | ||
| − | |style="width: 50%;|Image Image Image Image (Step 19) | + | | style="width: 50%;" |Image Image Image Image (Step 19) |
| − | |style="width: 50%;|Image Image Image Image (Step 20) | + | | style="width: 50%;" |Image Image Image Image (Step 20) |
|- | |- | ||
| − | |style="width: 50%;| | + | | style="width: 50%;" | |
| − | |style="width: 50%;| | + | | style="width: 50%;" | |
|- | |- | ||
| − | |style="width: 50%;|Image Image Image Image (Step 21) | + | | style="width: 50%;" |Image Image Image Image (Step 21) |
| − | |style="width: 50%;|Image Image Image Image (Step 22) | + | | style="width: 50%;" |Image Image Image Image (Step 22) |
|- | |- | ||
| − | |style="width: 50%;| | + | | style="width: 50%;" | |
| − | |style="width: 50%;| | + | | style="width: 50%;" | |
|- | |- | ||
| − | |style="width: 50%;|Image Image Image Image (Step 23) | + | | style="width: 50%;" |Image Image Image Image (Step 23) |
| − | |style="width: 50%;|Image Image Image Image (Step 24) | + | | style="width: 50%;" |Image Image Image Image (Step 24) |
|- | |- | ||
| − | |style="width: 50%;| | + | | style="width: 50%;" | |
| − | |style="width: 50%;| | + | | style="width: 50%;" | |
|} | |} | ||
==File formats for creation== | ==File formats for creation== | ||
| − | Not applicable | + | Not applicable. However, you can take screenshots or videos using [[Learn Kazam|Kazam]] |
==Saving the file== | ==Saving the file== | ||
| Line 208: | Line 165: | ||
|} | |} | ||
=The application on mobiles and tablets= | =The application on mobiles and tablets= | ||
| − | Skymap | + | Skymap is a mobile app. |
=Ideas for resource creation= | =Ideas for resource creation= | ||
| + | You can take screenshots to add to your lesson on astrophysics. | ||
=References= | =References= | ||
| − | http://stellarium.org/ | + | # http://stellarium.org/ |
| − | https://en.wikipedia.org/wiki/Stellarium_(software) | + | # https://en.wikipedia.org/wiki/Stellarium_(software) |
| − | |||
| − | |||
| − | |||
| − | |||
[[Category:Explore an application]] | [[Category:Explore an application]] | ||
Latest revision as of 22:24, 24 October 2020
Introduction
Stellarium is a free and open source software that converts your computer into a planetarium. It shows a realistic sky in 3 Dimension, just like what you would see with the naked eye, binoculars or a telescope.
It can be projected onto domes to simulate a planetarium.
Educational application and relevance
Version
Stellarium Version - 0.12.4
Configuration
There is no need to configure Stellarium, it is bundled with Ubuntu Kalpavriksha. To launch it - Application - Education - Stellarium
Overview of Features
Stellarium has default catalogue of over 600,000 stars, extra catalogues with more than 210 million stars and illustrations of the constellations, constellations for 20+ different cultures, images of nebulae (full Messier catalogue), realistic Milky Way, very realistic atmosphere and sunrise and sunset.
Other similar applications
Kstar
Development and community help
Working with the application
Functionalities
- Please label images as Step 1
- Please add 500px
File formats for creation
Not applicable. However, you can take screenshots or videos using Kazam
Saving the file
Not applicable
Export and publishing files
Not applicable
Advanced features
http://www.stellarium.org/wiki/index.php/Advanced_Use
Installation
| Method of installation | Steps |
|---|---|
| From Ubuntu software Centre | Steps |
| From Terminal | Steps |
| From the web | Steps |
| Web based registration | Steps |
The application on mobiles and tablets
Skymap is a mobile app.
Ideas for resource creation
You can take screenshots to add to your lesson on astrophysics.

