Difference between revisions of "Learn OSM"
| (8 intermediate revisions by 3 users not shown) | |||
| Line 17: | Line 17: | ||
The availability of aerial photography and other data from commercial and government sources has added important sources of data for manual editing and automated imports. Special processes are in place to handle automated imports and avoid legal and technical problems. | The availability of aerial photography and other data from commercial and government sources has added important sources of data for manual editing and automated imports. Special processes are in place to handle automated imports and avoid legal and technical problems. | ||
==Other similar applications== | ==Other similar applications== | ||
| − | + | NA | |
=Working with the application= | =Working with the application= | ||
==Functionalities== | ==Functionalities== | ||
| − | |||
| − | |||
{| class="wikitable" | {| class="wikitable" | ||
|- | |- | ||
| − | |style="width: 50%;| | + | |style="width: 50%;|[[File:OSM_1.png|450px]] |
| − | |style="width: 50%;| | + | |style="width: 50%;|[[File:OSM_2.png|450px]] |
|- | |- | ||
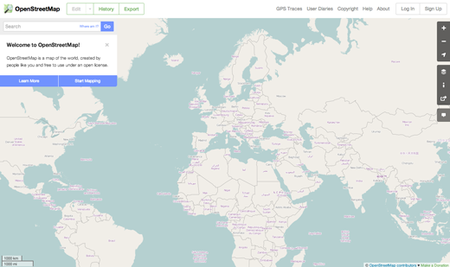
| − | |style="width: 50%;| | + | |style="width: 50%;|Step 1- In this section we will learn step by step how to navigate the OpenStreetMap website, view maps, and sign up for a user account. After you have your own username and password, you will be able to contribute your first points to the map. |
| − | |style="width: 50%;| | + | |style="width: 50%;|Step 2- Visit the OpenStreetMap Website<br> |
| + | Before you begin, be sure your computer is connected to the internet. (If you are reading this online, then you must be connected!) | ||
| + | Open your web browser. Common browsers are Firefox, Chrome, Opera, or Internet Explorer. If it is already open then you can create a new tab.<br> | ||
| + | In the address bar at the top of the window, enter the following and press Enter: www.openstreetmap.org | ||
| + | When the page has finished loading, you should see something like this. | ||
|- | |- | ||
| − | |style="width: 50%;| | + | |style="width: 50%;|[[File:OSM3.png|450px]] |
| − | |style="width: 50%;| | + | |style="width: 50%;|[[File:OSM4.png|450px]] |
|- | |- | ||
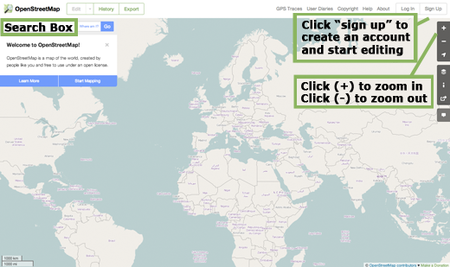
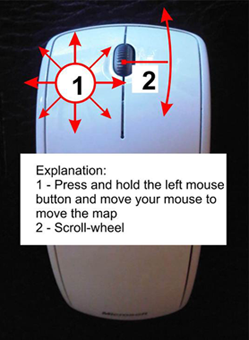
| − | |style="width: 50%;| | + | |style="width: 50%;|Step 3- The main thing you should see is the map. Move the map by clicking on it with your left mouse button, holding the button down, and dragging your mouse around (see figure below).<br> |
| − | |style="width: 50%;| | + | If you have a mouse with a scroll-wheel, zoom in and out on the map by turning the wheel. If you don’t have a scroll-wheel, use the + and – buttons on the upper right corner of the map. <br> |
| + | |||
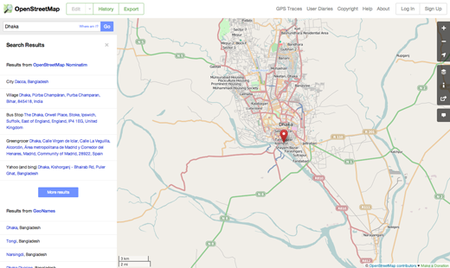
| + | |style="width: 50%;|Step 4- To search for a place, left-click in the box labelled “Search” on the left side of the page (see figure above). Type in the name of your town or village and press Enter. A window should appear to the left of the map with the results of your search. Click on the location that looks like the one you want. The map will automatically move to the location you chose. | ||
| + | |- | ||
| + | |style="width: 50%;|[[File:OSM_5.png|450px]] | ||
| + | |style="width: 50%;|[[File:OSM_6.png|450px]] | ||
| + | |- | ||
| + | |style="width: 50%;|Step 5- View Different Map Styles<br> | ||
| + | OpenStreetMap contains geographic data from all over the world. Although it is a single database, the data can be interpreted and styled in different ways. To see this in action, let’s look at various map “styles” available on the OSM website. | ||
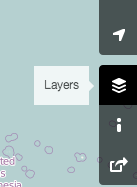
| + | Click on the Layers button on the right side of the map window. | ||
| + | |||
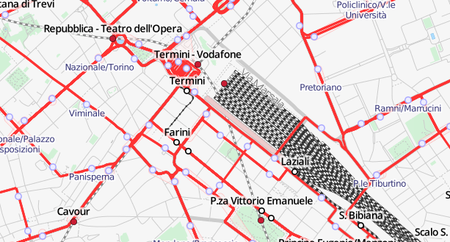
| + | |style="width: 50%;|Step 6- Click on the different style options for the map. Notice how the map changes with each one. The transport map, for example, emphasizes transportation routes on the map while the cycle map emphasizes cycling routes. All of the data to make this possible is contained in the OSM database. | ||
| + | |- | ||
| + | |style="width: 50%;|[[File:OSM_7.png|450px]] | ||
| + | |style="width: 50%;|[[File:OSM_8.png|450px]] | ||
| + | |- | ||
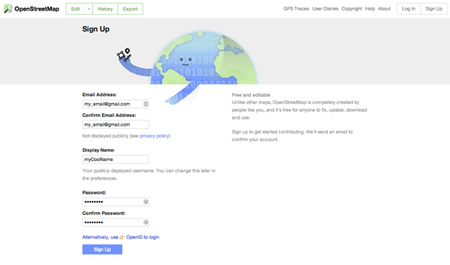
| + | |style="width: 50%;|Step 7- Create an OpenStreetMap Account<br> | ||
| + | Now that you have seen what the main website looks like, you can register for a username and password and make your first additions to the map. | ||
| + | On the OpenStreetMap website, click “sign up” in the top right corner of the page. | ||
| + | You should see a new page that looks like this: | ||
| + | |||
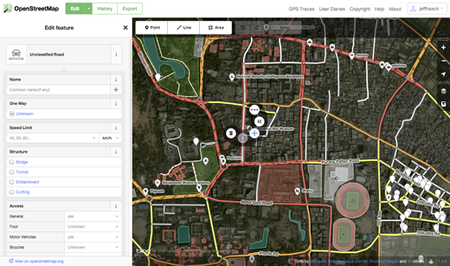
| + | |style="width: 50%;|Step 8- Adding Your First Points | ||
| + | Now that you are logged in with your username on the OpenStreetMap website, you can use the iD editor to add your first point to the map. | ||
| + | Move the map to a place that you know very well, such as your town or neighborhood. A good idea is to ensure your home (or your neighbour’s home) and workplace are drawn and given the correct address. | ||
| + | Zoom in to a place where you would like to add a point to the map (perhaps a restaurant or grocery store near you isn’t yet mapped). | ||
| + | Just above the map on the left, there is a tab named “Edit” with a small triangle besides it. Click the small triangle. You should see a menu drop down. | ||
| + | Click “Edit with iD (in-browser editor)”. | ||
| + | |- | ||
| + | |style="width: 50%;|[[File:OSM_9.png|450px]] | ||
| + | |- | ||
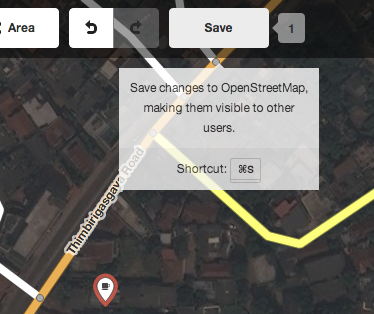
| + | |style="width: 50%;|Step 9- You can add a point to the map by clicking on the button named “Point” at the top the window. Then click on the map where you would like to add a new point.<br> | ||
| + | Select from the menu on the left what type of location it is that you are adding to the map. You can then fill in the appropriate form with the location’s name and other information. | ||
| + | To save your changes, click the “Save” button at the top. Since this is your first edit, you may prefer to play around with the editor. Don’t save your changes unless you are sure they are correct.<br> | ||
| + | If you do click Save, you will be asked to provide a description of your changes. Then you can click “Save” once more, and your additions will be saved to the OSM database!<br> | ||
| + | The iD editor is a fantastic way to easily edit OpenStreetMap. However, in the next chapter we will be looking at JOSM, a standalone application that offers many more features. Feel free to continue playing with iD. Once you have more experience contributing to OSM, you can choose which editor you like using the best. | ||
| + | |||
| + | |||
| + | |||
| + | |||
|} | |} | ||
| − | |||
==Export and publishing files== | ==Export and publishing files== | ||
| − | + | We can export the selected region output in .osm format to view that we need application which support .osm format like marble tool | |
| − | |||
=Installation= | =Installation= | ||
| Line 54: | Line 92: | ||
| From the web || Through OpenStreetMap.org URL | | From the web || Through OpenStreetMap.org URL | ||
|- | |- | ||
| − | + | ||
|} | |} | ||
Latest revision as of 01:51, 27 November 2020
Introduction
OpenStreetMap (OSM) is a collaborative project to create a free editable map of the world. The creation and growth of OSM has been motivated by restrictions on use or availability of map information across much of the world, and the advent of inexpensive portablesatellite navigation devices.
OSM is considered a prominent example of volunteered geographic information.
Educational application and relevance
OpenStreetMap is being used in schools, universities and colleges in a wide range of disciplines. OSM is relevant to education in geography, mathematics, ecology, community planning, government and information technology (IT). Some educators use existing OpenStreetMap data in class projects, while others contribute new data to OpenStreetMap. In the process of using OpenStreetMap and contributing data, students also develop IT skills (needed to process data) and gain valuable knowledge in the fields of GIS (geographic information systems), planning and community development.
Version
Not Applicable
Configuration
Not Applicable
Overview of Features
Map data is collected from scratch by volunteers performing systematic ground surveys using tools such as a handheld GPS unit, a notebook, digital camera, or a voice recorder. The data is then entered into the OpenStreetMap database.
The availability of aerial photography and other data from commercial and government sources has added important sources of data for manual editing and automated imports. Special processes are in place to handle automated imports and avoid legal and technical problems.
Other similar applications
NA
Working with the application
Functionalities
Export and publishing files
We can export the selected region output in .osm format to view that we need application which support .osm format like marble tool
Installation
| Method of installation | Steps |
|---|---|
| From Ubuntu software Centre | OsmAnd |
| From Terminal | OsmAnd |
| From the web | Through OpenStreetMap.org URL |
The application on mobiles and tablets
OsmAnd
OsmAnd is free software for Android and iOS mobile devices that can use offline vector data from OSM. It also supports layering OSM vector data with prerendered raster map tiles from OpenStreetMap and other sources

