Learn Diagrams (Draw.io)
Introduction
Diagrams or Draw.io is a diagram generator which allows the user to create and share diagrams or charts.
Basic information
| ICT Competency | Draw.io is a diagram generator which allows the user to create and share diagrams. The diagrams can be Flowcharts, Use case diagrams, Block diagrams, Cycle diagrams, Cluster diagrams, Ladder diagrams, Tree diagrams etc to represent the user data. |
| Educational application and relevance | Educators can use these diagrams to explain the concepts in a pictorial format. It can represent the idea of an entire concept in an attractive and conveyable way. |
| Version | 20.2.8 |
| Configuration | No specific configuration requirements. |
| Other similar applications | Inkscape, Creately |
| The application on mobiles and tablets | You can install Lucidchart
You can also use the web based platform of Draw.io here |
| Development and community help | Draw.io |
Overview of Features
Draw.io can be used to generate variety of diagrams or in a better term called as "charts", that may represent any form data. With Draw.io you can drag and drop variety of symbols, shapes, flowchart icons, Entity relations, UML diagrams in the canvas. There is a huge collection of other symbols that are helpful in implementing the required diagrams. It also focuses on arrangement of symbols, spelling checking, It contains a ready-to-apply set of styles making the entire diagrams more attractive and readable.
Installation
For Ubuntu OS
If you want to install Draw.io in your Ubuntu OS, follow the below steps:
- Open terminal by clicking "Applications->System Tools->Terminal" or through keyboard shortcut "Ctrl+Alt+T".
- In the terminal window, type below command and press enter key.
sudo snap install drawio
- Enter your Administrator password to install and press "Enter".
For Windows OS
- If you are using Windows OS, click here to download the "Windows Installer" file.
- Click on the downloaded Installer file. A Window appears and asks to choose the Destination folder to install the application.
- Choose the Destination --> Click "Install". Check the option "Run Draw.io" if you want to run the application and click "Finish".
For MAC OS
If you using MAC OS, Click here. This link downloads the .dmg file into your system, double click on the downloaded .dmg file. This will install the application on your system.
Working with the application
Draw.io allows the user to drag and drop the various drawing elements present in the software. Its interface is such a user friendly that any person with very little knowledge can also use this application efficiently and can generate the diagrams.
Getting familiar with application
Once you open the Draw.io application, the first page shows you an option to choose either of the following:
1. Create new diagram : This option lets you to create a new diagram by redirecting you to a fresh page. When you choose this option, it shows you a number of predefined templates that makes your task much easier. You can choose any of the required template if you are sure of the outcome. In case if you are unsure, choose the "Blank Diagram".
2. Open Existing Diagram : Choose this when you already have existing diagram prepared partially or any other diagram in the supported formats.
Creating new diagram
If you already have an idea of what needs to be done and what ways the things needs to be done then based on your requirement you can choose the template. The templates provided here not only gives you the structure of diagram but also gives more idea of how your final outcome may look like. If you are not having an idea of how your diagram should look like then it would be better to choose "Blank Diagram-->Create".
Basic interface of application
The interface of Drawio looks like the below image:
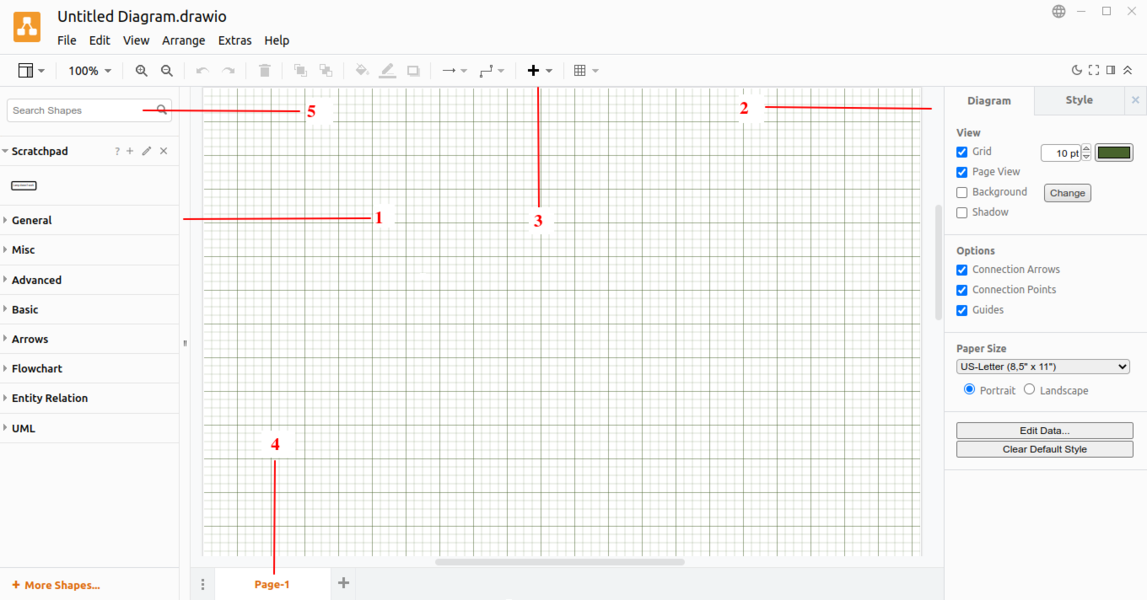
Diagram interface

1. Shape Panel : Shape panel shows you variety of shapes arranged under their category.
2. Format Panel:
- Diagram Tab : It shows the properties related to the Diagram
- Style Tab : It shows the predefined colorful styles that can be applied to the entire diagram.
3. Toolbar : Some basic tools required is listed here.
4. Page Tab : It shows the worksheet names.
5. Search Shapes : It searches for a particular shape entered by the user.
Adding a Shape to the workspace
Usually shapes in a particular context gives respective meaning. In a flowchart, oval represents the beginning or end of a process whereas in use case diagram it represents a process. Therefore be sure of which diagram you want to use in your case.
Depending on your requirement you can insert shape to the workspace.
- To insert a shape, you can type the shape name in the "Search Shapes" box or click on the appropriate tab if you are sure of.
- There are General, Basic, Arrows, Entity Relations and many other tabs that allows you to drop the respective shapes to the workspace.

Dragging the shapes
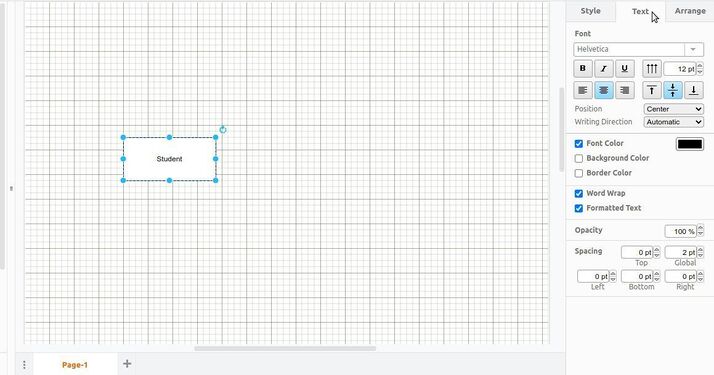
Writing text inside a shape


- If you simply click on a shape, it will be put into the workspace where you can expand or shrink the size of the shape by simply dragging the points. Whenever it shows "Hand" when the cursor is highlighted on the shape, you can simply drag and drop the shape wherever required. * If you want to type text inside any shapes double click inside the shape. When you choose a particular shape, the properties related to that shape will appear in the Format Panel window. Color, border thickness, style for the shape such as Shadow, Sketch can be set here.
- If you have entered some text inside the text, Format Panel shows you Font related settings where you can format the font. "Arrange" tab shows you how you can arrange or placements related to that shape in your workspace.
Adding more Shapes
Even though most of the shapes are available on the shape panel if you could not find the proper shape for your diagram then you can search and locate those as well.
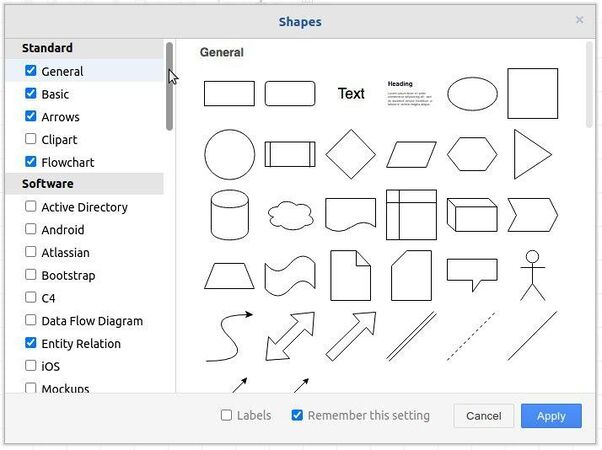
Adding more shapes to Shapes toolbox

To do this, Click on "More Shapes" option present in the left bottom of the application. Choose the required tool from the left side pane --> Click Apply. You can find the shapes related to the selected tool will be available in the Shapes pane.
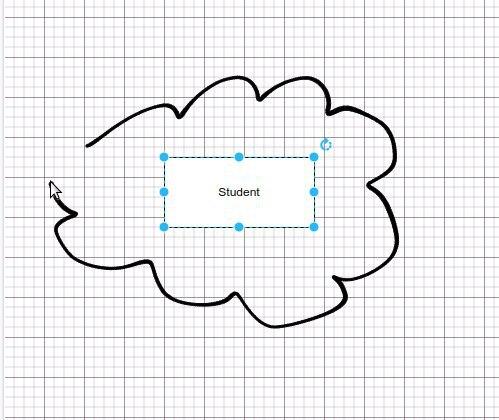
Freehand Drawing
In Draw, other than shapes you can also freely draw something by using the Freehand feature. Freehand feature may look like the below image:
Using Freehand option

To do this, Click on "+" icon in the toolbar and choose "Freehand" option. Alternatively you can press 'x' on the keyboard as shortcut. You can choose the size of the brush and can freely move the cursor on the sheet.
Adding Notes and Images
A note can be added near any node in draw. Note may give additional information regarding the node.
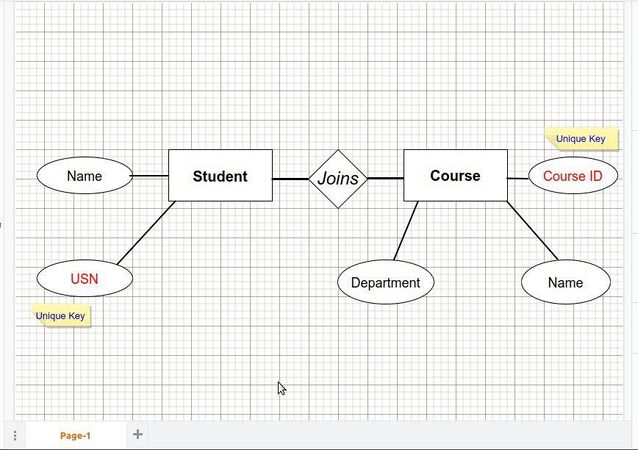
Notes added to the diagrams

Note can be added in the worksheet to give a description to the node.
Note can be resized according to your requirement. Once you add the note to the workspace you can move it wherever required.
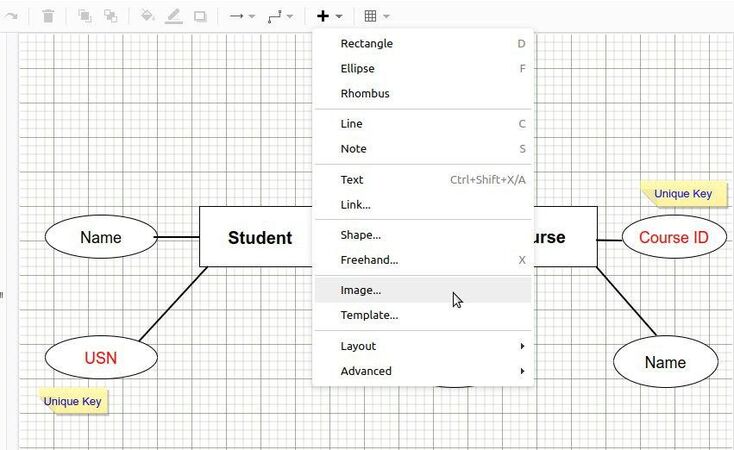
Adding the Image
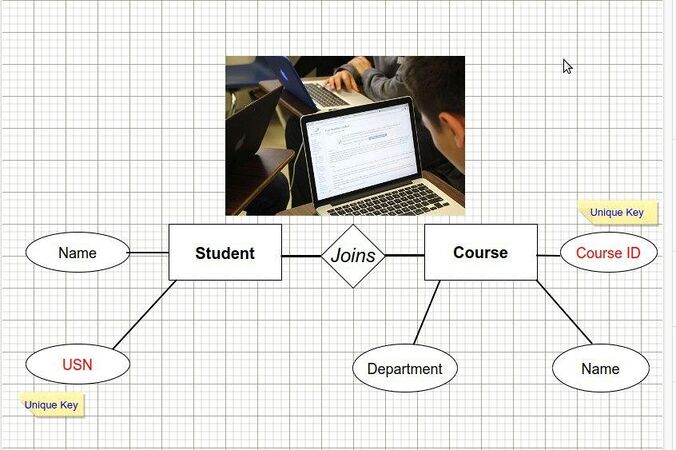
Image added to the diagram


Image can also be added to the workspace to make it more attractive and informative. Like shape and Note, Image can also be added resized. If you want to resize click on the image and click and drag the points.
Applying Styles to the workspace
Styles make your workspace much attractive and readable. This involves a simple step of choosing a style and applying the same. Some styles may only have the styles applied to the nodes whereas some other have styles to the background also.
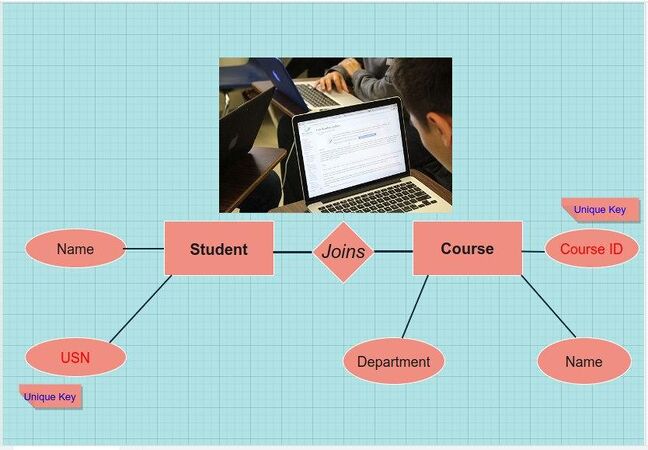
Style added to the diagram

To do this, Click on the "Format Panel --> Workspace" on the right, choose the style from the list. If you simply click on the style, that style will be added to the workspace.
Selecting the paper size
Paper size play important role if you are expecting it be on a paper as printout.
- If your plan is to print the chart on a paper and use it for some purpose then better if you select the page size at the starting. There is an option in the diagram panel to change the default Paper size.
- Click on the drop down menu present in Page size. You will get number of options that you can select for your requirement.
Making Rough works
- You can draw and design few elements and put it in Scratchpad for future use. You can drop number of works to the scratchpad and access those later. This helps when you are experimenting on an element and want to preserve the work you are done so far.
- To do this, you can drag the element you want to move to Scratchpad and drop it in that section. A small icon of what your element looks like is visible in the scratchpad section. As you require the element you just need to click on that element so that it appears in the worksheet.
Saving and exporting the Diagrams
- To save your project click on "File-->Save". Enter the proper filename for the file, it stores the file in .Draw.io format. --> Click Save.
- You can also export your diagrams into pdf, png, jpg, svg and other formats. You can do this by clicking on File--> Export As option. This shows a list of file extensions with which you can save your work.
Advanced features
- Shape library is a huge collection of shapes that are having specific way of representing the data.
- Explore Swim lane diagrams to use it for official purposes. Swim lane usually shows the responsibility or works needs to be done for each step or a process. This is in-built feature in Draw.io.
- Templates are ready-to-use syntax that can be inserted into a diagram for more convenience.
Ideas for resource creation
- With Draw.io you can create any kind of tables, charts, diagrams that takes less time and more specific to your requirement.