TE year1sourcebook/year1 unit2 Topics of Study in the Unit
In this unit, you will learn to create learning resources using different digital tools, in different formats - text, image and audio-video. You will also learn to create digital presentations. You should create resources on the same topic on which you accessed internet resources in Unit 1 and try to make your resource richer and more useful for your learning.
Concept mapping
Think about the word 'plant'. Now think of all the words that that come into your mind when you think about the word plant. List these words in your notebook. Some of the common thoughts/words that would come into mind when thinking about plants are: water, photosynthesis, leaf, flower, root, stem, soil, sunlight, carbon dioxide etc. These words can represent concepts connected to 'plant'. Concept is an abstract representation of an idea formed in the mind.
Learning often consists of understanding the concepts that underlie an activity, or an event or an idea. The linking of related concepts enables the forming of a 'concept map' in our mind, which represents our understanding of the topic or theme.
There are applications for creating digital concept maps. These concept maps can be an effective way of creating a text resource that can be organized in the form of a map or tree of ideas. It provides a pictorial overview of the concepts, related concepts / sub-concepts for a topic. In the map, you can link to additional resources, add annotations, graphically organize ideas through links etc. Concepts acquire power and meaning when they are connected to other concepts. Hence, organizing the concepts relevant to your topic is an important first step of generic resource creation. Concept mapping can be used to build skills in students for ideating and organizing ideas; you could also use it in your class to help students brain storm or capture prior knowledge in an area. Concept maps can also be useful in helping organize your thought processes when writing.
Getting introduced to Freeplane
20x20pxFreeplane is a FOSS application that can be used to create concept maps; in this unit you will learn how to use Freeplane and its various functionalities.You can view concept maps through Freeplane reader, on Android mobile phones.
- Learning to use Freeplane
Opening Freeplane from Applications Menu

Creating a concept map using Freeplane
Creating a node tree using Freeplane
Completed concept map


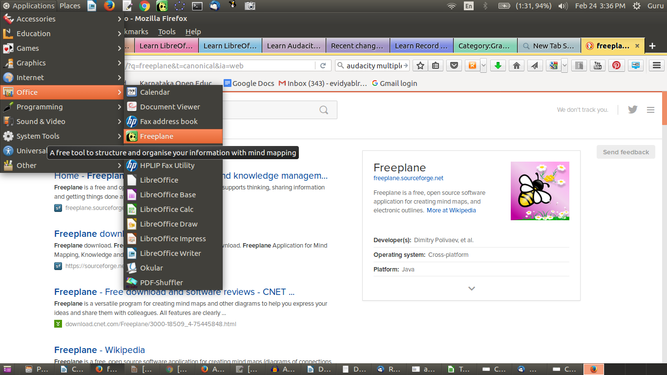
- In the custom distribution of the Ubuntu operating system, accompanying this sourcebook, all FOSS applications have been bundled. To open Freeplane, select Applications → Office → Freeplane, as shown in the first image below.
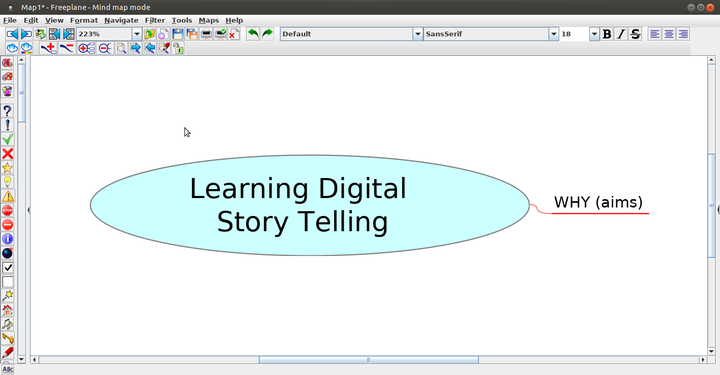
- The second image shows you how a new concept map appears in Freeplane. When you open Freeplane, the application opens a window with a box containing the text "New mindmap". This node, also called the "root node" will contain the core idea/ theme of the resource. Additional ideas are added by adding more nodes, called child nodes.
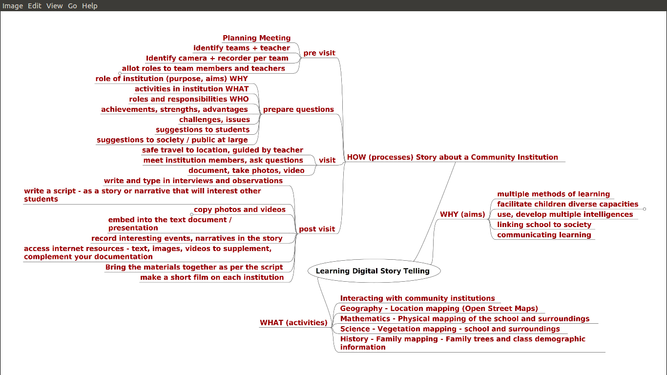
- The concept map gets built by adding further child nodes, for topics and sub-topics. Use the ‘insert’ key to create a ‘child node’ this is a sub-concept of your current concept. Use the ‘enter’ key to create a ‘sibling’ this is a parallel concept to your current concept. Thus you can create a concept map, as shown in the third image, with just two functions – add child node (insert) and add sibling node (enter). The ideas you have about the topic, the sequencing of ideas and sub concepts, the specific points for each idea / sub-concept can be developed on the map. The last image shows a completed concept map.

Connecting concepts (nodes)
Connecting concepts is what allows meaning making and you can do this in Freeplane by graphically linking nodes. You can link two nodes (which are not otherwise related as parent-child) by selecting the two nodes and clicking CTRL-L. This will provide a curved arrow to connect the two nodes. You can use this to indicate a direct linkage between the concepts represented by the two nodes, as shown in the image.
Hyperlinking files and weblinks to any node on your concept map

You can embed a hyper-link on a node, such that clicking that node will open a page on the Internet or a file on your computer, as shown in the image. This connects a node on your map to related resources you may want the reader to access. You can also use the keyboard short cut CTRL-K to insert a web-link and SHIFT-CTRL-K to insert a link to a file on your computer. Freeplane will open an input bar, in which you can type in the address. The link is indicated by a red arrow inside the node.

You can also add a hyperlink to a local file on your computer. If you select When you click on Edit-->Link-->Add Hyperlink (choose) allows you to link to a file on a folder on your computer. The third image shows how to choose a file from your folders to link. For instance, if you would like to display an image associated with a node, you can link the image file to the node and clicking the arrow, will open the image. You can link any file. You can even link a node to another concept map, this way you could link concept maps of topics related to a subject, to provide a connected perspective on these concepts.
Adding notes and note window

To add a note to a node, you can click on the node, go to View--->Notes--->Display note panel; this will open a window in which you can type your notes.You can change the position and size of this note window using your mouse.
The 'notes' feature allows you to provide detailed explanations, examples etc to any concept in the map. This can help you detail out your thinking on a concept. Freeplane displays a yellow label in the node, for which you have added a note.
These are some basic functionalities of Freeplane. For more advanced functions, you should refer to the User Manual for the application. The Freeplane tutorial is available within Freeplane itself, which you can access any time by pressing the F1 function key. The tutorial itself is a concept map, and you should browse this concept map, not only to get help that you may require, but also as a lesson on how a concept map can communicate so much information in such a simple manner!
Typing Kannada in Freeplane
Freeplane will not allow you to type Kannada directly, you will need to change font family in Freeplane by the following:
- Go to Tools -> Preferences -> Appearance
- In the font family option select Kannada fonts and click on Okay.
- Freeplane may ask you to restart, after which you can type in Kannada.
Note: If you are using older version of Freeplane, this will not work. You need to type in Kannada in LibreOffice Writer and copy paste it into Freeplane, and change the font to Kannada for each node.
Saving the file
The images below show you how to save and export concept maps in Freeplane. While saving the file, Freeplane will display the file browser, to allow you to select the folder in which you can save your file. By default your concept map is saved by Freeplane as a '.mm' format file, as shown in the first image. However, the concept map can be saved in many other formats. You can export the map to a text document file (in .odt or .doc formats). You can also export the map as an image (in .png or .jpeg formats) or as a web page (in .html format), as shown in the second image. By default, the file is saved in your home folder.


You should make concept mapping a habit. It is a wonderful way to think and document your ideas.
Student activity time (4 hours)Create a concept map for your chosen topic. Insert child nodes and sibling nodes to connect related concepts and sub concepts. Insert notes where you would like to provide a more detailed description or annotation for a concept. Insert a web link to Wikipedia for the main concept (root node). Note that simply saving the file will save it with the name you have given in the root node. Like with any editor, you can both create new maps and edit existing concept maps using Freeplane. You should save the concept map in your personal digital library, you could save in a sub folder called 'concept map'. You should also save/ export the map in different formats in this folder. References: Learn Freeplane |
The power of the digital concept map is that you can keep revising the nodes, adding and deleting, moving and copying nodes as you want. This makes the process quite dynamic, unlike a concept map drawn on paper. Once you have completed your concept map you can share it with your classmates for feedback with which you can refine the concept map still further.
Text editing
Text is a familiar resource format, the most common resource with a teacher, is the 'text book'. You will learn to use a text editor application to create digital text resources and combine text with other formats. You will use the FOSS Office Suite application called LibreOffice Writer (LibreOffice Writer) to create a text document. Open LibreOffice Writer on your computer, through Applications → Office – LibreOffice Writer. In Android Mobiles you can view text documents through "OpenDocumentReader" App or WPS Office App

Entering and formatting text
You can enter text by simply typing into this document, using your keyboard. To become familiar with the keyboard, you can learn Tux Typing, a software that will guide you to typing all characters on the keyboard using the correct fingers.
UNICODE font (text editing in Indian languages)
You can also type in multiple languages in the same document. To change the language click on "EN" button in top panel, and select the language you want to type in.
In the case of languages which use a script other than Latin, you must choose only UNICODE font for the text entry. Non-UNICODE fonts are likely to not render correctly on a web page. For Kannada typing, you can chose Lohit Kannada font.
Creating and saving a text file
Save a document
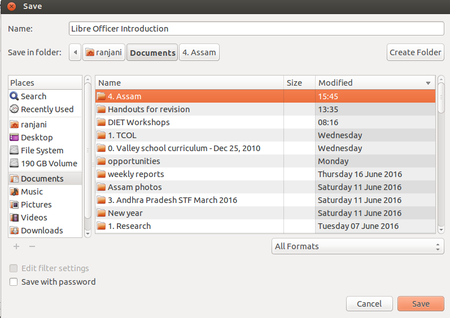
Save window


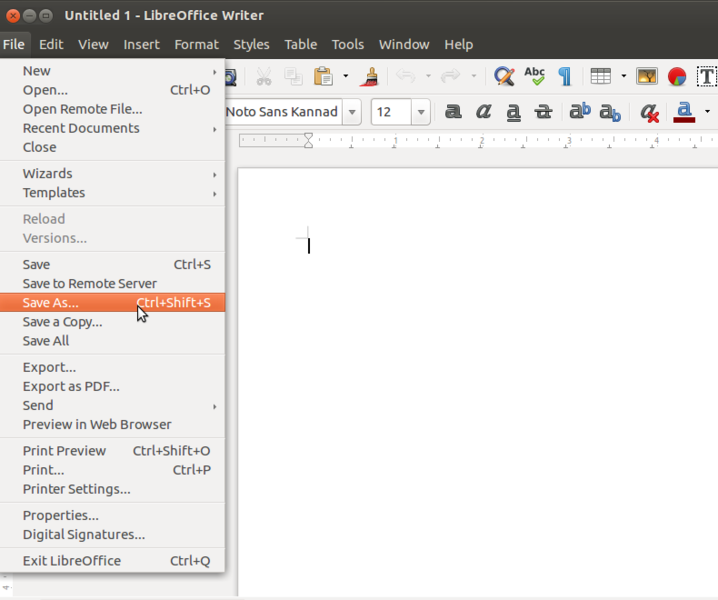
- Saving a file - When you start entering text into the document, save your document by using SAVE option. Documents can be saved using the FILE – SAVE option or by using short-cut key CTRL+S. Always give a meaningful file name for your documents. To save a file with another file name, you can use the Save-as option from the File menu.
- Saving a file - After selecting file name and folder click on "SAVE".
- The file will be saved with a .odt extension. ODT is the short form of Open Document Text.

LibreOffice Writer menu bar

The LibreOffice menu bar has multiple options for file operations (including saving discussed above), editing, viewing the document, inserting images, links, tables, etc in the document and formatting and defining styles in the document. There is also a tools option with functionalities for spell check, grammar, defining frequently used words, etc. You can either click on the menu bar on each item or click on the symbols shown for each. The commonly used options are discussed below.
Editing and formatting text
To copy text from one place to another, or from one document to another, you can select the text, go to Edit --→ Copy and go to a different place in the document to paste it; Edit → Paste. The editing menu also has an important feature for searching selected words. You can use the Edit--> Find option for searching selected words.
The format option is for changing the format of the text, changing the text font, text size, page format and text wrapping options. many of these option we can use short cut icons from formatting text tool bar, the letter “B” and “I” can be used to make the text bold and italics. You can format your text in many ways either through Format--->Text (as shown in the first image) or Format--->Character (as shown in the second image) or by changing the parameters on the tool bar. Click on the Format menu option of LibreOffice Writer to see the options. Commonly used formatting includes selecting text to highlight it through the ‘bold’ ‘italic’ or ‘underline’ functions, are shown in the third image, changing the font color or size and adding text highlighting.
- Formatting options

Formatting text using Format--->Text
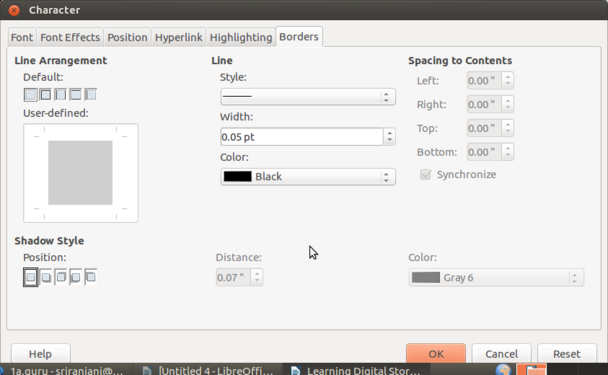
Formatting text using Format ---> Character
Formatting selected text


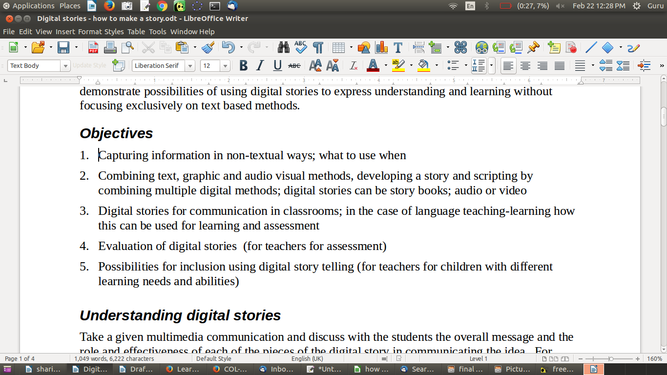
Inserting a numbered list
You may be making a list of items in your document. Instead of manually entering the numbers, you could use automatic numbering.
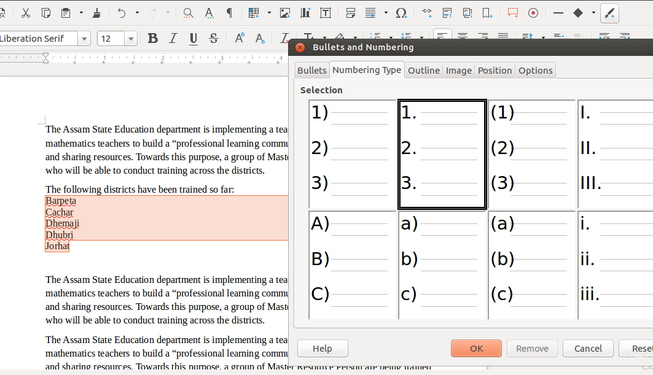
You can select Format → Bullets and Numbering and select the numbering type you want, as shown in the images.
- Inserting numbered lists
Selecting text and numbering type
Numbered list in LOW


- The first image shows the selection of text and numbering type.
- In the second image, you will see the numbered list under Objectives. Hit the ‘enter’ key to go to the next line with the next number.

It is also possible to create sub-numbering. For indenting and sub numbering, you can use the ‘Tab’ and 'shift Tab' keys. Hitting the tab key while at the beginning of a line, will move the cursor further and create a sub-number. Hitting Shift-Tab will move the cursor to the next higher level numbering. Using these keys, you can create any number of levels of numbering and sub-numbering. These steps can also be followed for creating bulleted lists
Adding a table / box item
You may want to put a specific information inside a box to highlight it separately. You can also use box to provide additional information. You can select Table. Select number of rows and number of columns as ‘1’. You will get a box (which is nothing but a table with one row and one column). Enter your text in this box.
Insert options in a text document
The insert menu option is for inserting images, hyper links, charts, page numbers, page breaks, formulas. Page numbers can be inserted in the footer of the page. The following images show how to insert images, hyperlinks and page numbers.
Inserting images

Insert Menu

Inserting Image

Inserted Image View


- For inserting an image - Go to Insert → Image; as shown in the first image.
- In the second image, you will see a folder from which images are to be inserted
- The third image shows a triangle inserted
Inserting a hyper-link
You can provide a hyper link in your text document to a web page. Clicking this link in the text document will open the web page (this requires internet connectivity). Inserting hyper links in relevant places in your text document, allows you to lead the reader to additional web resources. This way you need not provide information that is already publicly available, and instead focus on information or a perspective that is not available, in your document.

Selecting the weblink to add from the insert option
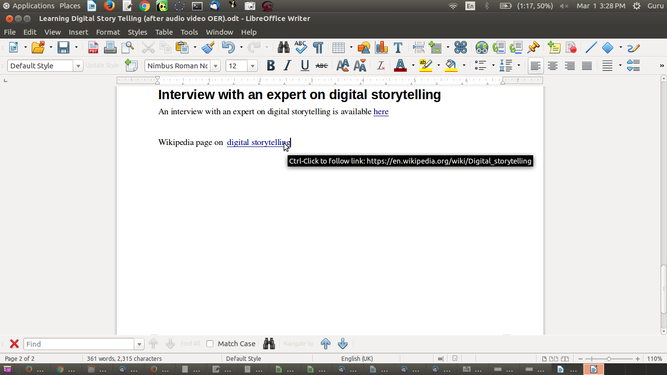
Hyper link to a web page inserted in a text document


It is useful to have page number and name of your document on every page, this is specially useful if the reader wants to read a print copy. The steps for doing this are shown below.

Inserting a footer in your document
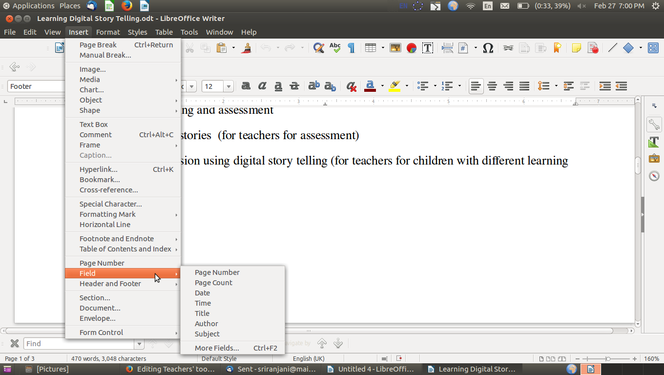
Adding fields to the footer


- LibreOffice Writer allows you to easily insert this information at the bottom or top of each page. This can be done using Insert--->Footer, as shown in the first image below.
- Once a footer has been inserted, you can go to the bottom of the page and insert multiple fields of information using Insert--->Fields, as shown in the second image. You can type any text in this footer, it will come on all pages. Other than page number, other dynamic information you can provide is the date/time stamp of the document. A similar method can also be adopted for inserting a header as well. Page numbers can also be inserted directly using Insert--->Page Number.
Continuing editing your text document
You can re-open this file any time to continue editing your text document using LibreOffice Writer. You can add, move, modify and remove text. You can format your text in different ways, insert images, web links and other annotations like footnotes etc. In this way, you can keep enhancing your text resource on your topic regularly.
Power of digital text editing
You have seen that text is another form of data and text can be organized in different ways using different tools.
- When text is entered digitally, it can be edited easily.
- A text editor like LibreOffice Writer allows text to be entered, formatted and presented in different ways and designed for printing. The text document also can add links to other files or resources on the computer or the internet. It is the most advanced tool available for creating textual outputs. Text can be copied, pasted and formatted differently. Some features like copy-paste are available across most applications
- In addition to this, presentation software, such as LibreOffice Impress is also available which allows combining text and images as well as embedding of videos to make a multimedia presentation.
Student activity time (4 hours)You should create a text document for your topic. Add sections for different ideas related to the topic. Insert hyper links to web resources, as you think will make your document richer and more useful. Insert a footer and provide name of your document and page number. Save the text document in your personal digital library, you could save in a sub folder called 'text resources' References: Learn LibreOffice Writer |
Making a slide presentation
You may want to bring in your text, images and web links to present your ideas in a crisp manner. This can be done by making 'slides' of information using a slide making software such as LibreOffice Impress. Each slide can be considered as a ‘page’ which will contain a coherent set of information, usually presented as bullet points. A slide presentation is a useful method of sharing information, or in training or teaching. While a text document is useful as a descriptive resource, a presentation can be more useful as a summarized view, which can support your talk.
Open LibreOffice Writer on your computer, through Applications → Office → LibreOffice Impress.

You will learn the following basic functions in LibreOffice Impress which you need to use in creating a slide presentation OER.
- Managing slides
- Entering and formatting text
- Inserting a numbered list
- Inserting a text box
Managing slides
You can create a slide presentation with as many slides (Slide → Create New slide) as you want using LibreOffice Impress, as shown in the image. You can duplicate a slide (Slide → Duplicate Slide) if you want to create a slide using the contents (or the format) of another slide. You can move slides across using drag-drop in the slide sorter view (View → Slide Sorter).

Entering text, formatting text, inserting a numbered list and inserting a text box
A useful feature of the LibreOffice suite is that the Writer and Impress products are fully integrated and have the same interface. When you select File → Open, you get to chose if you will create a text file or a presentation file. Hence most functions explained for LibreOffice Writer can be used in the same manner in LibreOffice Impress, including entering text, formatting text, inserting a numbered list and inserting a text box. These are shown in the images below.
Entering and formatting text using LibreOffice Impress
Change area colour of a text box on a slide
Changing line colour on a slide


- The first image shows how to enter and format text in an Impress presentation document.
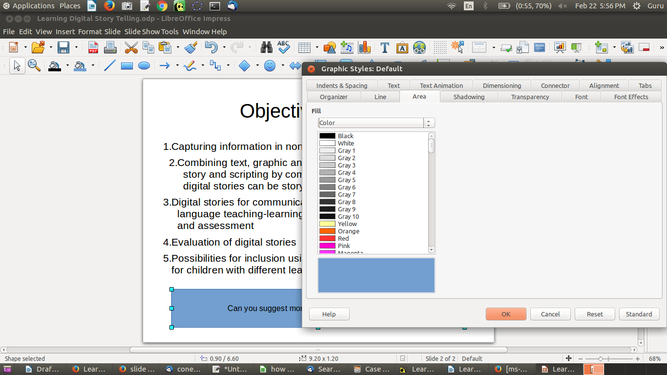
- You can change the background and line colours in the text boxes in your slides. To change the background colour, select Format → Style → Edit Style → Area. Select the colour you want (white is a good background). This is shown in the second image.
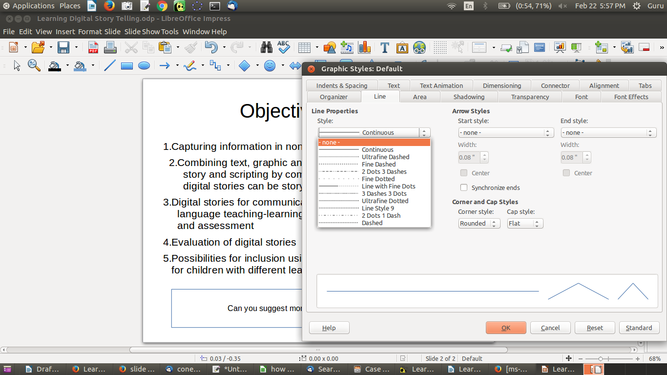
- Similarly, if you do not want a border for the text box, you can remove it. Select Format → Style → Edit Style → Line → Style → None. This is shown in the third image.
Student activity time (3 hours)You should create a slide presentation for your topic. Add slides for different ideas related to the topic. Insert text boxes in the presentation document. Insert hyper links to web resources, as you think will make your slide presentation richer and more useful. Save the slide presentation in your personal digital library, you could save in a sub folder called 'slide presentation'. You should open the file again and see the slides in the 'slide show' mode (Slide Show -> Start from the first slide). References: Learn LibreOffice Impress |
Creating an image resource
Images can be used standalone, or in a sequence as an animation, or in combination with text to create picture stories for communication and teaching. A picture can speak as much as a thousand words! With increasing use of ICT, creating and editing image resources is becoming more common. You should be familiar with the free and open source tools available for creation and editing of image resources.
A simple and easy way to create an image resource is to take a photo of the object you want an image of, using your camera or a mobile phone. Of course this will apply only where the topic is such that you have objects you can take a photo of. Sometimes an image can also be a digitization of hand-drawn images or paintings. Digitized representations of student drawings or paintings can be a useful collection of image resources and this can be used to help students develop communication skills.
Creating a digital drawing
You can also use a drawing software application such as Tux Paint to draw an image.
Open Tux Paint on your computer, through Applications → Education → Tux Paint.

The screen contains two tool bars on either side of the drawing canvas. The left side tool bar contains drawing and editing controls. The right side tool bar provides the various options for the specific tool that you select on the left side tool bar, as shown in the image here. For e.g., when the "Paint brush" tool is selected on the left tool bar, it shows the various brushes available on the right tool bar. When the "Rubber Stamp" tool is selected on the left tool bar, it shows the different stamps you can use, on the right tool bar. At the bottom, you can see a palette of colours. Below this, at the bottom of the screen, Tux, the Linux Penguin, provides tips and other information while you draw.
You can use the ‘brush’ tool, select the brush and the colour you want and paint on the drawing canvas. You can use the stamps for drawing / inserting predefined shapes into the canvas. The left tool bar also has an eraser in case you want to erase any part of your drawing.
The files created by you, are stored in the home/.tuxpaint/saved folder, in the 'png' format. To open the .tuxpaint folder, you may need to select the 'view hidden' files in the /home folder on Ubuntu. The file name will begin with 'year+month+date' in YYYYDDMM format, followed by a serial number. While the drawings created by you are stored in the 'tuxpaint' folder, you can also add images that you access from other resources into the 'tuxpaint' folder and edit them using Tuxpaint application. However, before doing this, you need to check the copyright and license information on the images to be sure that you can reuse and modify them.
Creating image resources using a screen capture tool Screenshot

One of the simplest and yet very powerful ways of creating an image is to simply take a picture of your computer screen. You may have opened a web page on which there is an image or some text you want to store as an image, or it may be from a file on your computer, or it may be a snapshot of a video you are playing. However, when you are taking screenshots of a web resource or a video, you must keep in mind copyright and terms of use of the resource.
You can use the tool Screenshot for this. Open Screenshot on your computer, through Applications → Accessories → Screenshot
You have an option of capturing the entire display on your screen or selecting a smaller area. For the latter option, chose ‘select area to grab’ as shown in the image. Then use your mouse to drag drop the (rectangular) area you want to capture. (Move your cursor to the left top of the area, keep your left mouse click pressed, move the cursor to the right bottom point and release it).
Student activity time (4 hours)You should create a drawing on an issue connected to your topic. Another possibility is you could use any image you found as a reference, and draw it using Tux Paint. A third possibility is to copy the image you have created by taking a photo to the Tux Paint folder (mentioned above) and open it in Tux Paint and edit it to create the image resource you want. A fourth possibility is to open the image you want (from an existing resource) and take a screen shot of the entire or part image using Screenshot tool. You need to ensure that any source image you are using for the above activities has a copyright clause that allows you to reuse and edit it. Reference: Learn Tux Paint, Learn ScreenShot |
Creating and editing image resources using an image editor GIMP
GNU Image Manipulation Program (GIMP) is an image editing software. GIMP can be opened from Applications--->Graphics---> GIMP Image Editor , as shown in the first image.
GIMP is very powerful with many sophisticated features. We will learn a few commonly used functions in image editing:
- Cropping an image
- Adding text to an image
Once you have opened the GIMP application, open the image you would like to edit, as shown in the second image. You can see the menu bar providing different options for editing the image.

Opening GIMP

File opened in GIMP


Cropping an image

Often, you want some part of a larger image to re-use in a different resource. GIMP allows you to select parts of an image - in different shapes or even using a freehand selection to select parts of an image. This is different from a screen shot where you can only grab an area that is in the shape of a rectangle. You can select parts of an image from Select Tools → Selection Tools → Free Select. You can move your cursor on the image to outline the area you want to crop, this is free hand, not necessarily in the form of a rectangle. Then crop the image to your selection through Image → Crop to Selection, as shown in the image. We have cropped the image to free select only the teacher and the student (see the dotted line in image 9). You can export this cropped image using File → Export as and export to an image format like .png or .jpeg.
Adding text to an image

You may want to add a caption to an image and make that caption a part of the image itself. You can do this using GIMP. Select Tools → Text. A text tool box appears.
Place your cursor where you want to type your text. You can format the text (change font size, colour) through the Text tool box.
In our image, we have added the text ‘Digital Storytelling, Health centre’ and selected the yellow colour for the text, since it will display better against a dark background. (Tip - the text should be in a colour contrasting with the background, for easier visibility).
Student activity time(2 hours)You should use GIMP to work on your image OER that you have created. You should use the text input option to enter captions on your image OER. You can crop a part of an image which contains the message you want to convey. GIMP is a very advanced and sophisticated image editor and students who have an interest in drawing/painting/visual art can explore many more features in GIMP to edit image resources. References: Learn GIMP |
Creating an audio-visual resource
One of the most exciting things about ICT is videos - and this unit is about that. While human beings have been writing text and drawing pictures, videos are a relatively recent development.
Objectives of creating an audio visual resource
- Appreciating that audio is a form of communication - both verbal and non-verbal
- Developing the skills to record audio with multiple devices
- Understanding that audio can be combined with words to communicate a message for sharing and for self learning and peer learning
Creating audio resources using your audio recorder on your mobile phone
You can record an audio clip using your mobile phone itself, using any audio recording app, such as ‘Audio Recorder’. You can copy the audio file from your phone to your computer for editing to create a resource. While recording, make sure that no copyright music or sound is playing in the background.
Creating video resources using your video recorder
You can record a video clip using your mobile phone itself, using the camera on the phone. While recording the video, take care to ensure that you are not shooting copyright materials or private spaces. You can copy the video file from your phone to your computer for editing and re-mixing to create resources.
Creating a video resource using a screen-casting tool - RecordMyDesktop
Screen casting is also a simple yet powerful way of creating a video resource. The RecordMyDesktop software records the computer output display as a video with audio, as shown in the image. This can be used to record the functioning of a software or any educational application. In addition to the audio played on the computer as part of the running of the application, additional audio spoken and provided as an input to the computer can also be recorded as a part of the video.
You can set your computer audio output to mute, and provide the audio entirely from an external source (which can be your own voice, or an audio recorded earlier on your mobile phone or computer). In this way you can combine the video from the computer with your own narrative to make a lesson plan on a topic.
Suggestions for creating video resources using a screencast recorder
There are some powerful ways of using this tool for creating video resources:
- You could "slide show" your presentations or play your images and add a narration to it to explain further. This can be shared as supplementary materials for your class and can be used by students who need reinforcement, additional reviews of your lessons.
- You may have used a particular software or educational application to demonstrate a concept in class. You could use the screen cast application to re-create the lesson by recording your description of the activity and sharing with students.
- Dubbing a video can create a resource in another language. In a teaching setting, you may want to use an existing video, and voice over it to add explanations to reflect the language and learning context of your class; this can be done quite effectively using this application. To dub a video using record my desktop , you need to set the sound settings on your computer to ‘mute’ (no output). Then start record my desktop application and play the video. As the video plays, read out your script. The audio read out by you will be combined with the video being shown on the screen to create the video in your language. Make sure you are not displaying copyright material on the screen when recording the video. If you record any copyright material in the video, it will be a copyright violation.
Getting started with Record my Desktop
The following images show how to work with the "Record my Desktop" application.
Opening Record my Desktop
RecordMyDesktop main window


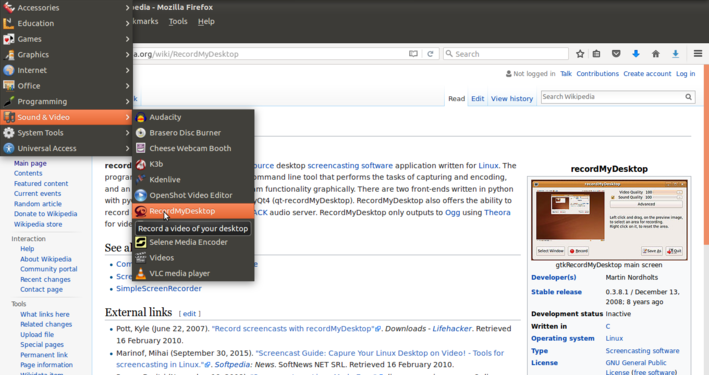
- The first image shows how to open the application, from Applications-->Sound and video
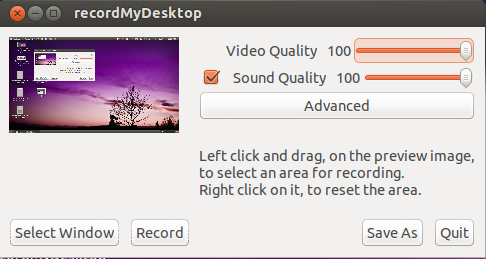
- The second image shows how the view of the application window
Configuring record my desktop application
There are different settings that you can choose for recording on screen cast software based on the kind of content you are capturing on the content as well as method of sharing and publishing. Here are some pointers for changing the settings.
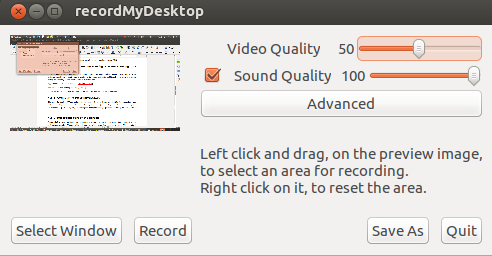
Adjusting video quality in RecordMyDesktop

RecordMyDesktop select area to record


- The first image shows how to define the audio and video quality of your recording by moving the slider. A higher quality video means a larger file, as shown in the image. Therefore, you would need to decide based on the content as well as the intended use (if the video is to be published, it may be better to have a smaller output file size). A video quality of 50% is good enough for most purposes and will keep file size lower). You can also click on Advanced--->Performance to adjust the frame per second to adjust video quality.
- You can also select the window of the screen which you want to record. Click on Select window, as shown in the second image, and you will be asked to grab the area to select. You can select only that part of the screen that you want to record. This is useful if you are opening photos or playing a video on only part of your screen and want to record that part only.
Recording and exporting
The following images will describe how to record and export the recording in the form of a video file.

Recording video using RecordMyDesktop
Exporting output file on RecordMyDesktop


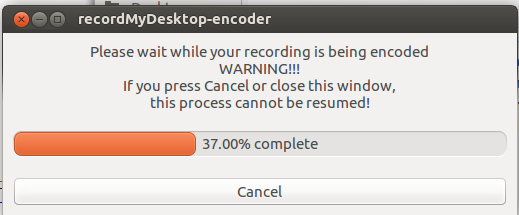
- When you click on Record button, desktop recording will start, as you can see in the first image. The recording can be paused and resumed at any time, by right clicking on the RecordMyDesktop icon in the top panel and selecting Pause (and later Resume when you want to continue recording). Clicking on ‘Stop’ will stop the recording and initiate the export of the video output.
- You need to wait till the export is completed, to get the output file as shown in the second image. If we close the process before, we will lose the output file. The output file will be saved in your "Home" folder by default, with .ogv format. The file will usually have a name like ‘out.ogv’, however you can use the ‘save as’ button on the RecordMyDesktop screen to give a file name of your choice.
Student activity time
Take any OER video you like, which is in accented English spoken in the USA or UK and dub it with your own voice, in English or Kannada. Save the video files in your personal digital library, you could save in a sub folder called 'Video documents'. The effectiveness of this editing will depend on how well you have prepared the script to match the original video. Also to make the recording more effective, you should use a microphone connected to the computer. You should record a couple of times and listen to it, to get feedback on what to do to improve, such as raising the audio volume, providing gaps and voice modulations etc. After you practice a few times, you are bound to get a good video!
References: Learn RecordMyDesktop |}
Combining text, images and audio-visuals to tell a story or teach a lesson
One of the most important advantages of OER is the possibility of creating resources in multiple formats - images being one of them. Images can be used standalone, or in a sequence as an animation, or in combination with text to create picture stories for communication. With increasing use of ICT, creating, editing and remixing image resources is becoming more and more prevalent. Availability of free and open source tools for creation and re-purposing of image resources can help the greater creation, re-purposing and publishing of image and animation OERs.
Inserting images in a text document (LibreOffice Writer)
One of the ways of making a powerful and high quality resource is by suitably integrating multiple resource formats. Images can be embedded / inserted into a text document. The image and the related text enhance the value of the other in the document. select Insert → Image. LibreOffice Writer will open the file browser. Use file browser to select the image file. The image will be inserted in your text document as shown (image 27).

Inserting audio-visual resource links in a text document
It is also possible to provide links and references to an audio / video file in a text document to provide a multimedia experience to the reader. There is an important difference between images and audio/video when integrating with a text document. While an image is embedded within the text document, an audio or video file resides out of the text document in a file folder and is separately accessed to play. This is done by inserting a hyper-link to the audio file or video file in your computer, to the document. Clicking on this link will access the audio/ video and play it, using the audio/video player. While publishing on a web page, it is possible for different formats to be displayed on a single page.
Combining text, image, audio and video resources can help you to communicate your message effectively. The key requirement is to be clear why you are selecting a particular resource in a particular format, this is a skill you will develop with experience.
Storing, sharing and printing a file
Any file (digital resource) can be stored on your computer (through the File -> Save option in the application), shared with others through email. Any file can also be printed to create a 'hard copy'. The applications discussed in this section have a File -> Print feature which will print the file. Before printing you can select the 'Print Preview' option to 'see' how the print will look. Based on the preview, you could adjust the formatting to get the printout as desired.
Student activity timeWork on your text document and slide presentation. The text document can be a detailed and rich explanation for the topic you have chosen, while the slide presentation can be a crisp outline of the main points you want to communicate about. Insert, as relevant, images as well as hyper links to web pages, audio and video files on your computer, to make an interesting narrative on the topic. Read the documents multiple times, to review and refine. Request your colleagues to also read and review it and offer feedback. The 'review-revise' loop is an important and iterative one that makes for a good quality resource! Take a printout of your main document and file it for your record. References: Learn LibreOffice Writer |
Integrating with other courses in the program
There is good scope for integrating activities planned in the other courses in the first year of the D.El.Ed. program, with the learning in this unit.
Submissions of assignments, notes can be prepared using a text editor to communicate in a rich and effective manner. This would apply to all courses.
Action research conducted can be tabulated using a spread sheet to capture the data and perform the required analyses, using the data pivot feature to prepare multi-variate tables. Charts can be prepared from the analysed data for pictorial representation
Concept map can be prepared for every assignment, this in fact can and should be the first activity for any assignment. Using a digital concept map can enable the arranging and re-arranging of ideas, concepts which connect together to record the assignment. Notes, links can be used for elaborating any specific concepts.
Presentation software can be used by student teachers to make presentations. Images, audio and video resources can also be accessed, created or modified to suit the requirements of any submission or communication.
The use of ICT, wherever relevant and meaningful, in other courses, is perhaps a good way to assess the learning in this course!
Student Portfolio
In this unit, the focus was on understanding that data can be represented as numbers, text, pictures, using concept maps, text documents and audio-visual materials to make meaning. The outputs from your activities in this unit constitute your digital portfolio, which will include
- your text, audio, video resources on your topic
- the combining of these resources to explain a topic / teach a lesson / tell a story