LibreOffice Installation and Configuration

Introduction
LibreOffice is the Free and Open-Source Software (FOSS) package. LibreOffice is similar to Microsoft Office. Here we will learn how to install and configure the LibreOffice in Ubuntu, Windows and Mac.
Installation
Steps to install in Ubuntu
- The application is part of the Ubuntu custom distribution.
- In case you do not find it on your computer, you can install by choosing “LibreOffice” in Ubuntu Software Center
- If you would like to install through the terminal follow these steps below:
- Open terminal by clicking (Ctrl+Alt+T),
- Once Window page is open, in front of dollar($) symbol just type below command.
- sudo apt-get install libreOffice
Please refer the below video link for the reference How to Install LibreOffice in Ubuntu
Steps to install in Windows
- Download "LibreOffice windows installer" from below
- If you are unsure which Windows version you have, press Win+Pause to open your system properties window. The LibreOffice Main Installer download page can be selected with a built-in help file for your language:
- Double-click on download "LibreOffice_..._Win_x64.msi" file to begin installation
- It will start downloading "LibreOffice" into your computer (by default browser will save the files in Downloads folder in your system)
Click "Yes" if it asks your permission to allow this program make change to the computer. The installation wizard welcome dialog box opens advising that the installation process is about to be started. Click “Next” Another dialog box opens, giving you a choice whether you want a default installation, or whether you want to choose special locations and components. If you want a default installation, click “Next”.

Installation Wizard

Setup type


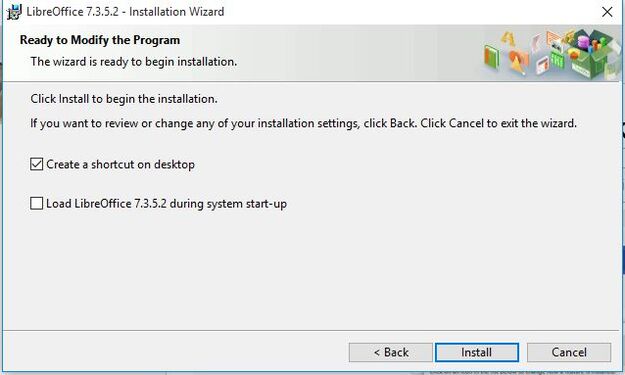
Another dialog box opens, asking you whether:
- A shortcut to open LibreOffice should be placed on your desktop. The default option is to create a shortcut.
- To load LibreOffice during system start-up.
If you need these options by default, let the check mark be checked. Uncheck otherwise.
- Click on "Install" to proceed with installation.
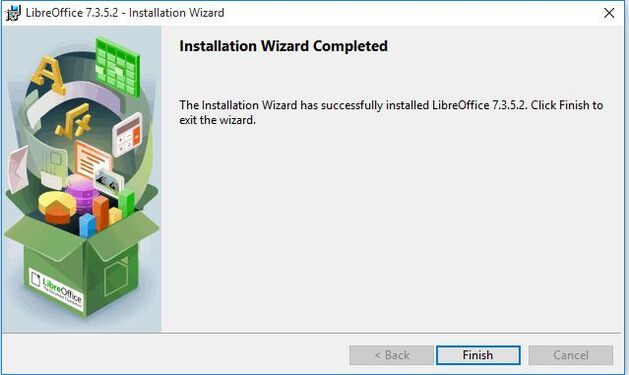
- Once the installation gets completed, click "Finish".
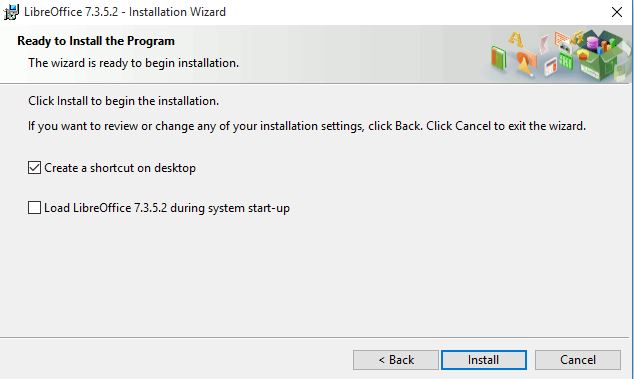
Ready to install the program
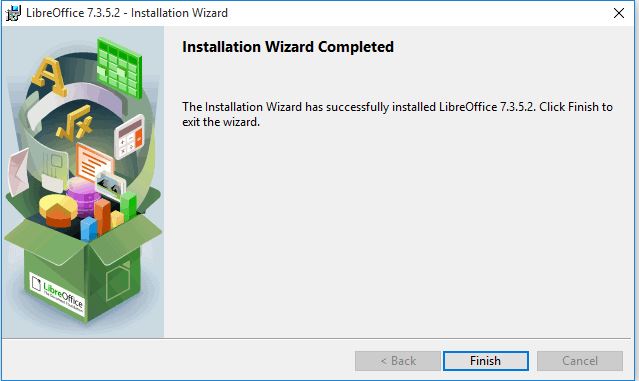
Finish


Please refer the below video link for the reference How to Install LibreOffice in Windows
Steps to install in Mac
- Download the .DMG file from here and choose the operating system.
- Open the .DMG file by double-clicking on it.
- An installation window appears: drag and drop the LibreOffice icon onto the Applications icon in the same window. You may be required to enter your administrator password.
- The files are copied over and a progress bar shows when the installation is complete.
- If needed, you may now download and install the language pack(s) of your choice and built-in help by downloading the .DMG file of your choice. The installers for these are launched from inside their .DMG files.
Please refer the below video link for the reference How to Install LibreOffice in Mac
After Installation
After the installation of LibreOffice have to do languages setup. Please follow the below mentioned steps.
Language package installation in LibreOffice
LibreOffice interface has been translated (localized) into over 40 languages and most of the Indian languages. Additionally, there are over 70 spelling dictionaries available for languages. The dictionaries are available from the LibreOffice website. To use LibreOffice interface in your own language like Hindi, Kannada or in any other language, please follow below instructions.
- Once again double click on the Downloaded installation file, which will open LibreOffice installer wizard click on the "Next" option.
- On the next (Program Maintenance) screen you will get 3 options (Modify, Repair, Remove), choose "Modify" option and click on "Next".
-
Installation wizard
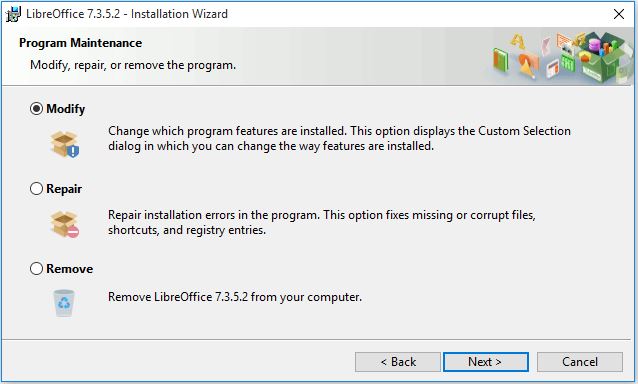
Select modify

- In the next screen, if you would like to install and use LibreOffice in your preferred language, then click on "+" button (small down arrow) in "User interface languages"
- It will open the list of options. In that select "This feature and all sub features, will be installed on the local hard drive".
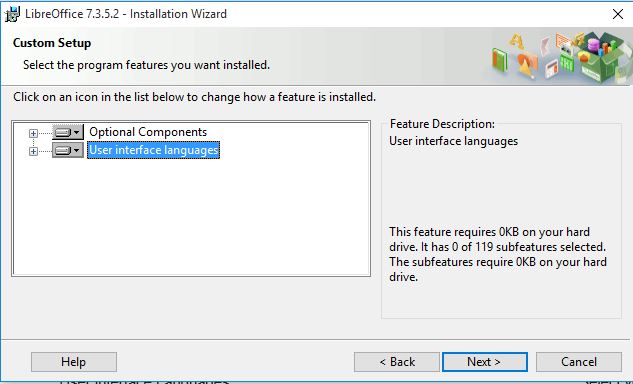
User interface Language
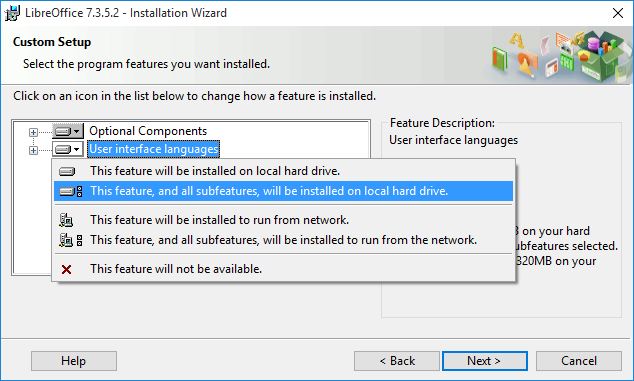
Select your preferred language


- Another dialog box opens, inviting you to choose whether to open Microsoft Office documents with LibreOffice. By default, this feature is not enabled. If you want LibreOffice to open Microsoft Office files (documents, spreadsheets and presentations), put a check mark in all four check boxes.
- Another dialog box opens, asking you whether to create A shortcut to your desktop. The default option is to create a shortcut.
- Then click on Finish.
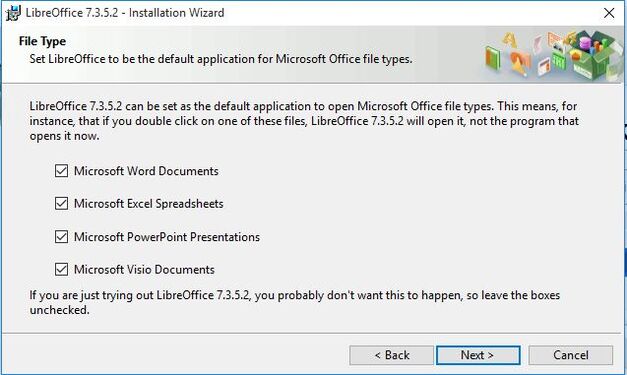
File type selection
Desktop shortcut
Finish


Adding Language tool, Dictionaries and Extensions
- To add the language tool and dictionaries you should download the tool and dictionary first. Please refer the below link to download.
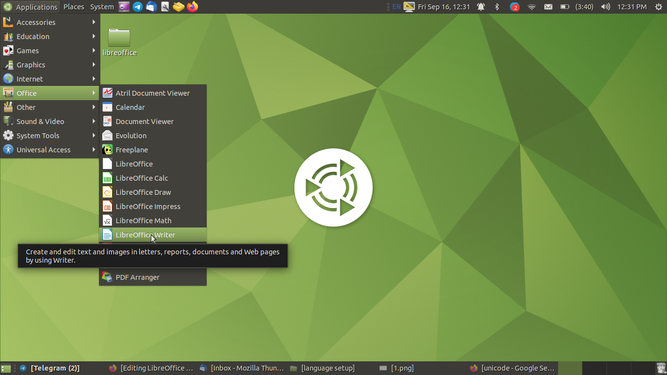
- Open the LibreOffice Writer by clicking on "Application" menu in that select "Office" and open the LibreOffice Writer.
- Once the LibreOffice Writer is opened clink on "Tools" and select the "Extension Manager" and Open or use Ctrl+Alt+E.
Opening the LibreOffice
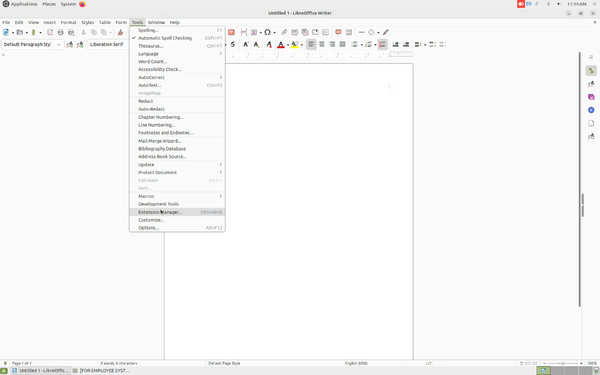
Opening the Extension Manager


- Another dialog box will open in that click on "Add" and it will ask you to choose the file then choose the downloaded file from the folder and click on open so that it can be added to the Extension Manager.
![]() Note: Do the same for Language tool and Dictionaries each time.
Note: Do the same for Language tool and Dictionaries each time.

Add

Selecting the downloaded file
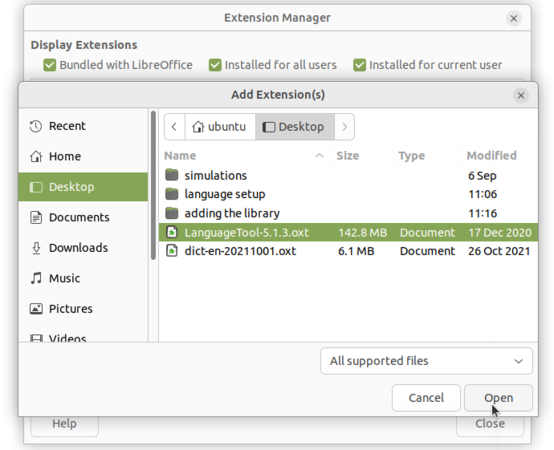
Clicking on Open
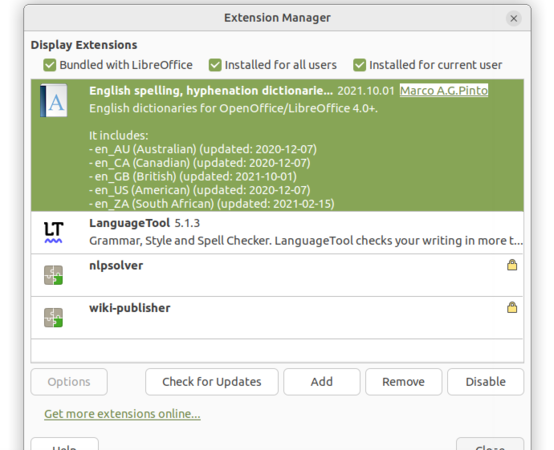
After adding the language tool and dictionary


- Another dialog box will open asking whether to restart now or later, Select "Restart now". Once LibreOffice gets restarted the language tool and dictionaries will be working.

Restart

Font configuration
Once Language package installation in LibreOffice is done, If you want to change the user interface language and format setting, please follow the below steps.
- Open LibreOffice Writer by clicking on "Application" menu, in that select "Office" and open the LibreOffice Writer.
- Once LibreOffice Writer is opened click on "Tools" and select the "Options" and click.
-
Opening the LibreOffice

Opening the Options

- Another dialog box will open, in that click on "Language settings -> Languages"
- Choose the "User interface language" and the "Formats" as you require.
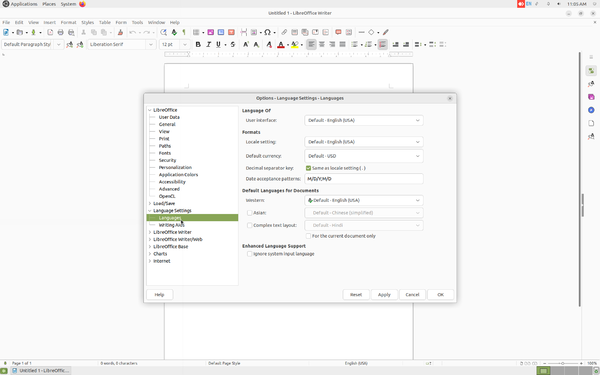
Language setup & Languages
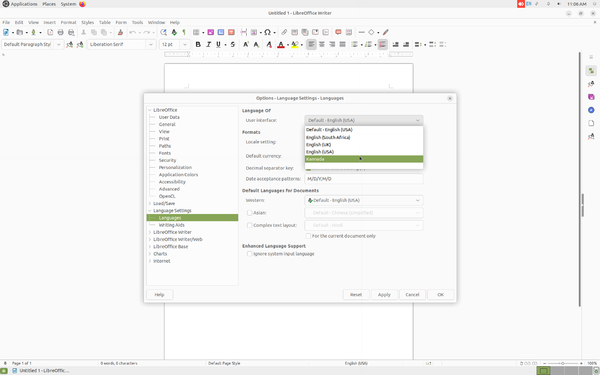
Changing the user interface and formats


- Click on the "LibreOffice Writer" and in that click on "Basic Fonts(Western)".
- In each of the options given say, "Default","Heading","List","Caption" and "Index", choose the fonts that needs to be default in your Writer and click on "Apply->OK".

Opening the LibreOffice writer and Basic fonts

Selecting the fonts
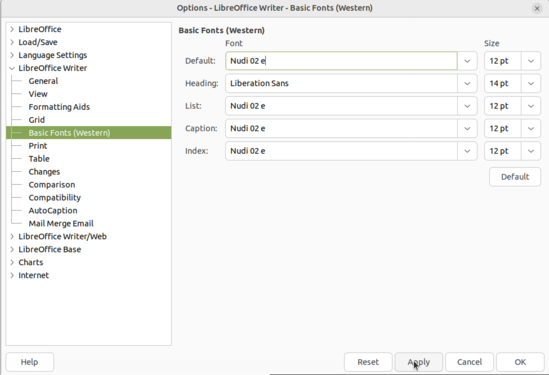
Changing the default fonts
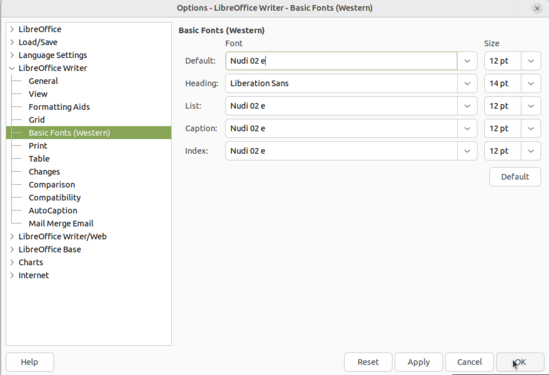
Click Apply->OK


- If you want to use Unicode languages, click on "Language settings->Languages" (Refer the first image from above). And check mark on "complex text layout" and select the language you want to use. Click on "OK".
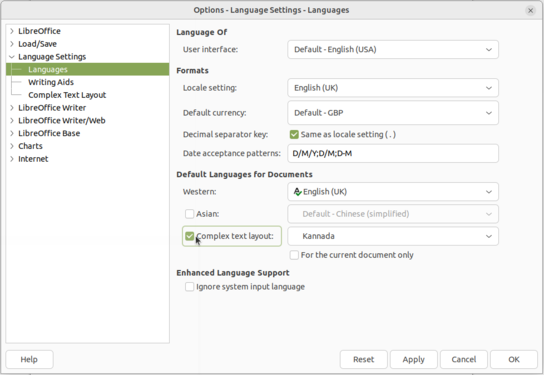
Check mark on CTL

Selecting the language in CTL
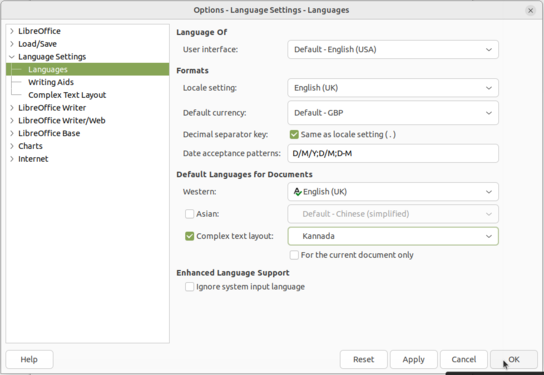
OK


- Open the "Tools->Options->LibreOffice Writer-Basic Fonts(CTL)>" again.
- In each of the options given say, "Default","Heading","List","Caption" and "Index", choose the fonts that needs to be default in your Writer and click on "Apply->OK".
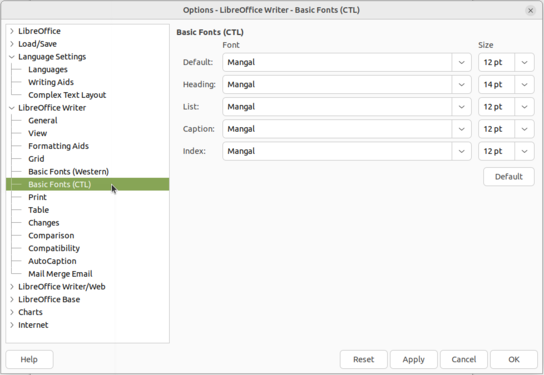
Basic Fonts(CTS)
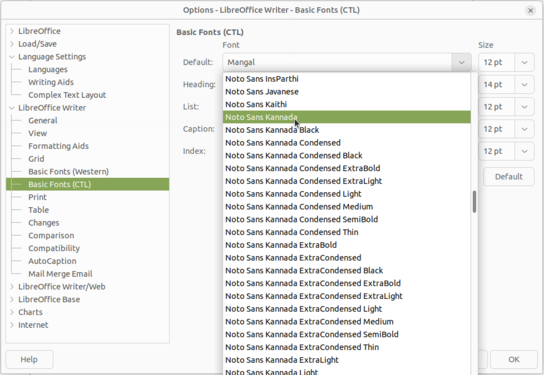
Selecting the Unicode fonts

OK
.png)


- Now you can use the customized Unicode languages as per you customization.