Learn LibreOffice Impress
हिंदी मे देखिये
ಕನ್ನಡದಲ್ಲಿ ನೋಡಿ

Introduction
Basic information
| ICT Competency | LibreOffice Impress is a free and open source application for creating generic resources, in the form of slide presentations. |
| Educational application and relevance | LibreOffice Impress can be used to create slides that contain many different elements including text, lists, tables, charts, audio and video links etc. Slides are often used in training programs and in teaching to quickly and simply communicate ideas through points. |
| Version | Version: 7.3 |
| Configuration | No specific configuration requirements |
| Other similar applications | Sozi, Apache OpenOffice Impress, Google Drive Slides are all presentation software applications |
| The application on mobiles and tablets | Only Office for Android,
Collabora Office for Android and for iOS You can use DeckDeckGo for creating and sharing presentations online. It is a FOSS alternative for Google Slides. Although there are similar full office-suite along with Google Drive storage service like NextCloud, this is simpler when we just want to use a clean presentation tool. It works on mobile too. |
| Development and community help | 1. Official Website |
Overview of Features
LibreOffice Impress lets you create professional slide shows that can include charts, drawing objects, text, multimedia and a variety of other items. We can import and modify Microsoft PowerPoint presentations. On-screen slide shows, animation, slide transitions are a few of the techniques you can use to make presentation more appealing. Impress also includes a spelling checker, text styles and background styles, to communicate information in simple and powerful ways.
Installation
For Ubuntu OS
- The application is part of the Ubuntu custom distribution.
- In case you do not find it on your computer, you can install by choosing “LibreOffice” in Ubuntu Software Centre
- If you would like to install through the terminal follow these steps below:
- Open terminal by clicking (Ctrl+Alt+T),
- Once Window page is open, in front of dollar($) symbol just type below command.
- sudo apt-get install libreOffice
For Windows
- Download "LibreOffice windows installer" from below
- If you are unsure which Windows version you have, press Win+Pause to open your system properties window. The LibreOffice Main Installer download page can be selected with a built-in help file for your language:
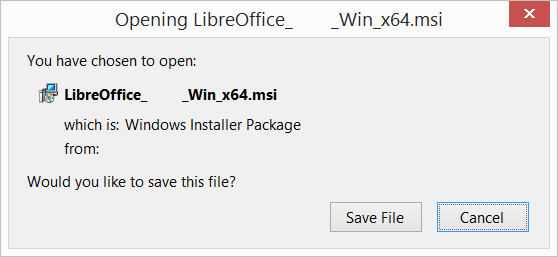
- Double-click on download "LibreOffice_..._Win_x64.msi" file to begin installation
- It will start downloading "LibreOffice" into your computer (by default browser will save the files in "Downloads" folder in your system)
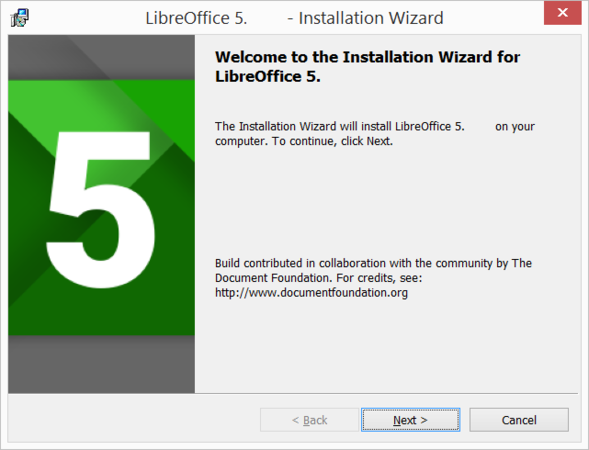
Click "Yes" if it ask your permission to allow this program make change to the computer, the Installation Wizard Welcome dialog box opens advising that the installation process is about to be started. Click “Next”
Downloading LibreOffice
Installation wizard


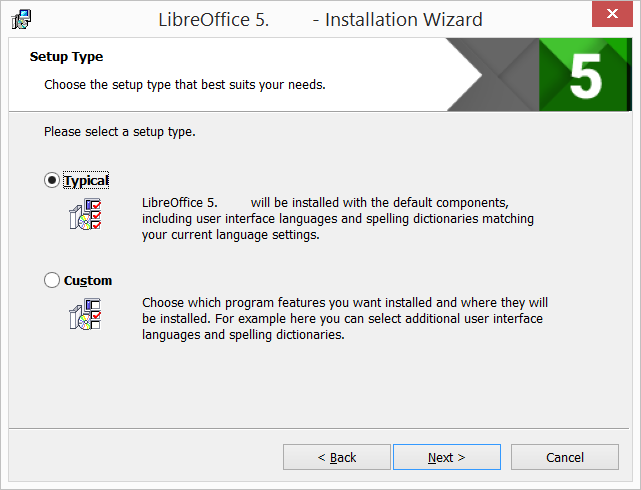
Another dialog box opens, giving you a choice whether you want a default installation, or whether you want to choose special locations and components. If you want a default installation, just press “Next”. If you want to make special choices, click on “Custom” and then press “Next”. The Custom Setup enables changes to the features that will be installed. If you would like to install the spelling dictionaries, hyphenation rules, thesauri and grammar checkers:
- Click "Expand Optional Components"
- Click "Expand Dictionaries"
Setup type
File type selection


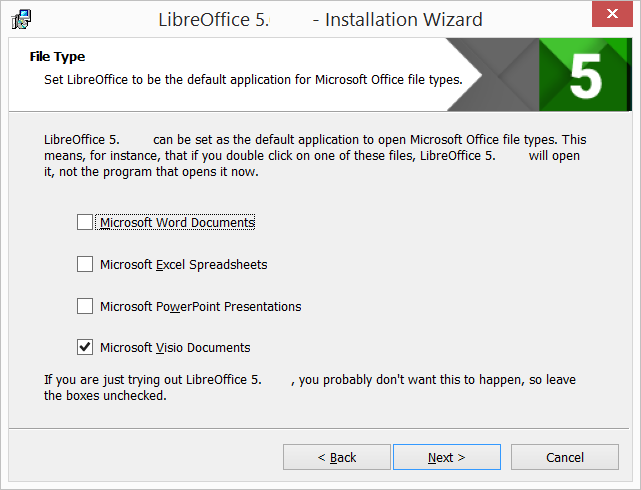
Another dialog box opens, inviting you to choose whether to open Microsoft Office documents with LibreOffice. By default, this feature is not enabled. If you want LibreOffice to open Microsoft Office files (documents, spreadsheets and presentations), put a check mark in all four checkboxes. Another dialog box opens, asking you whether:
- A shortcut to open LibreOffice should be placed on your desktop. The default option is to create a shortcut.
- To load LibreOffice during system start-up.
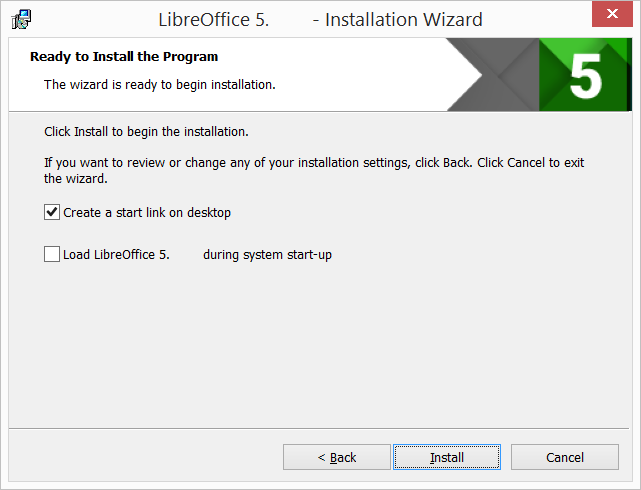
Ready to install the program
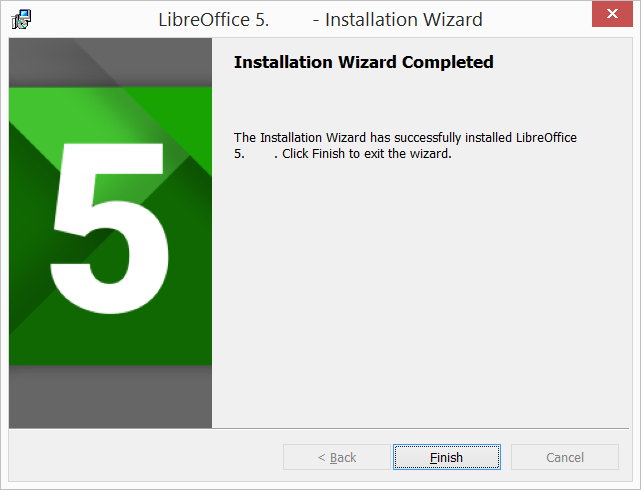
Finish


If you are not able to install LibreOffice in your windows machine, follow this official website installation instruction or Click here to see the LibreOffice Installation - English Tutorial
For MAC OS
- For MAC OS Go to this click and click on "libreoffice MAC OS" for MAC laptops
- It will start downloading "LibreOffice_..._MacOS_x86-64.dmg" into your computer (by default browser will save the files in "Downloads" folder in your system
- Double-click on download "LibreOffice_..._MacOS_x86-64.dmg" file to begin installation
- An installation window appears: drag and drop the LibreOffice icon onto the Applications icon in the same window. You may be required to enter your administrator password.
- The files are copied over and a progress bar shows when the installation is complete.
If you are not able to install Libreoffice in your MAC machine, follow this official website installation instructions
Working with the application
Opening a presentation slide

LibreOffice Impress interface

- In Ubuntu LibreOffice Impress can be opened from "Applications --> Office --> LibreOffice Impress" and In windows double click on the LibreOffice desktop shortcut.
- When you open the LibreOffice Impress application, it will show the window like this. You can click the cursor on "Click to add title" and type the title of the information you want to enter. And then you can click the cursor on "Click to add text" and type the information you want to present.
Inserting new slide (Add new slide, Duplicate slide, select slide layout)
- When you create a new presentation, Impress shows only one slide in the Slides pane and Workspace. You can add new slides or duplicate slides to your presentation as follows.
- A new slide is inserted into a presentation using one of the following methods:
- Go to "Slide --> New Slide" on the Menu bar.
- Right-click in the Slides pane and select New Slide from the context menu.
- Use the keyboard shortcut "Ctrl+M".
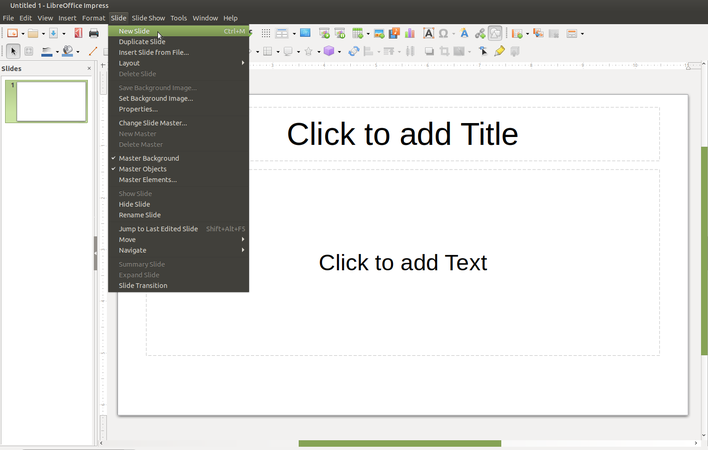
Insert new slide from menu bar
Duplicate slide


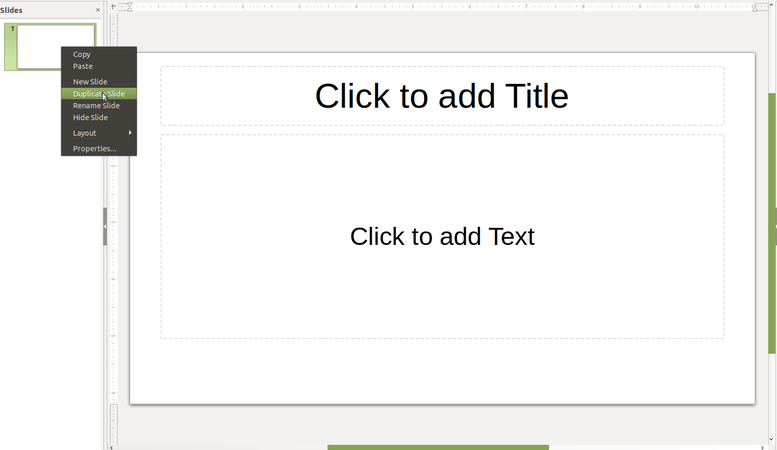
Duplicate a slide
To duplicate a slide, select the slide you want to duplicate in the Slides pane and use one of the following methods. A duplicate slide is inserted after the selected slide in the presentation.
- Right-click on a slide in the Slides pane and select "Duplicate Slide" from the context menu.
- Go to "Slide Sorter" view in the Workspace, right-click on a slide and select "Duplicate Slide" from the context menu.
- Go to "Slide --> Duplicate Slide" on the Menu bar.
Slide layout
Slide content type


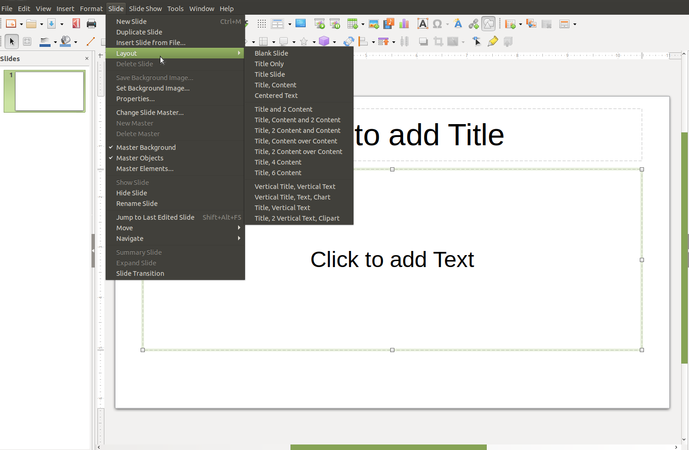
Changing slide layout
After selecting a slide in your presentation, change the slide layout using one of the following methods:
- Click on the required layout in "Layouts" section of the Properties deck in the Sidebar
- Go to "Slide --> Layout" on the Menu bar and select the required layout from the drop down list.
- Right click on a slide in the Slides pane, select Layout from the context menu and select the required layout from the drop down list.
- Click on the "Slide Layout" icon on the Presentation toolbar and select a layout from the options available.
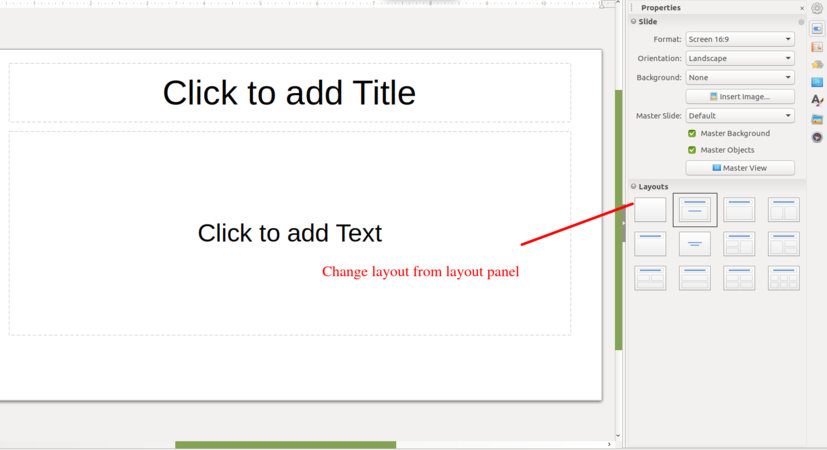
Slide layout panel

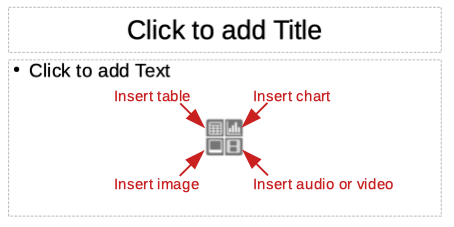
Slide contents
Several layouts contain one or more content boxes. Each of these boxes can be configured to contain one of the following elements: slide title, text, table, chart, image or audio/video,etc
- Slide title – Click on "Click to add Title" and type a title in the text box. Impress enters text editing mode and the Text Formatting toolbar automatically opens.
- Text – Click on "Click to add Text" and type your contents in the text box. Impress enters text editing mode and the Text Formatting toolbar automatically opens.
Watch this video to learn inserting slides and formatting slides
Adding text
There are two ways of adding text to a slide – contents box or text box.
- Contents box – click on "Click to add text" in the contents box and type your text. Outline styles are automatically applied to the text as you insert it. You can change the outline level of each paragraph as well as its position within the contents box by using the arrow buttons on the Outline toolbar and Workspace Outline view.
- Text box – click on "Text" on the Standard toolbar or Drawing toolbar to select text mode, then click on your slide. A text box is created and the Text Formatting toolbar automatically opens. Type your text and click outside the text box to end text mode.

Textbox
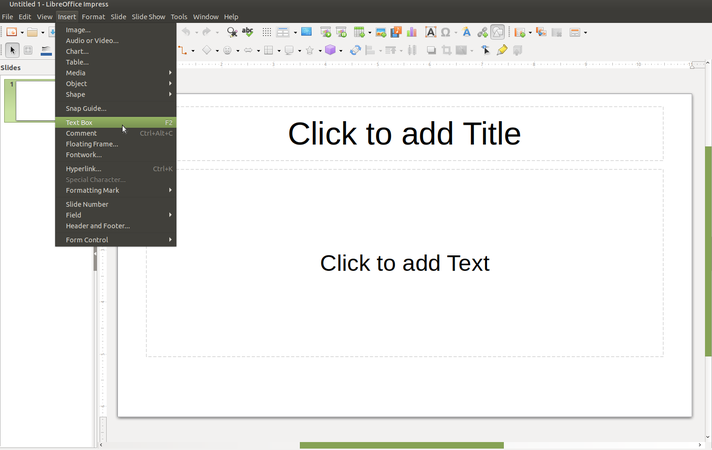
Insert textbox from menubar


Text Formatting

Text formatting properties

Text properies panel


- To format added text go to "sidebar settings" and click on "properties" as shown in the animation
- To copy text from one place to another, or from one document to another, you can select the text, go to "Edit --> Copy" and go to a different place in the document to paste it "Edit --> Paste". The editing menu also has an important feature for searching selected words. You can use the "Edit--> Find" the option for searching selected words.
- The format option is for changing the format of the text, changing the text font, text size, page format, and text wrapping options. many of these options can use short-cut icons from the formatting text toolbar, the letter “B” and “I” can be used to make the text bold and italics.
- You can type in text in different languages, not only in English. You can type a paragraph of text with words/sentences in different languages. The IBUS application allows you to type in most Indian languages. To type in Hindi or Kannada or Telugu or Tamil, visit the Learn_Ubuntu page.
Bold,Italic,Underline etc
Alignment features


Using bullet and numbering features
- To add the bullets and numbers to text information, choose "Format --> Bullets and Numbering". You can also select the different symbols of bullets and numbers here.
- An important feature of Impress is to enable you present your information through simple and short points ('bullet points').
- For the selected text input that has been entered, go to "Format --> select Bullets and Numbering" and choose the numbering type that is needed. You can create sub-numbered lists.
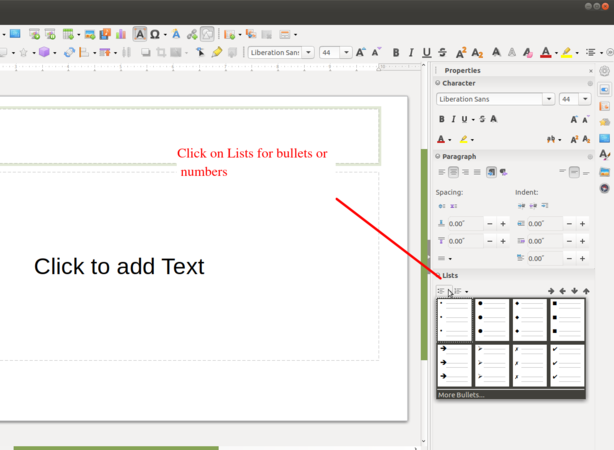
Add Bullets or Numbers
Selecting bullets or numbers


Inserting images
- By adding images, videos or any other media will make you presentation more informative and attractive. To add images, go to the "Insert" from the menu bar and click on the "Image" option and select the image which you want to insert from your local drive, select and click on "Open".
Insert Image

- Alternatively after inserting a new slide, on the inserted new slide you can move the cursor around that, and it will show the option "Insert Image". Along with image, you can insert table, video or graph.
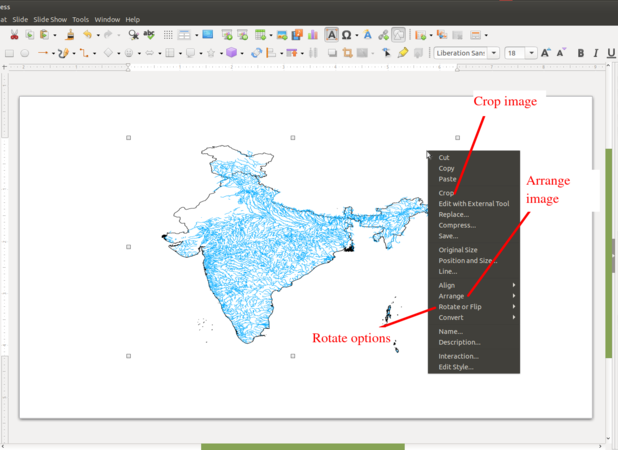
Edit Image

![]() Note: When resizing a graphic, right-click the picture. Select "Position and Size" from the context menu and make sure that "Keep ratio" is selected. Then adjust the height or width to the size you need. As you adjust one dimension, both dimensions will change to keep the width and height ratio the same, ensuring that the picture will not become distorted. Remember also that resizing a bitmap image will reduce its quality. It is better to create an image of the desired size outside of Impress.
Note: When resizing a graphic, right-click the picture. Select "Position and Size" from the context menu and make sure that "Keep ratio" is selected. Then adjust the height or width to the size you need. As you adjust one dimension, both dimensions will change to keep the width and height ratio the same, ensuring that the picture will not become distorted. Remember also that resizing a bitmap image will reduce its quality. It is better to create an image of the desired size outside of Impress.
- In the same way you can "Insert video" into the presentation. Go to "Insert --> Audio or Video". Note that when you insert the video it does not play in the edit mode. If you want to know whether the inserted video is working Press "F5" to move to the presentation mode.
Insert Hyperlinks
- To insert Web link place the text cursor in the document at the point where you want to insert the hyperlink or select the text that you want to put the hyperlink on.
- Select "Hyperlink" command from the Insert menu. When you present your slides (using 'Slide Show' from the Menu), you will be able to click this web link and open the web page with that address (you will need internet connectivity for this). You can also use this to link a file on your own computer, which can be opened in the same manner.
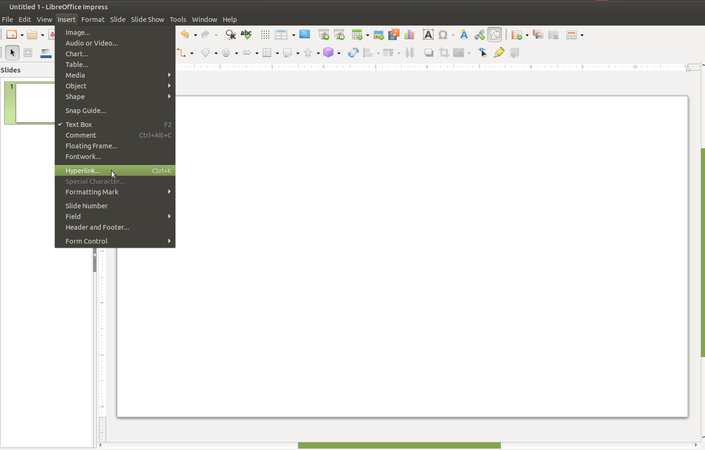
Insert Hyperlink
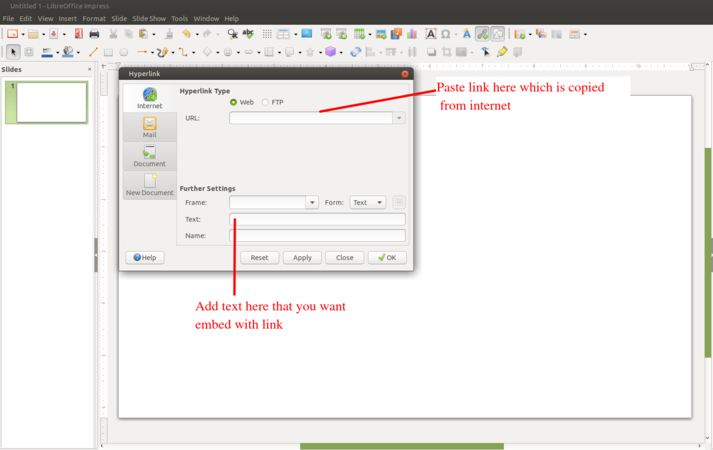
Hyperlink wizard


Insert Shapes
- Go to "Insert--> Shape". Choose the type of shape you need to draw on your presentation. Drag the shape on the surface of a slide.
- To change the properties of the shape you can go to "Area" tab in the "Properties" option.
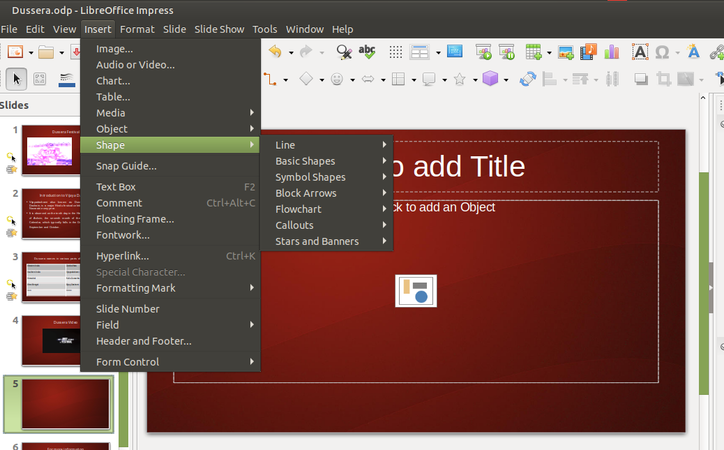
Inserting Shapes

Insert Table and table formatting
- Go to "Insert --> Table" on the Menu bar, select the number of rows and columns required from the Insert Table dialog that opens. Don’t worry if you aren’t sure how many you will need at first, you can always edit the table later, but if you do know your needs, this is a good time to fill it in since it is more work to fix it later.
- Alternatively, click on "Table" icon on toolbar and select the number of rows and columns by dragging the cursor.
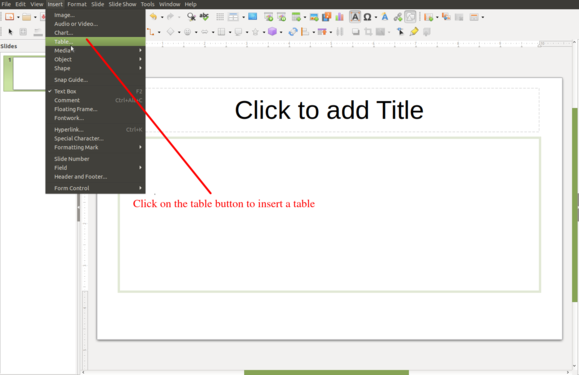
Insert table from the insert menu

Table design and Table properties


- This will insert a default table into your slide with the number of rows and columns you specified. But if you look to the Sidebar on the right you will see that the "Properties" window has opened the "Table Design" section for you. You can do a lot from this toolbar, so let’s take a look at it. Under table design you can change into any predefined table designs.
- Remember that you can always read the name of the button by moving over it and reading the pop-up.
Changing the template using 'Master slide'
- Impress comes with a collection of master slides which you can use it for to change the slide background. Click on the "Master slide" section from task panel on right side of the working window, and click on the slide design which you want to apply for your slide. After you select background for your slide and to apply the same background to all the slides in your file, right click on the "Master slide" from side panel and select "Apply to all slides".
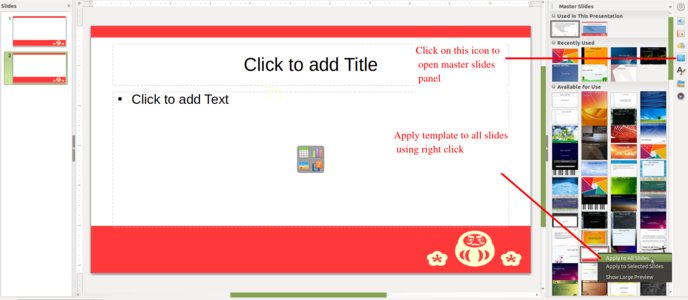
Apply template to all slides
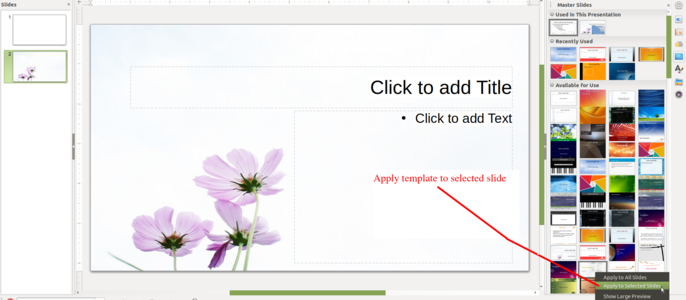
Apply template to selected slides


- After you select background for your slide and apply the same background to selected slides in your file, right click on the master slide from side panel and select "Apply to selected slide".
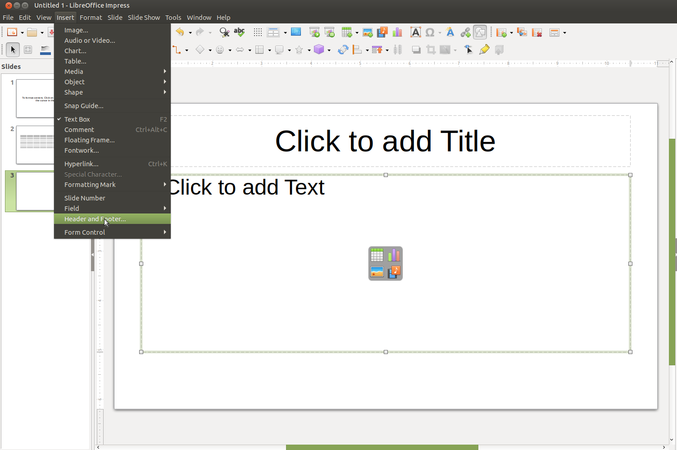
Add header and footer

- To add the header or footer go to "Insert" menu from the top menu bar and click on "Header Footer --> Add the header or footer" like fixed date , variable date , slide number etc. Check "Date and Time" and choose a time setting. Choose between "Update automatically" and "Fixed" as a display type. If you choose "Fixed" type the date in the blank.
Add header and footer

Custom animation for presentation

- Custom animation - Opens the "Custom Animation" from task panel on right side of the working window. Alternatively choose "Slide" from Menu Bar and then click on "Custom Animation".
- There will be varieties of styles to add, you can choose. "Custom animation" enables you to present your text in different styles. You can have the text come in different speeds, in different ways, this makes it interesting for the viewer by providing visual relief.
- Try different animation methods and have fun!
Slide Transitions
To add the slide transition wherein the transitions can be applied to the selected slide or to all slides.
- In Normal view, select the slide that you want to add the transition effect to.
- On the Tasks pane, click "Slide Transition".
- Select a "slide transition" from the list.
To preview the transition effect for a slide, click the small icon underneath the slide on the Slides Pane.

Click on slide transition
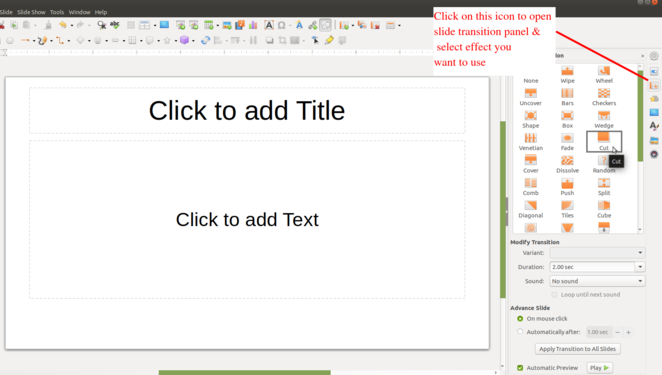
Slide transition panel
To remove a transition effect
- In "Slide Sorter View", select the slides that you want to remove the transition effect from.
- Choose "No Transition" in the listbox on the Tasks pane.
Inserting other objects
- To add any objects to a slide, for example formula, QR code etc. Click on "Insert" and go to "object" then select the object as per the requirement.
- To add formula under the object in the slide click on "Insert--> Object--> Formula", formula available for unary/binary operators, relations, set operations, functions, brackets, attributes.
- To add fields like slide number,title,count, Author name etc click on "Insert--> Fields"
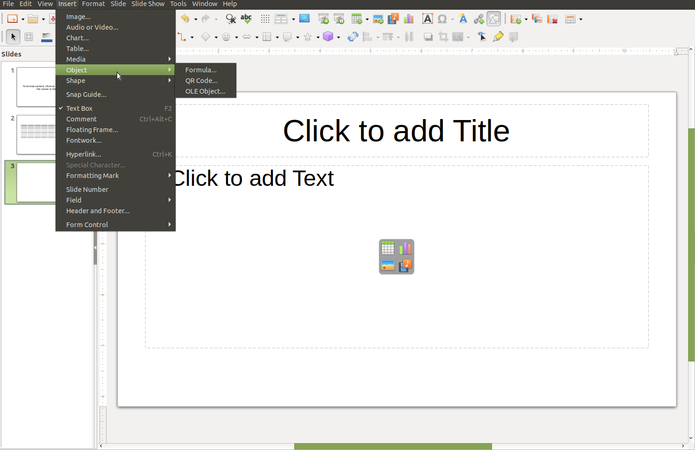
Insert formula
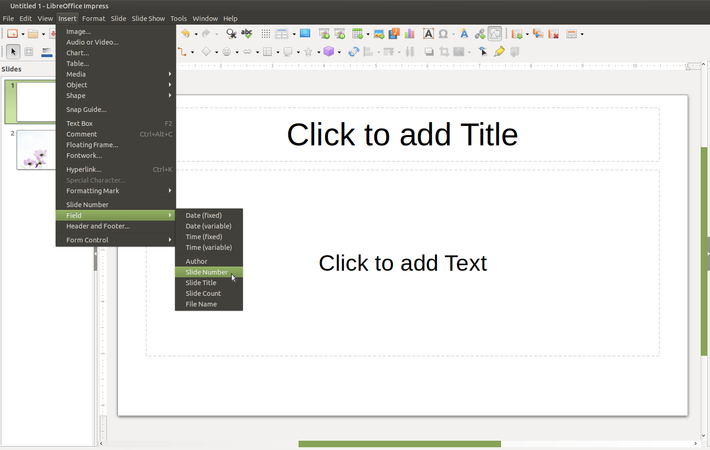
Insert fields in slide like slide number ,title


Running Sideshow

Running the presentation

- To run the slideshow go to the slideshow from the top menu bar, click on the "Slide Show" and click on "Start from First Slide" or use the keyboard shortcut key "F5" to start the presentation from the first slide of your presentation.
- The same way you start your slides presentation from the current slide which you are seeing on your screen by pressing "Shift+F5" keyboard shortcut keys or click on the "Slide Show" and click on "Start from Current Slide".
- For an automatic change to the next slide, you must assign a slide transition to each slide.
- Open the "Slide Transition" sidebar deck.
- In the "Advanced slide area", click "Automatically" after, and select a time duration.
- Click "Apply to All Slides".
Language package installation in LibreOffice
- LibreOffice interface has been translated (localized) into over 40 languages and most of the Indian languages. Additionally, there are over 70 spelling dictionaries available for languages. The dictionaries are available from the LibreOffice website. To use LibreOffice interface in your own language like Hindi, Kannada or in any other language, please follow below instructions.
- Once again double click on the Downloaded installation file, which will open LibreOffice installer wizard click on the "Next" option.
- On the next (Program Maintenance) screen you will get 3 options (Modify, Repair, Remove), choose "Modify" option and click on "Next".
- In the next screen, if you would like to install and use LibreOffice in your preferred language, then click on "+" button (small down arrow) in "User interface languages"
- It will open the list of languages available, in that select "Your preferred language" and select "This feature will be installed on the local hard drive".
- Once all the required changes are done on the screen, click “Next”
- On the next "File Type" window, select all the options to open Microsoft Office files, Click "Next". In next screen that is, "Shortcut and Load during system startup" screen click on the "Install" button to finish the installation.

Installation wizard
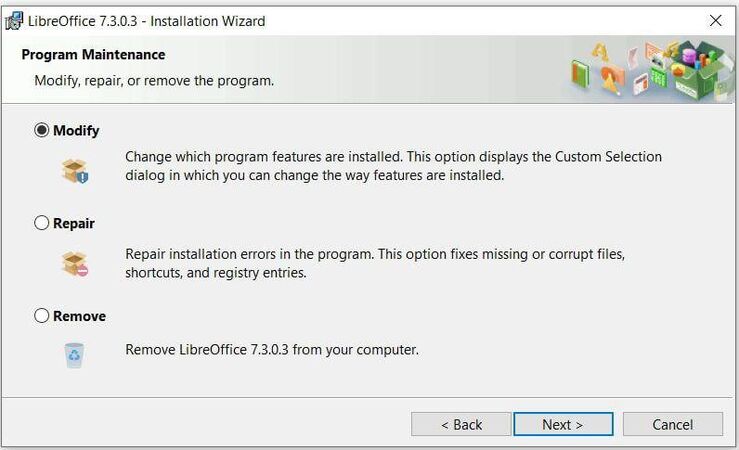
Select modify


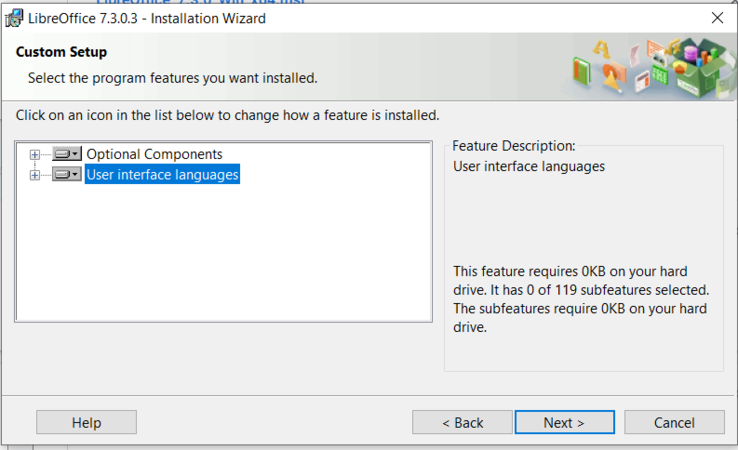
User interface Languages
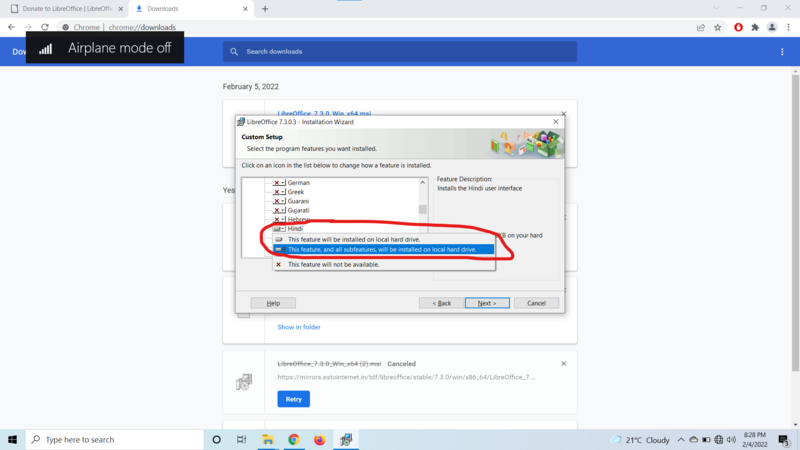
Select your preferred language


Changing LibreOffice language interface (after the installation)
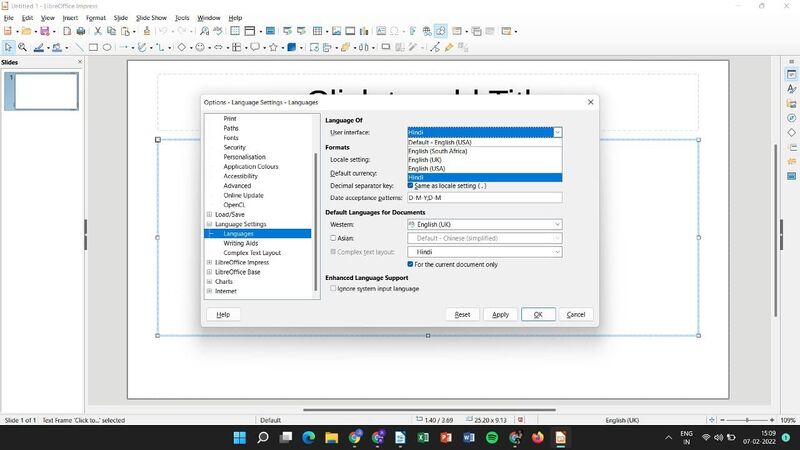
- When creating a presentation in other languages, you can use the language setting (Tools --> Options --> Language settings --> Languages --> User Interface --> Add the required language) to create styles that only differ in the language in formatting attributes. This allows you to easily check spelling of all of the presentation contents without affecting appearance.
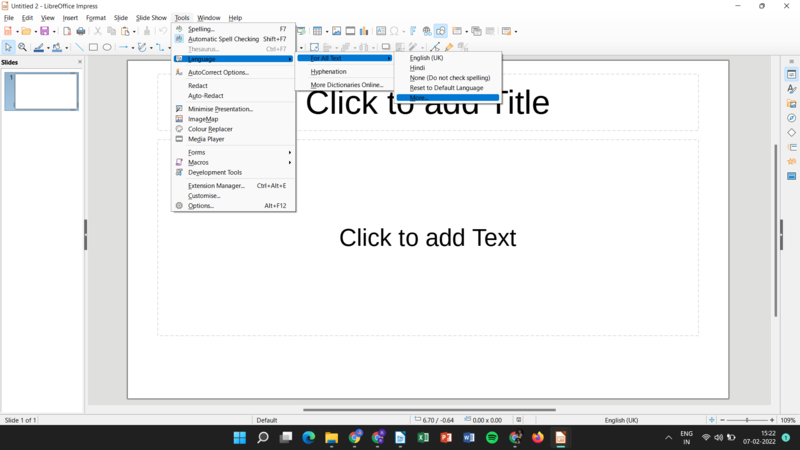
Menubar tools
Languages interface


Saving the files and formats
- Like in most applications, a file can be saved using the File --> Save command, or by the shortcut key CTRL+S. Always give a meaningful file name, reading which you should get an idea of the file contents.
- The files will be saved as ".odp".
- The files can be exported to a PDF format (File --> Export as PDF). This is useful when you only need to print the file and do not want any changes to it. You can also save your file in the Microsoft ppt format (File --> Save As).
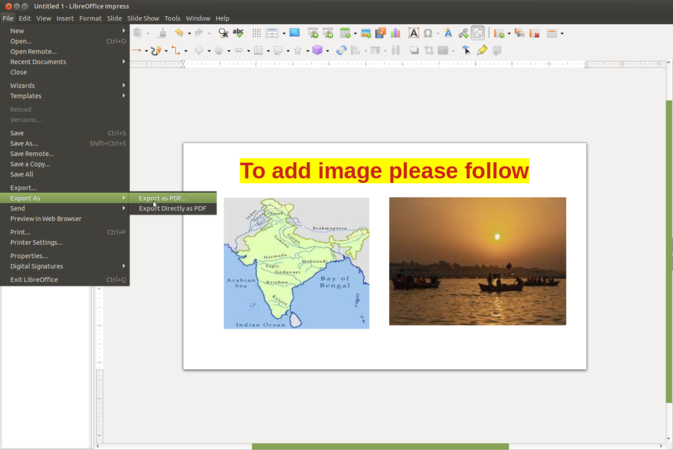
Export as PDF
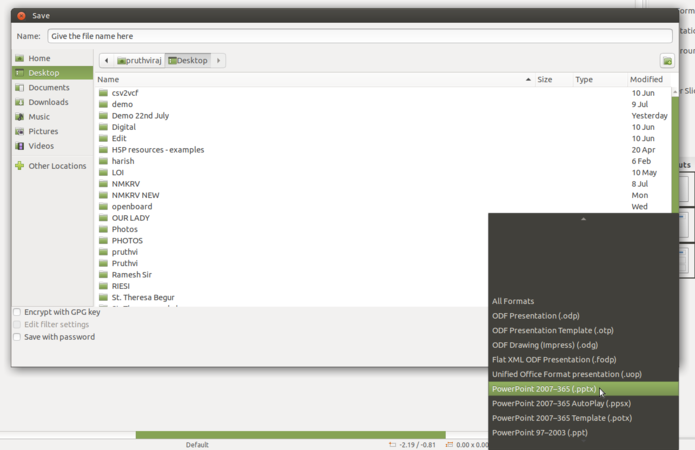
Save as PPT


Advanced features
You can use custom animation in advanced ways to present text, audio, video and images in rich ways. You have different options to print your slides - only slides or as a handout.
Video tutorials
Click here to see the video tutorials to learn LibreOffice Impress
Ideas for resource creation
- You can organize and structure teaching ideas through slide presentations. You can animate your slides and combine text, image, audio and video elements for richer communication.
References
- The Document Foundation
- LibreOffice Impress Official Website