Difference between revisions of "Learn Freemind"
Jump to navigation
Jump to search
| Line 26: | Line 26: | ||
Here the mind map is named Food and is saved under home/ranjani/Documents | Here the mind map is named Food and is saved under home/ranjani/Documents | ||
|- | |- | ||
| − | |style="width: 50%;| | + | |style="width: 50%;|{{ext-img|450px|https://upload.wikimedia.org/wikipedia/commons/6/6e/FreeMind_3_Insert_Child_nodes.png}} |
| − | |style="width: 50%;| | + | |style="width: 50%;|{{ext-img|450px|https://upload.wikimedia.org/wikipedia/commons/e/e6/FreeMind_4_Adding_child_nodes.png}} |
|- | |- | ||
| − | |style="width: 50%;| | + | |style="width: 50%;|Step 3 - Now you see that the mind map is named Food and the root node is called Food. To insert other words that are connected, you can enter them as child nodes. To enter these nodes, you can use the "Enter" key or "Insert" key after selecting the node to which the child nodes must be added. Here, the child nodes have been added after selecting the node "Food". The child nodes added are called sibling nodes and the main node is called parent node. |
| − | |style="width: 50%;| | + | |style="width: 50%;|Step 4 - You can keep adding child nodes to any node. For example you can add child nodes to the node called environment by selecting and using "Insert" key. You can also add a sibling node to environment by selecting the node environment and using "Enter" key. "Plants" and "Animals" are child nodes for "environment" and "agriculture" is sibling node for "environment. |
|- | |- | ||
|style="width: 50%;|Image Image Image Image (Step 5) | |style="width: 50%;|Image Image Image Image (Step 5) | ||
Revision as of 05:25, 14 October 2016

Introduction
Educational application and relevance
Version
Configuration
Overview of Features
Other similar applications
Development and community help
Working with the application
Functionalities
- Please label images as Step 1
- Please add 500px
|

|
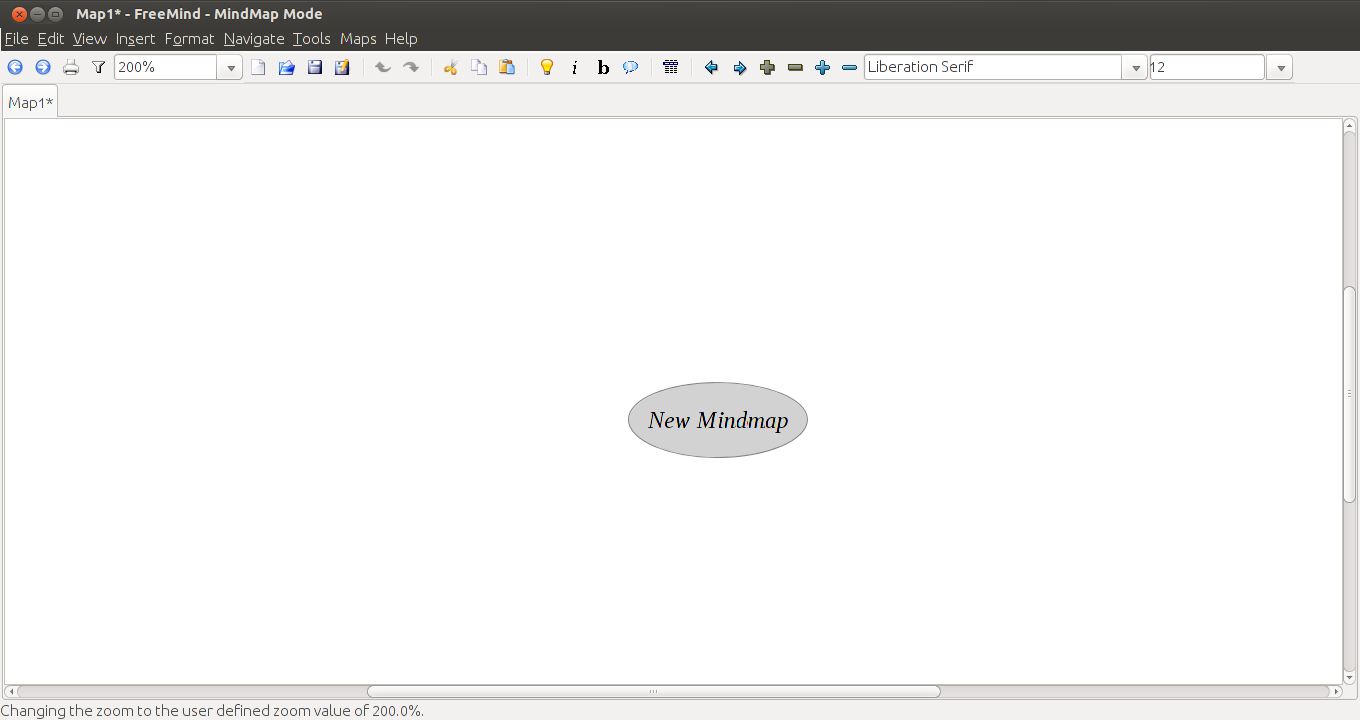
| Step 1 - Once Freemind is open you will see a window like this.
The new mind map is the root node and you can give it any name you want. The name of this root node will be the name of the mind map. Once you have given it a name, you can save the mind map. |
Step 2 - Once you click on save, you will see a window like this.
You can save the folder you want to select the folder you want to save it on. Here the mind map is named Food and is saved under home/ranjani/Documents |

|

|
| Step 3 - Now you see that the mind map is named Food and the root node is called Food. To insert other words that are connected, you can enter them as child nodes. To enter these nodes, you can use the "Enter" key or "Insert" key after selecting the node to which the child nodes must be added. Here, the child nodes have been added after selecting the node "Food". The child nodes added are called sibling nodes and the main node is called parent node. | Step 4 - You can keep adding child nodes to any node. For example you can add child nodes to the node called environment by selecting and using "Insert" key. You can also add a sibling node to environment by selecting the node environment and using "Enter" key. "Plants" and "Animals" are child nodes for "environment" and "agriculture" is sibling node for "environment. |
| Image Image Image Image (Step 5) | Image Image Image Image (Step 6) |
| Texttexttexttexttext Texttexttexttexttext Texttexttexttexttext Texttexttexttexttext Texttexttexttexttext Texttexttexttexttext Texttexttexttexttext Texttexttexttexttext Texttexttexttexttext Texttexttexttexttext | Texttexttexttexttext Texttexttexttexttext Texttexttexttexttext Texttexttexttexttext Texttexttexttexttext Texttexttexttexttext Texttexttexttexttext Texttexttexttexttext Texttexttexttexttext Texttexttexttexttext |
| Image Image Image Image (Step 7) | Image Image Image Image (Step 8) |
| Texttexttexttexttext Texttexttexttexttext Texttexttexttexttext Texttexttexttexttext Texttexttexttexttext Texttexttexttexttext Texttexttexttexttext Texttexttexttexttext Texttexttexttexttext Texttexttexttexttext | Texttexttexttexttext Texttexttexttexttext Texttexttexttexttext Texttexttexttexttext Texttexttexttexttext Texttexttexttexttext Texttexttexttexttext Texttexttexttexttext Texttexttexttexttext Texttexttexttexttext |
| Image Image Image Image (Step 9) | Image Image Image Image (Step 10) |
| Texttexttexttexttext Texttexttexttexttext Texttexttexttexttext Texttexttexttexttext Texttexttexttexttext Texttexttexttexttext Texttexttexttexttext Texttexttexttexttext Texttexttexttexttext Texttexttexttexttext | Texttexttexttexttext Texttexttexttexttext Texttexttexttexttext Texttexttexttexttext Texttexttexttexttext Texttexttexttexttext Texttexttexttexttext Texttexttexttexttext Texttexttexttexttext Texttexttexttexttext |
File formats for creation
Saving the file
Export and publishing files
Advanced features
Installation
| Method of installation | Steps |
|---|---|
| From Ubuntu software Centre | Steps |
| From Terminal | Steps |
| From the web | Steps |
| Web based registration | Steps |
The application on mobiles and tablets
Ideas for resource creation
References
How to use template
{{subst:Explore_an_application}} on the page you create for your tool. Page Name should be "Learn ToolName"