Learn wisemapping

Introduction
Basic information
| ICT Competency | WiseMapping is a free, web-based mind mapping tool that allows users to create, share, and collaborate on mind maps online. This guide will help you understand how to use WiseMapping effectively for your projects'. |
| Educational application and relevance | Making concept maps can support thinking, brainstorming, sharing information and documenting meetings and group processes.
Educators consider that concept mapping is a good approach for building skills in students for ideating and organizing ideas; they also find it a great asset for teaching. It is a great tool for students to help them organize their thought processes when writing. Teachers and students can use this application to collaboratively or individually create concept maps on an idea or explore a problem. |
| Version | Version - 6.0 |
| Configuration | This tool has no specific configuration requirements. It is a web-based application accessible through any modern web browser. WiseMapping is available for use on all major operating systems, including Windows, Mac, Linux, and Android (not stable). |
| Other similar applications | teammapper |
| The application on mobiles and tablets | MiMind & teammapper |
| Development and community help | wisemapping |
Overview of Features
WiseMapping helps you create and manage mind maps with ease. It allows for the organization of ideas into a structured format that can be visually represented. The tool is entirely web-based, facilitating easy access and collaboration from any location without the need for installation. It offers features like:
- Mind Map Creation
- Linking Resources
- Annotations and Notes
- Rich Icons
- Hierarchical Organization
- Collaboration
- Embedding and Exporting
- Customizability
Setting Up a WiseMapping Account
Setting Up a WiseMapping Account

Creating an Account
- Visit the WiseMapping Website
Sign Up
Click on the "Sign Up" button at the top right corner

signing up a wisemaping account

Choose a Sign-Up Method:
You will be provided with two options:
- Option 1: Fill in the required information (username, email, password) and complete the captcha.
- Option 2: Sign up with a Google account. This option will ask for permission to choose your email. Select your email ID and click Continue.

signing up a WiseMapping Account

Complete the Process:
Once you click "Continue," your account will be created within a few seconds
![]() Note: Option 2, signing up with a Google account, is much easier than Option 1, the traditional sign-up method.
Note: Option 2, signing up with a Google account, is much easier than Option 1, the traditional sign-up method.
Working with the application
To learn working with WiseMapping, we will start by creating a concept map. Upon signing up or logging in to WiseMapping, you will see an interface similar to the one shown above. WiseMapping provides a demo mind map named "Welcome, [Your First Name]!" based on your Gmail account. This mind map is given by WiseMapping to help you understand its functionalities and features.
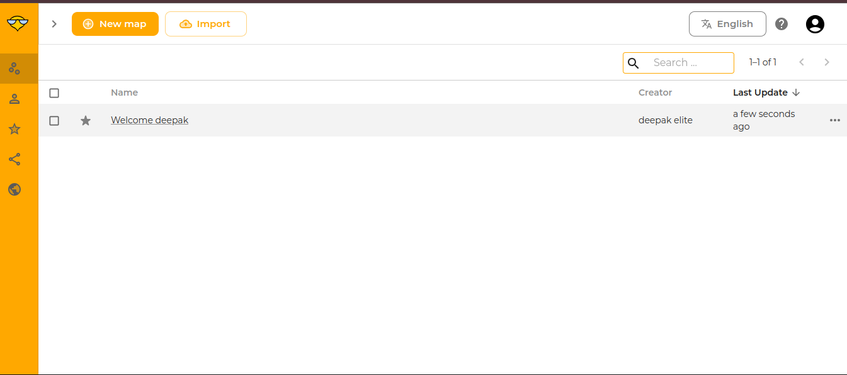
Main interface of wisemapping
Main window of wisemapping


Creating a map
To create a mind map, go to the top left corner of the interface window and click on "New map." Once you click on "New map," it will ask for the map name. I will input "Digital Story Telling" as my map name. You will also need to fill in the description of the map to help others understand what your mind map is about when you share it. Once you click "Create," it will create the mind map.
Creating a mindmap

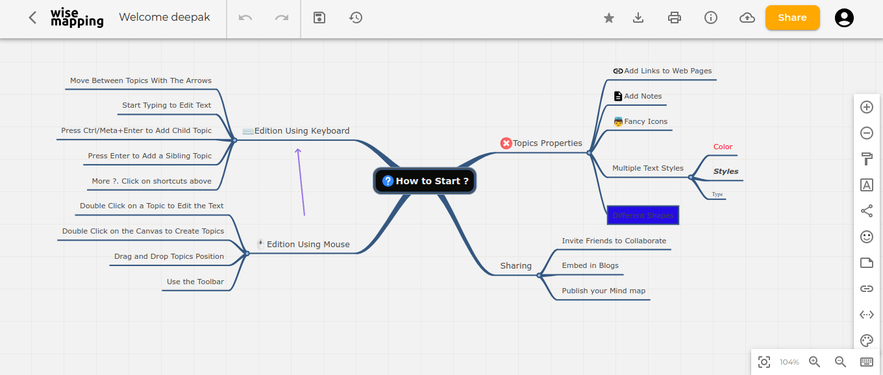
Inserting nodes
Here as an example, we have created a concept map called Learning Digital Story Telling. After the root node is created, additional ideas are added by adding more nodes, called child nodes. The concept map gets built by adding further child nodes, for topics and sub-topics. You can keep adding child nodes to any node.
- Use the ‘insert’ key to create a ‘child node’ this is a sub-concept of your current concept.
- Use the ‘enter’ key to create a ‘sibling’ this is a parallel concept to your current concept.
Thus you can create a concept map with knowing just two functions – add child node (insert) and add sibling node (enter). In this manner, a concept map can be used to classify and categorize information.
- Child and sibling nodes
Child Node
Sibling Node


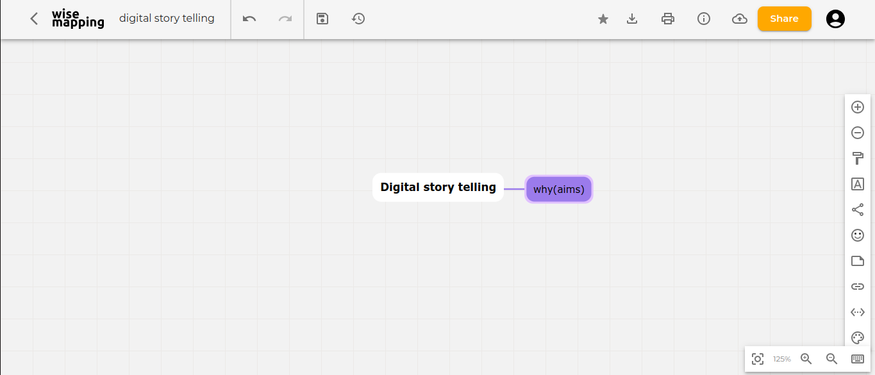
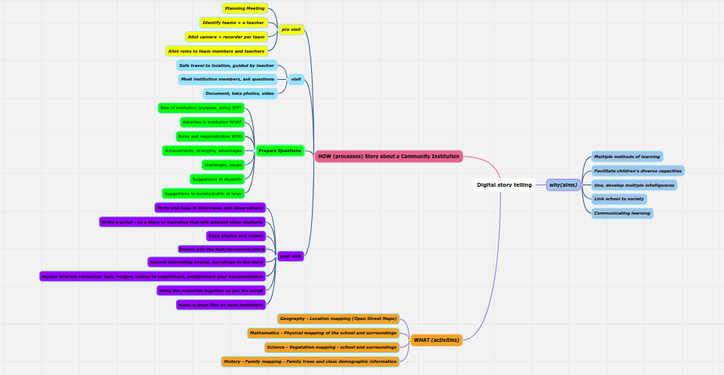
Our map has nodes for the ‘why’, ‘what’ and ‘how’ of DST, with sub-nodes.
- The first image shows the creation of a concept map with the first child node.
- The second image shows the completed concept map with child nodes and sibling nodes.
![]() Note: You can zoom in and zoom out the map as needed. To do this, click the zoom in and zoom out icons located in the bottom right corner of the interface.
Note: You can zoom in and zoom out the map as needed. To do this, click the zoom in and zoom out icons located in the bottom right corner of the interface.