Difference between revisions of "Learn Moodle"
| Line 45: | Line 45: | ||
File:Moodle - edit option 2.png|Uncheck "Use default section name" for custom title name | File:Moodle - edit option 2.png|Uncheck "Use default section name" for custom title name | ||
</gallery> | </gallery> | ||
| + | |||
| + | You can embed your local files like images or videos by drag and drop it on the summary section and adjust the size of the file. | ||
Un-check "Use default section name" to give your custom heading for your section. Start adding section summary under the summary box (you can copy paste from text documents also). Use the top basic formatting toolbar to format your text. | Un-check "Use default section name" to give your custom heading for your section. Start adding section summary under the summary box (you can copy paste from text documents also). Use the top basic formatting toolbar to format your text. | ||
| Line 77: | Line 79: | ||
** Time limit : If enabled, the time limit is stated on the initial quiz page and a countdown timer is displayed in the quiz navigation block. | ** Time limit : If enabled, the time limit is stated on the initial quiz page and a countdown timer is displayed in the quiz navigation block. | ||
<gallery mode="packed" heights="250px" caption="Configuring activities"> | <gallery mode="packed" heights="250px" caption="Configuring activities"> | ||
| − | + | File:Moodle adding activity auiz - 3.png|Ad basic information about the activities | |
| + | File:Moodle adding activity quiz - 4.png|Setting up display and submitting time | ||
| + | </gallery> | ||
Once the all the settings has been filled out as you needed and saved, the activity will appear at the bottom of the section. You can move any activity around in the course with the move buttons while in course edit mode. | Once the all the settings has been filled out as you needed and saved, the activity will appear at the bottom of the section. You can move any activity around in the course with the move buttons while in course edit mode. | ||
| Line 83: | Line 87: | ||
A resource is an item that a teacher can use to support learning, such as a file or link. To add a resources like files, folder, URLs and to create book turn on your editing by clicking on "turn edit on", choose the section in your course homepage where you'd like it to appear and click on the "Add an activity or resource" then select the type of resources you are going to add into section from the list. | A resource is an item that a teacher can use to support learning, such as a file or link. To add a resources like files, folder, URLs and to create book turn on your editing by clicking on "turn edit on", choose the section in your course homepage where you'd like it to appear and click on the "Add an activity or resource" then select the type of resources you are going to add into section from the list. | ||
| − | After you select any resource type from the list for example: file. In the next dialog box will be a settings form as below.<br> | + | After you select any resource type from the list for example: file. In the next dialog box will be a settings form as below.<br> |
| + | <gallery mode="packed" heights="250px" caption="Adding resources into the sections"> | ||
| + | File:Moodle - adding file resources.png|select a type of resources from the list | ||
| + | File:Moodle adding resources 1.png|Entering general details about resources | ||
| + | </gallery> | ||
* Name : Type the name for your resources link, it will form the link learners click on to view the file so it is helpful to give it a name that suggests its purpose. | * Name : Type the name for your resources link, it will form the link learners click on to view the file so it is helpful to give it a name that suggests its purpose. | ||
* Description : Add a description of your file here if required. | * Description : Add a description of your file here if required. | ||
* Display description on the course page : If this box is ticked, the description will appear on the course page just below the name of the file. | * Display description on the course page : If this box is ticked, the description will appear on the course page just below the name of the file. | ||
* Select files : click on "Add" and use the File picker to upload your file or drag and drop your file onto the arrow if you are using an appropriate browser. Here you can also create folder and add multiple resource files.<br><gallery mode="packed" heights="250px" caption="Adding resources into the sections"> | * Select files : click on "Add" and use the File picker to upload your file or drag and drop your file onto the arrow if you are using an appropriate browser. Here you can also create folder and add multiple resource files.<br><gallery mode="packed" heights="250px" caption="Adding resources into the sections"> | ||
| − | |||
File:Moodle adding resources 2.png|Upload files under the select file section | File:Moodle adding resources 2.png|Upload files under the select file section | ||
| + | File:Moodle upload your resource - files.png|Browse your local file location | ||
</gallery> | </gallery> | ||
| + | |||
Finally, click on the save and display to display your resources under the specified section. | Finally, click on the save and display to display your resources under the specified section. | ||
[[Category:Explore an application]] | [[Category:Explore an application]] | ||
Revision as of 08:01, 8 March 2018
Introduction
Basic information
| ICT Competency | Moodle is a learning platform designed to provide educators, administrators and learners with a single robust, secure and integrated system to create personalised learning environments. |
| Educational application and relevance | It is an collaborative learning environments that empower both teaching and learning. |
| Version | currently using 3.4 |
| Other similar applications | TalentLMS, |
| The application on mobiles and tablets | It is a web based software installing in the web server. |
| Development and community help | Moodle |
Working with Moodle
A course is a space on a Moodle site where teachers can add learning materials for their students. A teacher may have more than one course and a course may include more than one teacher and more than one group of learners
Logging into Moodle course page
Click on your Moodle course link and click on the login to view or edit the course content. click here to use our Moodle.
- Moodle - Login to the course
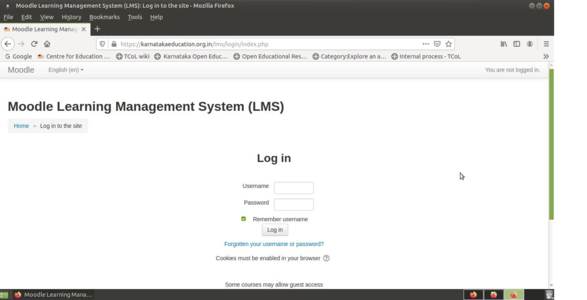
Moodle login screen
Course home page


Once you login, you can see the course content and on the top right corner if you are seeing your login name, then your looged in with your user name and password.
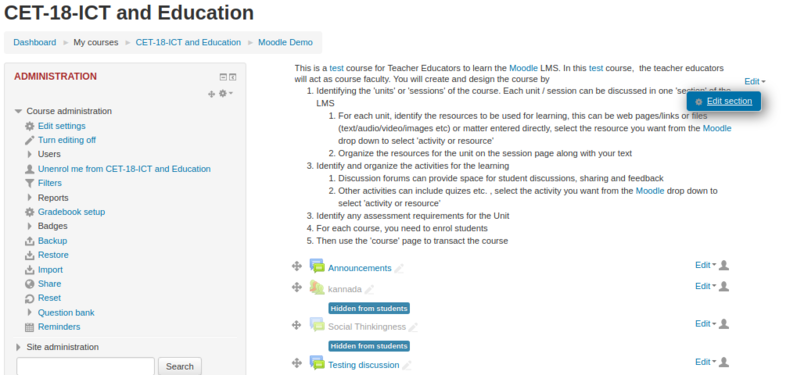
Editing sections
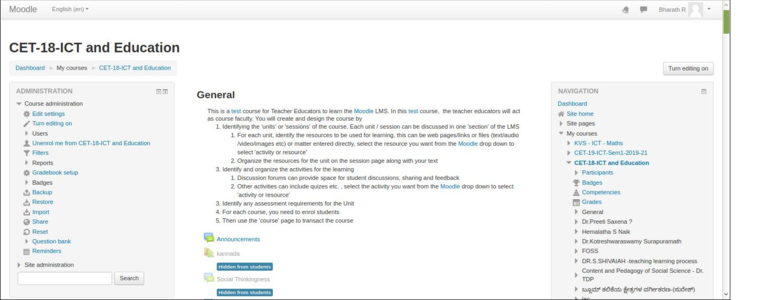
Once you have a new blank course, you can start work on it by turning on the editing, either with the button top right.
With the editing turned on, each item on your course homepage and each section/block will have edit options next to it which all perform different functions such as edit/move/copy/delete/hide. Note: your theme may have different icons.
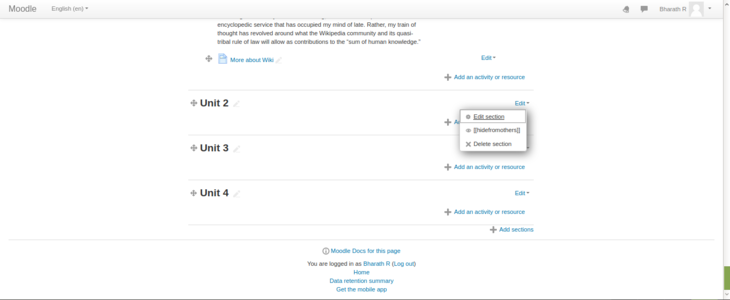
Once you click on edit - edit topics, it will take us to edit page (see the below screenshots).
- Moodle - editing course content sections
Click edit topics option to start editing section
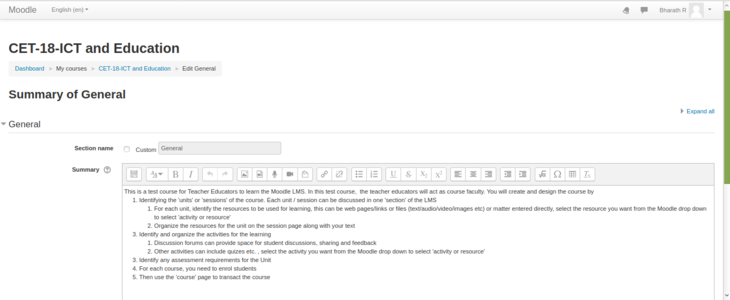
Uncheck "Use default section name" for custom title name


You can embed your local files like images or videos by drag and drop it on the summary section and adjust the size of the file.
Un-check "Use default section name" to give your custom heading for your section. Start adding section summary under the summary box (you can copy paste from text documents also). Use the top basic formatting toolbar to format your text.
Under the restrict section, you can restrict the page to access as in the below screenshot.
- Moodle - editing course content sections
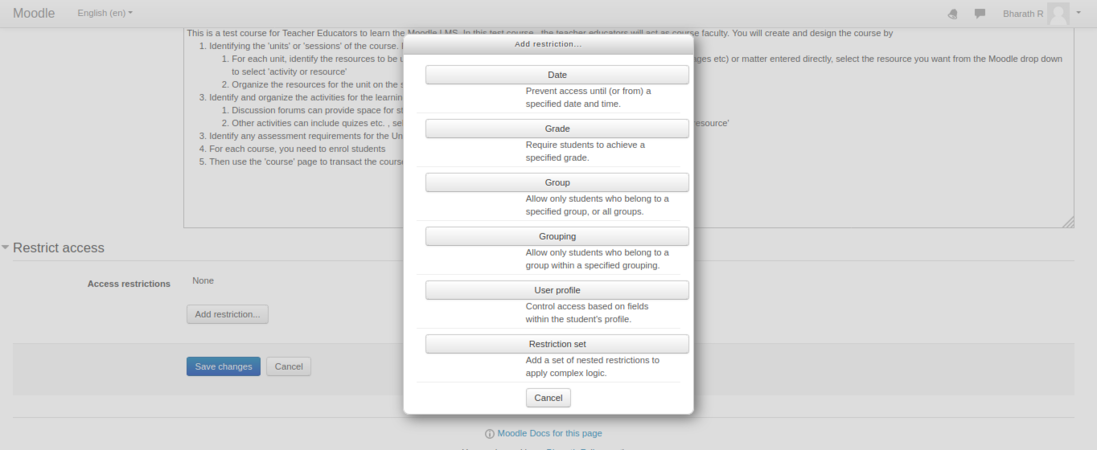
Set restrictions to access the section
To add or remove sections


Once you done all this click on "save changes" button to save your content under that section.
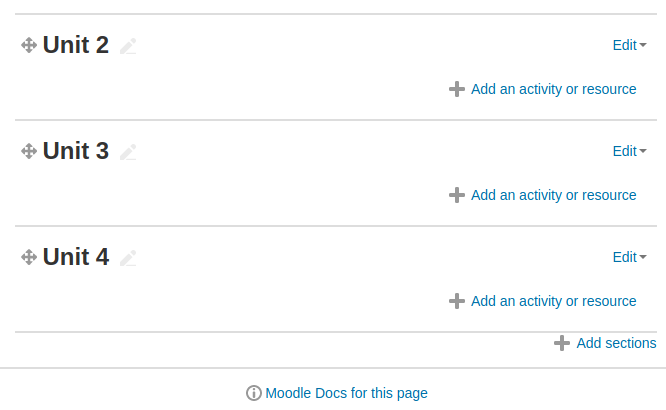
Scroll to the bottom of the curse main page and, below the last section, look for the small + and - icons (at right). Click the plus (+)/minus(-) to add/remove an sections.
Adding Activities
As well as adding interactive exercises for your students, you can provide them with activities. Moodle supports a range of different activities types that allow you to insert to any section.
To add a activities like quiz, discussion forum, attendances, forms and surveys turn on your editing by clicking on "turn edit on", choose the section in your course homepage where you'd like it to appear and click on the "Add an activity or resource" then select the type of activities you are going to add into section from the list (for example: Quiz).
- Adding activities
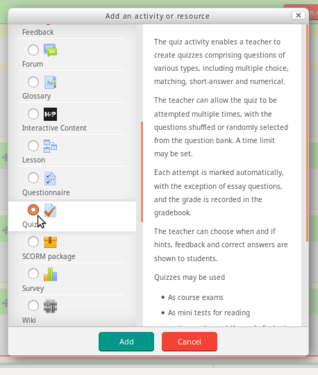
Select type of activity
Configure your activity


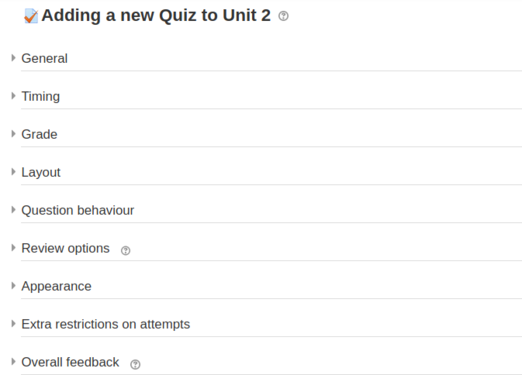
After select any activity which you are going to add it to the section (for example: quiz) then click on "add". In the next dialog box will be a settings form for the activity like below.
- General
- Name : Type the name for your resources link, it will form the link learners click on to view the file so it is helpful to give it a name that suggests its purpose.
- Description : Add a description of your file here if required.
- Display description on the course page : If this box is ticked, the description will appear on the course page just below the name of the file.
- Timing
- Open the quiz and Close the quiz : Students can only start their attempt(s) after the open time and they must complete their attempts before the close time.
- Time limit : If enabled, the time limit is stated on the initial quiz page and a countdown timer is displayed in the quiz navigation block.
- Configuring activities
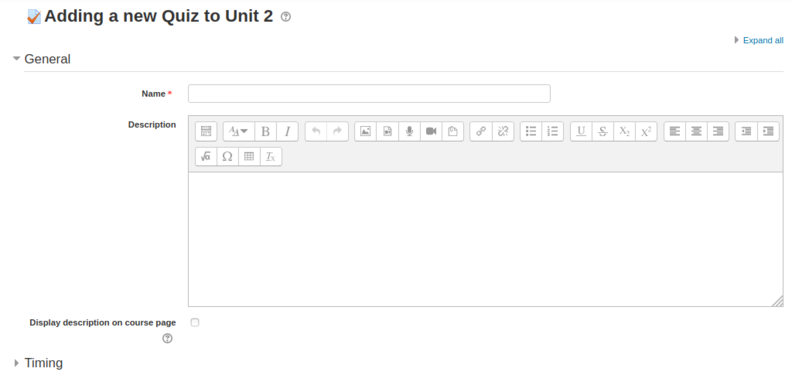
Ad basic information about the activities
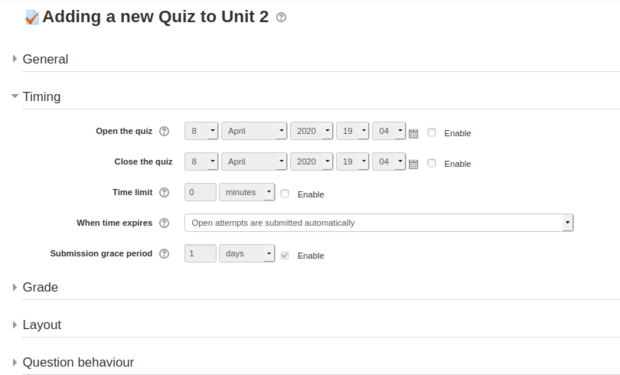
Setting up display and submitting time


Once the all the settings has been filled out as you needed and saved, the activity will appear at the bottom of the section. You can move any activity around in the course with the move buttons while in course edit mode.
Adding Resources
A resource is an item that a teacher can use to support learning, such as a file or link. To add a resources like files, folder, URLs and to create book turn on your editing by clicking on "turn edit on", choose the section in your course homepage where you'd like it to appear and click on the "Add an activity or resource" then select the type of resources you are going to add into section from the list.
After you select any resource type from the list for example: file. In the next dialog box will be a settings form as below.
- Adding resources into the sections
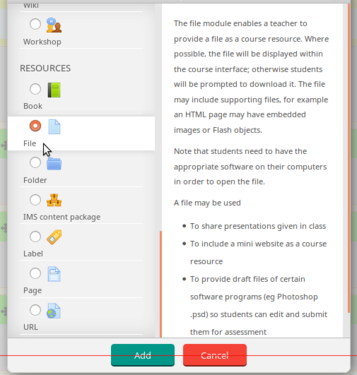
select a type of resources from the list
Entering general details about resources


- Name : Type the name for your resources link, it will form the link learners click on to view the file so it is helpful to give it a name that suggests its purpose.
- Description : Add a description of your file here if required.
- Display description on the course page : If this box is ticked, the description will appear on the course page just below the name of the file.
- Select files : click on "Add" and use the File picker to upload your file or drag and drop your file onto the arrow if you are using an appropriate browser. Here you can also create folder and add multiple resource files.
- Adding resources into the sections
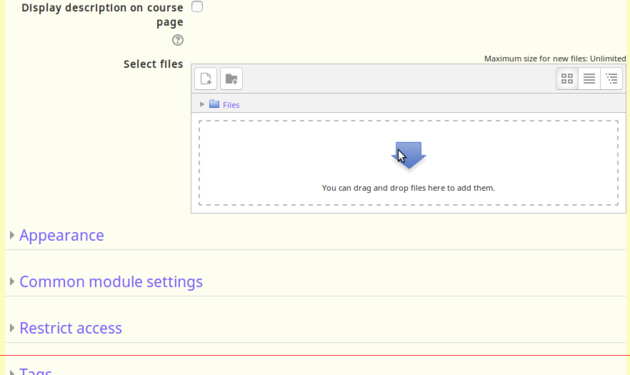
Upload files under the select file section
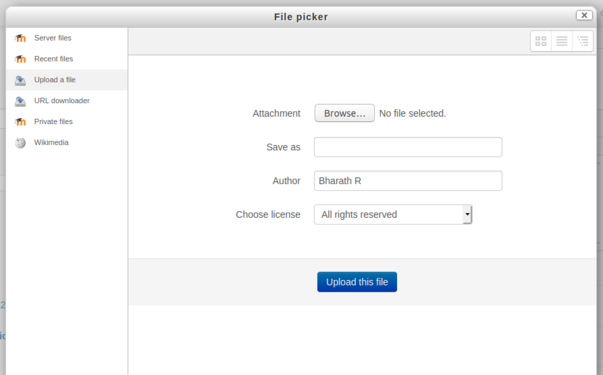
Browse your local file location


Finally, click on the save and display to display your resources under the specified section.