Difference between revisions of "Learn LibreOffice Impress"
| Line 41: | Line 41: | ||
{| class="wikitable" | {| class="wikitable" | ||
|- | |- | ||
| − | |style="width: 50%;|{{ext-img|450px| | + | |style="width: 50%;|{{ext-img|450px|[[File:LO_Impress_1_Main_page.png]]}} |
| − | |style="width: 50%;|{{ext-img|450px| | + | |style="width: 50%;|{{ext-img|450px|[[File:LO_Impress_2_Font_setting.png]]}} |
|- | |- | ||
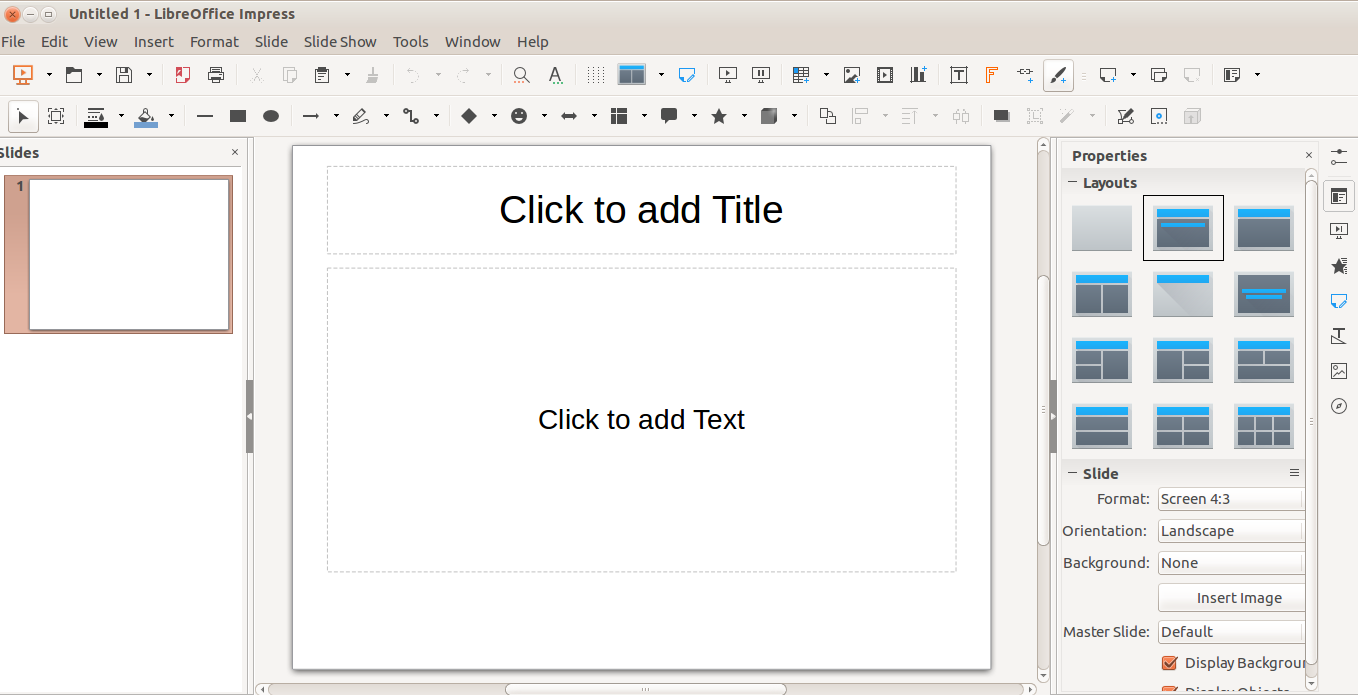
|style="width: 50%;|Step 1- #To open the application : Application – office- and select and click libre office impress. Now you can see the display like left side picture . | |style="width: 50%;|Step 1- #To open the application : Application – office- and select and click libre office impress. Now you can see the display like left side picture . | ||
| Line 48: | Line 48: | ||
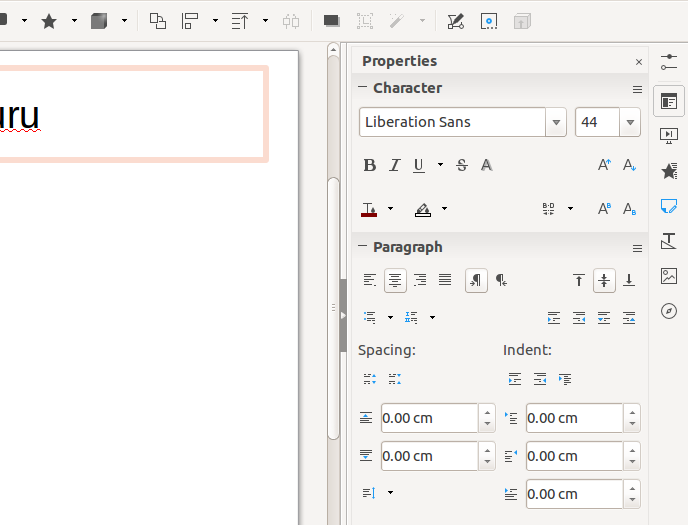
|style="width: 50%;|Step 2- Font setting -in the properties we can select the character like font style and font size which we want | |style="width: 50%;|Step 2- Font setting -in the properties we can select the character like font style and font size which we want | ||
|- | |- | ||
| − | |style="width: 50%;|{{ext-img|450px| | + | |style="width: 50%;|{{ext-img|450px|[[File:LO_Impress_3_Layout_Setting.png]]}} |
| − | |style="width: 50%;|{{ext-img|450px| | + | |style="width: 50%;|{{ext-img|450px|[[File:LO_Impress_4_Slide_transaction.png]]}} |
|- | |- | ||
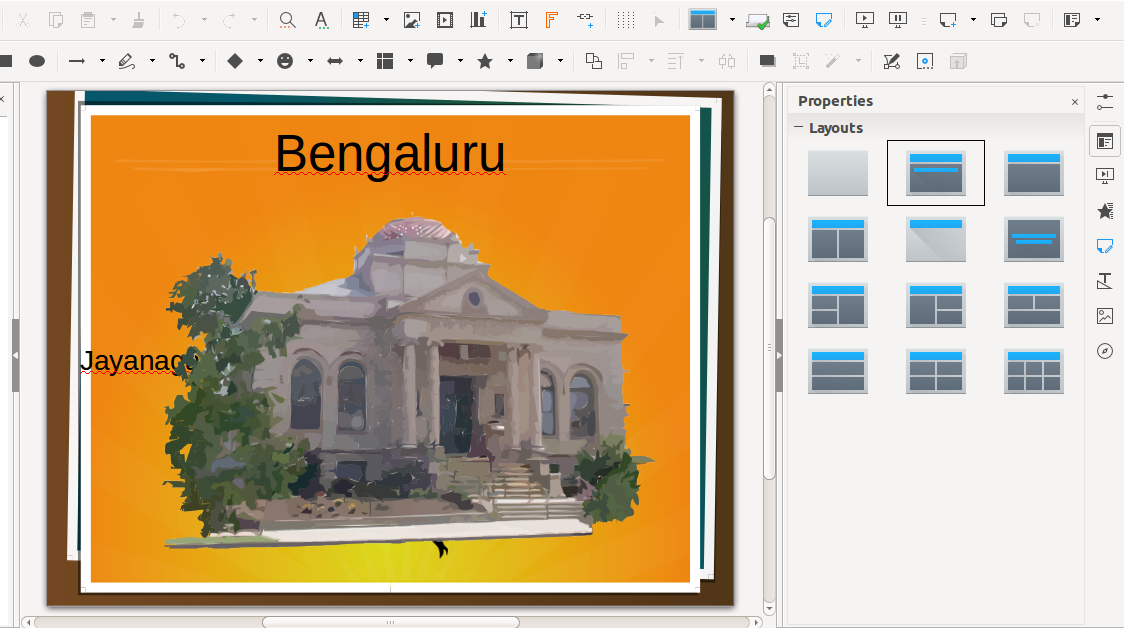
|style="width: 50%;|Step 3-To add background images-Go to the insert menu in menu bar and click on images and select the image which we want to display to background | |style="width: 50%;|Step 3-To add background images-Go to the insert menu in menu bar and click on images and select the image which we want to display to background | ||
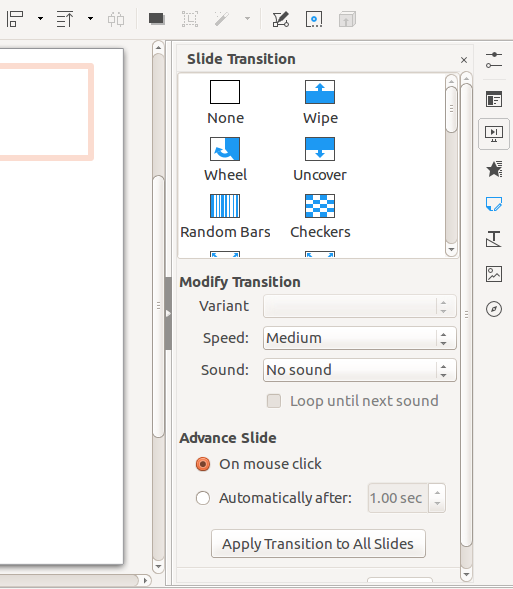
|style="width: 50%;|Step 4-Slide transaction- from the right side corner we can select the slide transaction like flying ,crowling text from right to left anf left to right which type we want to in presentation time | |style="width: 50%;|Step 4-Slide transaction- from the right side corner we can select the slide transaction like flying ,crowling text from right to left anf left to right which type we want to in presentation time | ||
|- | |- | ||
| − | |style="width: 50%;|{{ext-img|450px| | + | |style="width: 50%;|{{ext-img|450px|[[File:LO_Impress_5_Custom_animation.png]]}} |
| − | |style="width: 50%;|{{ext-img|450px| | + | |style="width: 50%;|{{ext-img|450px|[[FileLO_Impress_6_Master_page_setting.png]]}} |
|- | |- | ||
|style="width: 50%;|Step 5-Custom animation- the letters can appear like flying rolling Etc. and we can select the time to appear Entrance; | |style="width: 50%;|Step 5-Custom animation- the letters can appear like flying rolling Etc. and we can select the time to appear Entrance; | ||
| Line 69: | Line 69: | ||
|- | |- | ||
|- | |- | ||
| − | |style="width: 50%;|{{ext-img|450px| | + | |style="width: 50%;|{{ext-img|450px|[[File:LO_Impress_7_Gallery.png]]}} |
| − | |style="width: 50%;|{{ext-img|450px| | + | |style="width: 50%;|{{ext-img|450px|[[File:LO_Impress_8_Navigation.png]]}} |
|- | |- | ||
|style="width: 50%;|Step 7- Gallery- Graphics in the Gallery are grouped by themes,such as Bullets, Rulers, and 3D Effects.The left pane of the gallery window lists the available themes. Click on a theme to see its images displayed in the right pane of the Gallery dialog. | |style="width: 50%;|Step 7- Gallery- Graphics in the Gallery are grouped by themes,such as Bullets, Rulers, and 3D Effects.The left pane of the gallery window lists the available themes. Click on a theme to see its images displayed in the right pane of the Gallery dialog. | ||
Revision as of 17:02, 18 October 2016
Introduction
LibreOffice is a powerful office suite; Its clean interface and its powerful tools let you unleash your creativity and grow your productivity. LibreOffice embeds several applications that make it the most powerful Free & Open Source Office suite on the market.
ICT Competency
Libre office impress is a tool for Generic Resource Creation
Educational application and relevance
libre office impress is an application which allows the presentation (slide show) program included in LibreOffice. You can create slides that contain many different elements, including text, bulleted and numbered lists, tables, charts, and a wide range of graphic objects such as clipart, drawings and photographs. Impress also includes a spelling checker, a thesaurus, text styles, and background styles.
Version
Version: 5.2.2.2 Build ID: 1:5.2.2-0ubuntu1~trusty0 CPU Threads: 4; OS Version: Linux 4.4; UI Render: default; Locale: en-US (en_US.UTF-8); Calc: group Using KDE Development Platform 4.13.3 This application is free and licensed under the GNU Public License.
Configuration
This tool has no specific configuration requirements.
Overview of Features
LibreOffice Impress lets create professional slide shows that can include charts, drawing objects, text, multimedia and a variety of other items.we can even import and modify Microsoft PowerPoint presentations. For on-screen slide shows, animation, slide transitions and multimedia are a few of the techniques you can use to make presentation more exciting. Libre office impress also have some more features like :
- Creating Vector Graphics
- Creating Slides
- Creating Presentations
- Publishing Presentations
- Giving Presentations
Other similar applications
Prezi-Prezi allows anyone who can sketch an idea on a napkin to create and perform stunning non-linear presentations with relations, zooming into details, and adjusting to the time left without the need to skip slides.
'MS Office power point - Microsoft PowerPoint, part of the Microsoft Office Suite, enables users to create high-impact, dynamic presentations, while integrating workflow and ways to easily share information. From the Microsoft Office Fluent user interface to the new graphics and formatting capabilities, PowerPoint puts the control in your hands to create great-looking presentations.
Google Drive - Google Slides, part of Google Drive , is an online presentations app that allows you to show off your work in a visual way. Sozi- Sozi is an open-source browser-based presentation software using SVG and JavaScript to play animated presentations.
Development and community help
This tool is developed by OpenOffice.org and supports the continuous development of the application. More detail please visit this site OpenOffice.org
Working with the application
Functionalities
|
|
|
| Step 1- #To open the application : Application – office- and select and click libre office impress. Now you can see the display like left side picture .
Slide setting -from the right side corner from the layout we can select the slide layout which we want |
Step 2- Font setting -in the properties we can select the character like font style and font size which we want |
|
|
|
| Step 3-To add background images-Go to the insert menu in menu bar and click on images and select the image which we want to display to background | Step 4-Slide transaction- from the right side corner we can select the slide transaction like flying ,crowling text from right to left anf left to right which type we want to in presentation time |
|
|
|
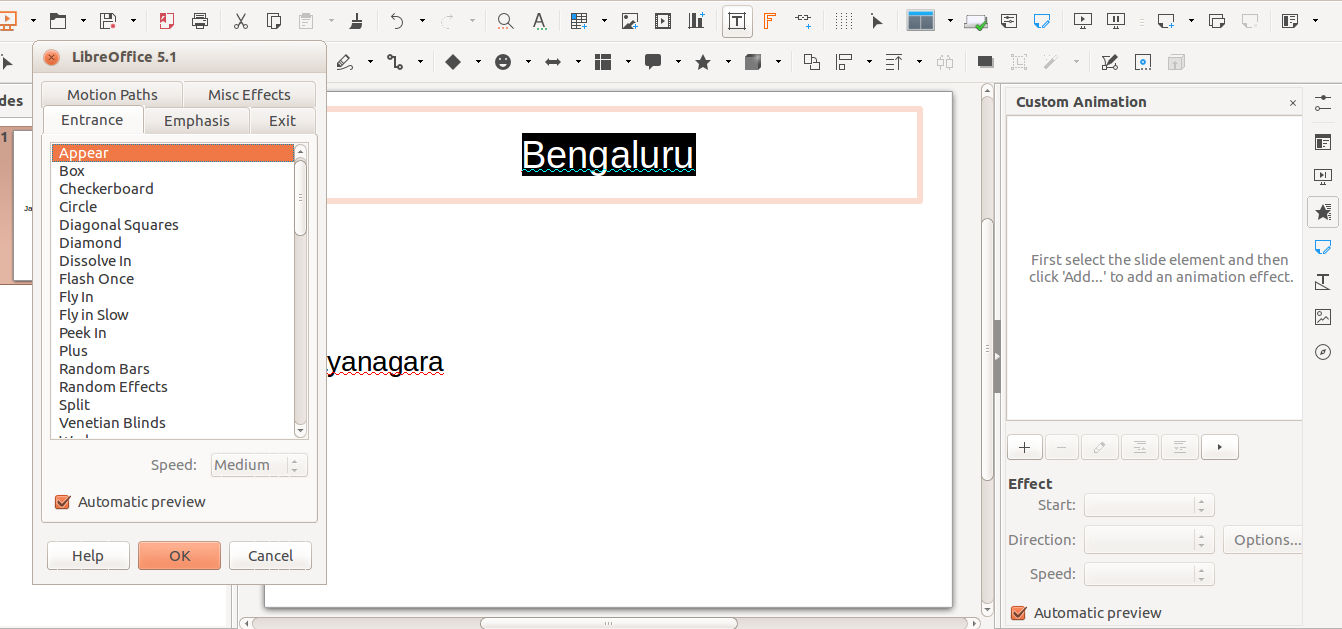
| Step 5-Custom animation- the letters can appear like flying rolling Etc. and we can select the time to appear Entrance;
Select an entrance effect from the effect categories. Emphasis;Select an emphasis effect from the effect categories. Exit; Select an exiting effect from the effect categories. Motion Paths; Select a motion path from the motion path categories. Speed; Specifies the speed or duration of the selected animation effect. Automatic preview;Select to preview new or edited effects on the slide. |
Step 6-Mater slide- Impress comes with a collection of slide masters. These slide masters are shown in the Master Pages section of the Tasks pane. This section has three subsections:
Used in This Presentation, Recently Used,and Available for Use.Click the expand marker (usually a downward-pointing triangle or+sign) next to the name of a subsection to expand it and show thumbnails of the slides,or click the collapse marker (usually an upward-pointing triangle or a sign) to collapse the subsection to hide the thumbnails |
|
|
|
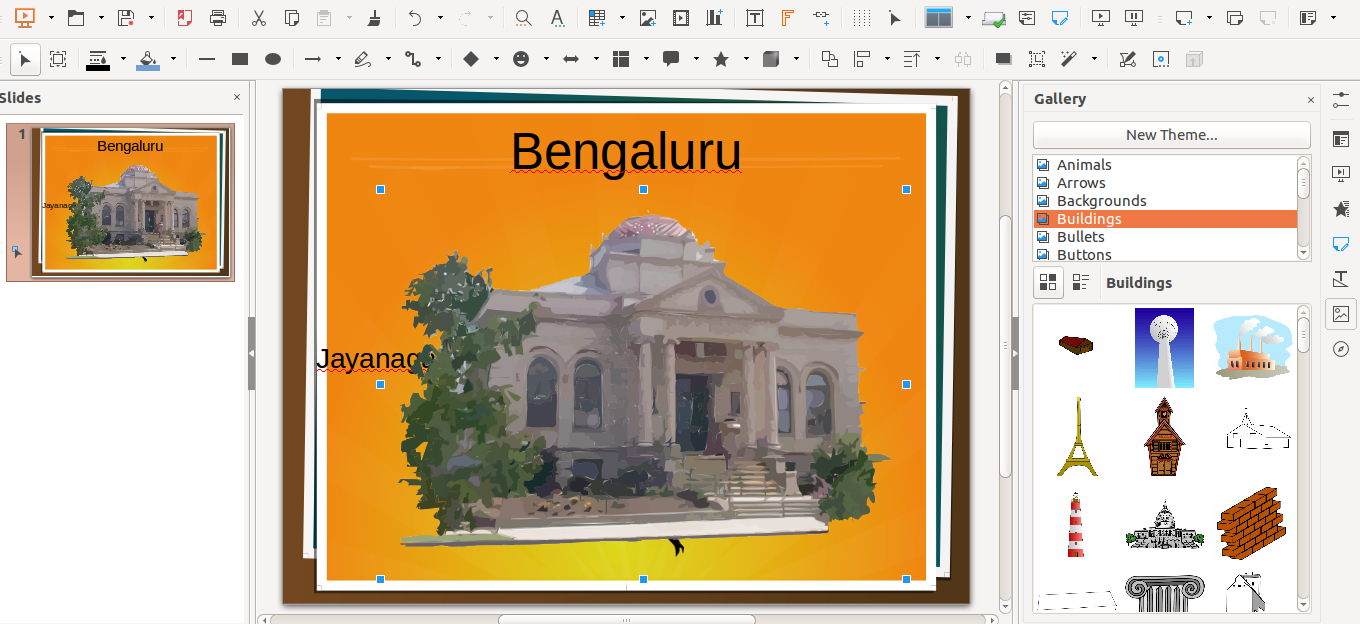
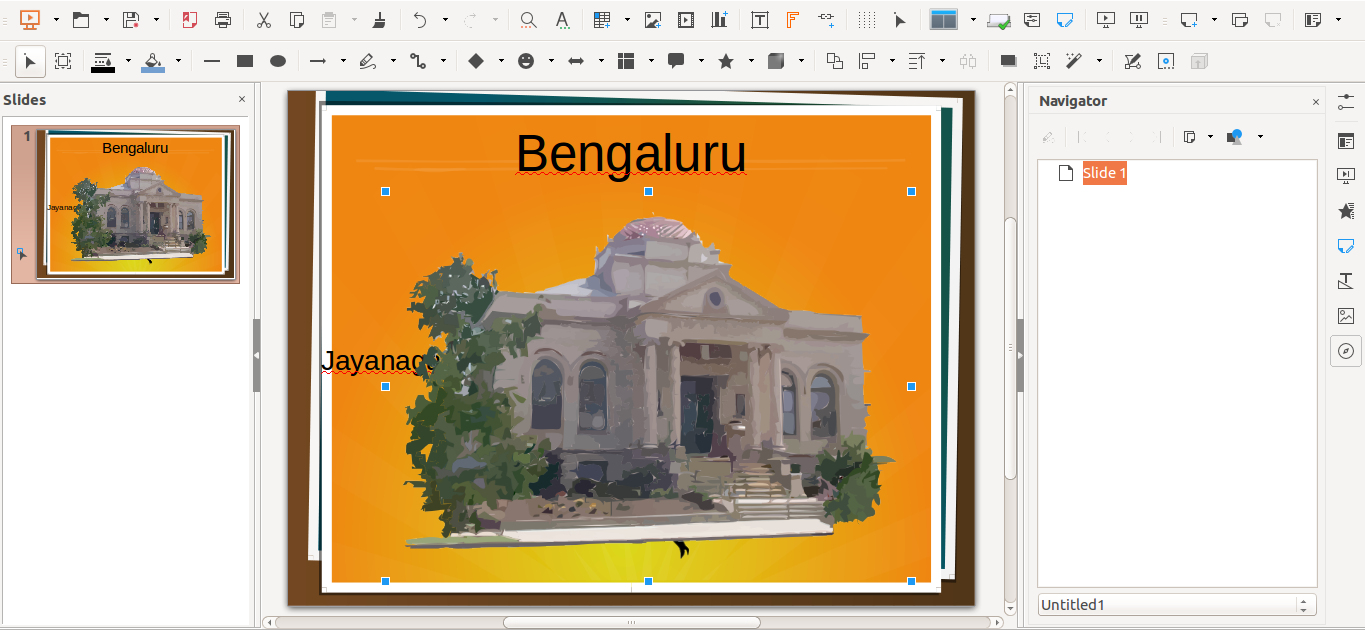
| Step 7- Gallery- Graphics in the Gallery are grouped by themes,such as Bullets, Rulers, and 3D Effects.The left pane of the gallery window lists the available themes. Click on a theme to see its images displayed in the right pane of the Gallery dialog. | Step 8- Navigation-
Escape Key;Moves the focus to the first slide. Arrow key;Moves the focus to the next slide. Spacebar;Makes the slide with focus the current slide |
File formats for creation
An .Odp file we will get from this tool.
Saving the file
After completing edition, need to save the file. Under Menu bar, go to FILE and then click on Save. Under selected Folders, pick a path and file folder, and then name the file and click SAVE.
Export and publishing files
Not applicable
Advanced features
- Hide a Slide: There are certain situations where you just need to show a few slides of a bigger presentation, or omit certain slides to certain audiences. In these cases, its possible to hide certain slides from showing in the ‘slide show’ mode.
- Save the presentation as PDF file
- Slide Transition / Sound Effects
- Change Master Layout Background Colours/ Patterns
- Impressive Bullets/ Numbering
Installation
| Method of installation | Steps |
|---|---|
| From Ubuntu software Centre | Go to Ubuntu Software System and search and download. This is part of the custom distribution 16.04, Kalpavriksha. |
| From Terminal | sudo apt-get install libreoffice |
| From the web | https://www.libreoffice.org/ and https://wiki.ubuntu.com/LibreOffice |
The application on mobiles and tablets
In android mobile go to Playstore and search libreoffice impress, you will get libreoffice impress remote
Ideas for resource creation
It is best to do this after you have developed an outline, because the outline will determine some of the requirements for the appearance of the slides. For example:
- What color combinations (background and text) will look good and also be easy for your audience to read?
- Would a picture help your audience understand the contents better?
- Do you want particular text and a picture to appear on all the slides? For example a company name and logo.
- Would the audience benefit from having the slides numbered so that they can quickly refer to one of them?
- Do you want a background graphic or gradient? If so, you need to pick something that does not interfere or clash with content such as the colors used in charts.
- Will you need one slide master or more than one? Will one slide design suit all of the content? You can change the appearance of slides as you develop the presentation, but planning ahead will save you time in the long run.

