Difference between revisions of "Learn GIMP"
Jump to navigation
Jump to search
| Line 6: | Line 6: | ||
|}</div> | |}</div> | ||
| − | + | ==Introduction== | |
==== Basic information ==== | ==== Basic information ==== | ||
{| class="wikitable" | {| class="wikitable" | ||
|ICT Competency | |ICT Competency | ||
| − | | | + | |It is a tool for generic resource creation, used to edit images. |
|- | |- | ||
|Educational application and relevance | |Educational application and relevance | ||
| − | | | + | |GIMP can be used for multiple kind of image editing and it's a FOSS tool so there will no payment or subscription needed it can be used in education sector to teach children about image editing. |
| − | |||
|- | |- | ||
|Version | |Version | ||
| − | |Version - | + | |Version - 2.10.34 |
|- | |- | ||
|Configuration | |Configuration | ||
| − | | | + | |Its GIMP is part of the Ubuntu distribution. This can be opened from Applications → graphics → GIMP. |
| − | |||
|- | |- | ||
|Other similar applications | |Other similar applications | ||
| − | |[ | + | |[https://inkscape.org/ Inkscape] |
|- | |- | ||
|The application on mobiles and tablets | |The application on mobiles and tablets | ||
| − | |[https://play.google.com/store/apps/details?id= | + | |[https://play.google.com/store/apps/details?id=org.dandroidmobile.xgimp&hl=en_IN&gl=US xgimp] |
|- | |- | ||
|Development and community help | |Development and community help | ||
| − | |[https://www. | + | |[https://www.gimp.org/ The GIMP Development Team] |
|} | |} | ||
| − | + | ==Overview of Features== | |
| − | |||
| − | |||
| − | |||
| − | |||
| − | |||
| − | + | *Tools used to perform image editing can be accessed via the toolbox, They include filters and brushes, as well as transformation, selection, layer and masking tools. | |
| − | + | *GIMP selection tools include a rectangular and circular selection tool, free select tool. | |
| − | + | *There are many tools that can be used for editing images in GIMP. The more common tools include a paint brush, pencil, airbrush, eraser and ink tools used to create new or blended pixels | |
| − | |||
| − | |||
| − | |||
| − | |||
| − | |||
| − | |||
== Installation == | == Installation == | ||
| Line 73: | Line 60: | ||
# Download the installation file from [https://download.gimp.org/gimp/v2.10/macos/gimp-2.10.34-x86_64.dmg this link]. | # Download the installation file from [https://download.gimp.org/gimp/v2.10/macos/gimp-2.10.34-x86_64.dmg this link]. | ||
# When the download is complete, find the downloaded .dmg file and double click on it and follow the above steps mentioned for windows. | # When the download is complete, find the downloaded .dmg file and double click on it and follow the above steps mentioned for windows. | ||
| − | |||
| − | |||
| − | |||
| − | |||
| − | |||
| − | |||
=Working with the application= | =Working with the application= | ||
| Line 129: | Line 110: | ||
==Advanced features== | ==Advanced features== | ||
| − | #Customizable Interface- Each task requires a different environment and GIMP allows you to customize the view and behavior the way you like it. Starting from the widget theme, allowing you to change colors, widget | + | #Customizable Interface- Each task requires a different environment and GIMP allows you to customize the view and behavior the way you like it. Starting from the widget theme, allowing you to change colors, widget spacing and icon sizes to custom tool sets in the toolbox. |
#Photo Enhancement- Numerous digital photo imperfections can be easily compensated for using GIMP. | #Photo Enhancement- Numerous digital photo imperfections can be easily compensated for using GIMP. | ||
| − | |||
| − | |||
| − | |||
| − | |||
| − | |||
| − | |||
| − | |||
| − | |||
| − | |||
| − | |||
| − | |||
| − | |||
| − | |||
| − | |||
| − | |||
| − | |||
| − | |||
=Ideas for resource creation= | =Ideas for resource creation= | ||
Revision as of 15:34, 21 March 2023
Introduction
Basic information
| ICT Competency | It is a tool for generic resource creation, used to edit images. |
| Educational application and relevance | GIMP can be used for multiple kind of image editing and it's a FOSS tool so there will no payment or subscription needed it can be used in education sector to teach children about image editing. |
| Version | Version - 2.10.34 |
| Configuration | Its GIMP is part of the Ubuntu distribution. This can be opened from Applications → graphics → GIMP. |
| Other similar applications | Inkscape |
| The application on mobiles and tablets | xgimp |
| Development and community help | The GIMP Development Team |
Overview of Features
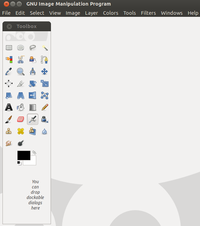
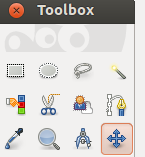
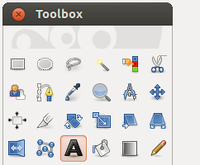
- Tools used to perform image editing can be accessed via the toolbox, They include filters and brushes, as well as transformation, selection, layer and masking tools.
- GIMP selection tools include a rectangular and circular selection tool, free select tool.
- There are many tools that can be used for editing images in GIMP. The more common tools include a paint brush, pencil, airbrush, eraser and ink tools used to create new or blended pixels
Installation
For Ubuntu OS
- The application is part of the Ubuntu custom distribution.
- In case you do not find it on your computer, you can install by typing GIMP on top search bar in Software Centre(App Grid).
- If you would like to install through the terminal follow these steps below:
- Open terminal by clicking Applications->System Tools->Terminal or through Keyboard shortcut
Ctrl+Alt+T - In the terminal window, type below command and press enter to start the installation by providing your machine password:
sudo apt-get install gimp
- Open terminal by clicking Applications->System Tools->Terminal or through Keyboard shortcut
For Windows OS
To install and use GIMP on your Windows computer, you need to install GIMP in your Windows computer.
- Download the gimp-2.YtZWkPvy.10.34-setup.exe from this link. You can save this executable (.exe for windows/.dmg for MAC) files to your desktop or any other location in your computer.
- Once you download the file, double-click on "gimp-2.YtZWkPvy.10.34-setup.exe/dmg" file to begin the installation.
- Click "Yes" if it ask your permission to allow this program make change to the computer, Keep clicking on "Next" button to continue and complete the installation.
For MAC OS
- Download the installation file from this link.
- When the download is complete, find the downloaded .dmg file and double click on it and follow the above steps mentioned for windows.
Working with the application
Functionalities
File formats for creation
Saving the file
Like in most applications, a file can be saved using the FILE – SAVE AS command, or by the shortcut key CTRL+S. Always give a meaningful file name, reading which you should get an idea of the file contents. Its saving in .xcf
Export and publishing files
After your edits, final output file can be export from here by using the FILE – Export AS command. Always give a meaningful file name, reading which you should get an idea of the file contents. You can export the image to various formats, including .PNG .JPEG .JPG
Advanced features
- Customizable Interface- Each task requires a different environment and GIMP allows you to customize the view and behavior the way you like it. Starting from the widget theme, allowing you to change colors, widget spacing and icon sizes to custom tool sets in the toolbox.
- Photo Enhancement- Numerous digital photo imperfections can be easily compensated for using GIMP.
Ideas for resource creation
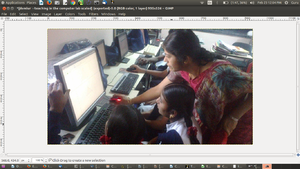
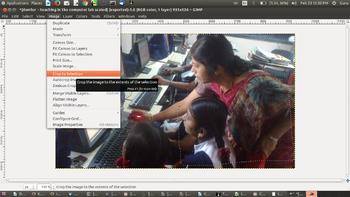
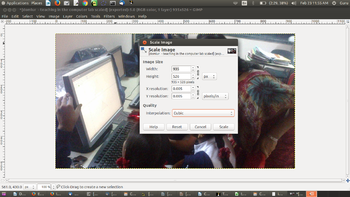
Modify pictures hight, width, size, etc and creating resources.
References
- GIMP Official Website
- https://en.wikipedia.org/wiki/GIMP GIMP Wikipedia

