Difference between revisions of "ICT student textbook/Tell a story"
Jump to navigation
Jump to search
| Line 1: | Line 1: | ||
| − | {{Navigate|Prev=Photo and image essays|Curr=Tell a story|Next= | + | {{Navigate|Prev=Photo and image essays|Curr=Tell a story|Next=Communication with graphics level 1 learning check list}} |
'''Telling a story from pictures''' | '''Telling a story from pictures''' | ||
<div class="noprint" style="float:right; border:1px solid blue;width:300px;background-color:#F5F5F5;padding:2px;"> | <div class="noprint" style="float:right; border:1px solid blue;width:300px;background-color:#F5F5F5;padding:2px;"> | ||
{| cellspacing="0" | {| cellspacing="0" | ||
| [[File:Book.jpg|none|80px|Book image]] | | [[File:Book.jpg|none|80px|Book image]] | ||
| − | | style="padding-left:2px;" | Go to <br /> [[ICT teacher handbook/Communicating_with_graphics|Teacher | + | | style="padding-left:2px;" | Go to <br /> [[ICT teacher handbook/Communicating_with_graphics|ICT Teacher Handbook]] |
|}</div> | |}</div> | ||
| Line 17: | Line 17: | ||
#Familiarity with text editor - basic text entry, inserting images into a document | #Familiarity with text editor - basic text entry, inserting images into a document | ||
#Local language typing | #Local language typing | ||
| − | === | + | ===What resources do you need=== |
#Computer lab with projection equipment | #Computer lab with projection equipment | ||
| − | #Camera | + | #Camera, mobile, connectors |
| − | # | + | #Images, photos |
#Handout for [[Learn Ubuntu|Ubuntu]] | #Handout for [[Learn Ubuntu|Ubuntu]] | ||
#Handout for [[Learn LibreOffice Writer|LibreOffice Writer]] | #Handout for [[Learn LibreOffice Writer|LibreOffice Writer]] | ||
| − | === | + | #Handout for [[Learn Freeplane|Freeplane]] |
| + | #Handout for [[Learn Tux Paint|Tux Paint]] | ||
| + | #Handout for [[Learn Image Viewer|Image Viewer]] | ||
| + | |||
| + | ===What digital skills will you learn=== | ||
#Local language text typing | #Local language text typing | ||
#Combining images and text | #Combining images and text | ||
| Line 30: | Line 34: | ||
===Description of activity with detailed steps=== | ===Description of activity with detailed steps=== | ||
====Teacher led activity==== | ====Teacher led activity==== | ||
| − | ====='' | + | =====''Pictures to describe a place''===== |
Your teacher will demonstrate how to tell a story with a set of images. In your lab computers, you will find the following images of a railway station (Warangal railway station). You must work on this in groups and make your stories. Compare your stories at the end of the class. | Your teacher will demonstrate how to tell a story with a set of images. In your lab computers, you will find the following images of a railway station (Warangal railway station). You must work on this in groups and make your stories. Compare your stories at the end of the class. | ||
| − | + | <gallery mode="packed" heights="200px" caption="Warrangal station in pictures"> | |
| + | File:Warangal_railway_station.jpg | ||
| + | File:Konarkexpresskzpt.jpg | ||
| + | File:Warangal_rly_station_overview.jpg | ||
| + | </gallery> | ||
| + | |||
| + | =====''Using pictures to tell a story''===== | ||
| + | <gallery mode="packed" heights="150px" caption="The story of food"> | ||
| + | File:Pachi Charu@Telangana.jpg | ||
| + | File:Telangana Biryani.jpg | ||
| + | File:Sweety Arishalu.jpg | ||
| + | File:Gongura Chutney.JPG | ||
| + | </gallery> | ||
| + | #Your teacher will discuss with you how to use this set of images to talk about how food habits of the state of Telangana. Some ideas that you can discuss with your teacher are: | ||
| + | ##How does the weather and local vegetation shape our food and recipes? | ||
| + | ##How does caste impact food habits? | ||
| + | ##How does the economic condition impact food habits? | ||
| + | #Using these pictures you can also trace how food habits change in a community or culture | ||
| + | #You can put your ideas in a concept map first, before you write out your story. You can make it a habit to prepare a concept map before every article or story you write. The concept map will help you write out all the ideas/concepts you want to cover, and help you place them in relationship to one another. Since you can create or move the nodes easily in a digital concept map, this will help you think in an iterative manner to revise and refine your ideas well before you actually write it out. | ||
| + | |||
| + | =====''Given story line''===== | ||
| + | {| | ||
|- | |- | ||
| − | |[[File: | + | |[[File:Write a story based on the picture.gif|center|thumb|650px|Tell a story]] |
| − | |||
| − | |||
|} | |} | ||
| − | |||
| − | |||
| − | |||
| − | |||
| − | |||
#Your teacher will show you this image in class and will discuss with you how to develop a story | #Your teacher will show you this image in class and will discuss with you how to develop a story | ||
#You will notice that in this case your story has been given; you need to add a text narrative to the story | #You will notice that in this case your story has been given; you need to add a text narrative to the story | ||
Discuss with your teacher the difference between the two story telling exercises. | Discuss with your teacher the difference between the two story telling exercises. | ||
| − | |||
===Student activities=== | ===Student activities=== | ||
| − | #Go back to your photo and images from the previous activity. For each one of the image essays, add a text description to describe your image. After making a slideshow, insert the images in a document and type a phrase describing the picture. These images are your story! You use your imagination to tell the story you want. | + | #Go back to your photo and images from the previous activity. For each one of the image essays, add a text description to describe your image. After making a slideshow, insert the images in a document and type a phrase describing the picture. These images are your story! You use your imagination to tell the story you want. You need not be restricted to reality, you can use your imagination for fiction and imaginary stories as well. |
| − | #In your local habitats - lake, pond, field, dry land -find out the animals that live there and develop a food chain infographic. | + | #In your local habitats - lake, pond, field, dry land -find out the animals that live there and develop a food chain infographic. You can either illustrate the images for the infographic or photograph them. |
#Capture photographs of food wastage in functions and hotels and tell a story | #Capture photographs of food wastage in functions and hotels and tell a story | ||
| − | #Take photographs/ collect photographs of local leaders and make a biographic. | + | #If there are garbage heaps in your locality, take photos of them. Write an essay on Making my Bharat Swacha, describing the problem and possible solutions. |
| + | #Take photographs/ collect photographs of local leaders and make a biographic. The biographic should have 5 images of which at least 1 should be an illustration (draw and take a photo). | ||
#On your computer, you will find images of the water cycle (Venkat Reddy Sir to give images). Look at the images and add your story. Add your own illustrations (draw and take a photo) | #On your computer, you will find images of the water cycle (Venkat Reddy Sir to give images). Look at the images and add your story. Add your own illustrations (draw and take a photo) | ||
| + | #You will save your images for one topic in one folder. You can do a slide show of the images. By default the Image Viewer will show the images in the order you have saved. You can also change the display order by naming the images with numbers. You can present the slide show to the class and narrate the story as the images move. You can also do an automatic slide show | ||
===Portfolio=== | ===Portfolio=== | ||
| Line 60: | Line 79: | ||
#Your picture stories of images created | #Your picture stories of images created | ||
#Infographics of local habitat and water cycle | #Infographics of local habitat and water cycle | ||
| + | #Concept map of the story | ||
| + | |||
| + | [[Category:Level 1]] | ||
| + | [[Category:Communication with graphics]] | ||
Revision as of 11:44, 25 March 2017
Telling a story from pictures
Objectives
- Adding narratives to a picture essay
- Building language communication skills - including in multiple languages
- Building skills of creative interpretation and expression
What prior skills are assumed
- Capturing images from different devices (Mobiles, Cameras, videos)
- Importing images from the devices (Pen drives, Memory Cards, CD's and DVD's)
- Organizing images on the computer
- Familiarity with text editor - basic text entry, inserting images into a document
- Local language typing
What resources do you need
- Computer lab with projection equipment
- Camera, mobile, connectors
- Images, photos
- Handout for Ubuntu
- Handout for LibreOffice Writer
- Handout for Freeplane
- Handout for Tux Paint
- Handout for Image Viewer
What digital skills will you learn
- Local language text typing
- Combining images and text
- Simple formatting and layout
Description of activity with detailed steps
Teacher led activity
Pictures to describe a place
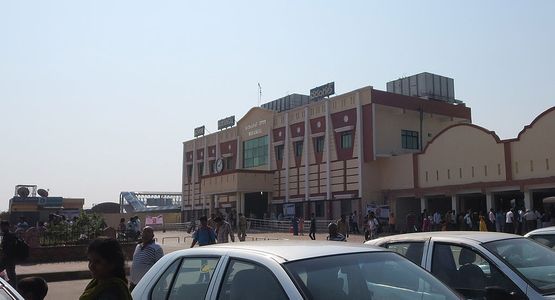
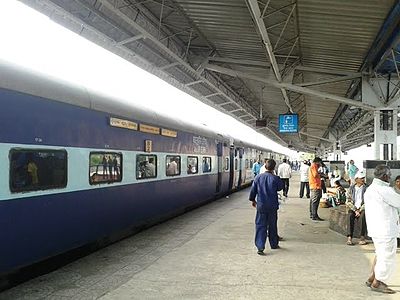
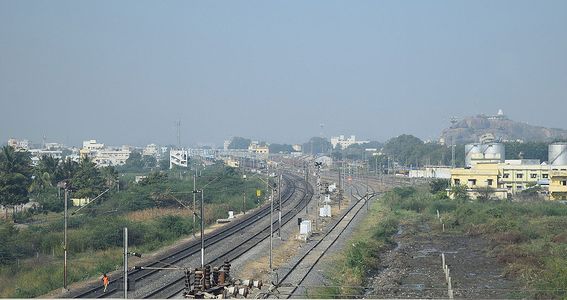
Your teacher will demonstrate how to tell a story with a set of images. In your lab computers, you will find the following images of a railway station (Warangal railway station). You must work on this in groups and make your stories. Compare your stories at the end of the class.
- Warrangal station in pictures
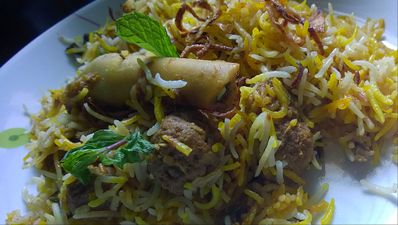
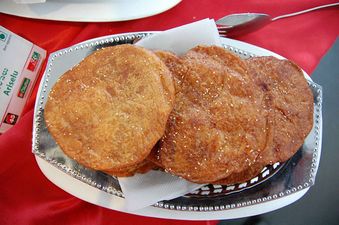
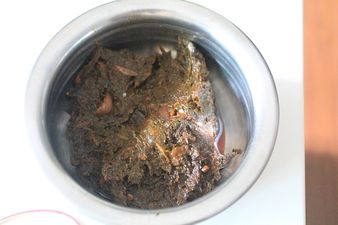
Using pictures to tell a story
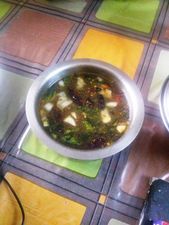
- The story of food
- Your teacher will discuss with you how to use this set of images to talk about how food habits of the state of Telangana. Some ideas that you can discuss with your teacher are:
- How does the weather and local vegetation shape our food and recipes?
- How does caste impact food habits?
- How does the economic condition impact food habits?
- Using these pictures you can also trace how food habits change in a community or culture
- You can put your ideas in a concept map first, before you write out your story. You can make it a habit to prepare a concept map before every article or story you write. The concept map will help you write out all the ideas/concepts you want to cover, and help you place them in relationship to one another. Since you can create or move the nodes easily in a digital concept map, this will help you think in an iterative manner to revise and refine your ideas well before you actually write it out.
Given story line
- Your teacher will show you this image in class and will discuss with you how to develop a story
- You will notice that in this case your story has been given; you need to add a text narrative to the story
Discuss with your teacher the difference between the two story telling exercises.
Student activities
- Go back to your photo and images from the previous activity. For each one of the image essays, add a text description to describe your image. After making a slideshow, insert the images in a document and type a phrase describing the picture. These images are your story! You use your imagination to tell the story you want. You need not be restricted to reality, you can use your imagination for fiction and imaginary stories as well.
- In your local habitats - lake, pond, field, dry land -find out the animals that live there and develop a food chain infographic. You can either illustrate the images for the infographic or photograph them.
- Capture photographs of food wastage in functions and hotels and tell a story
- If there are garbage heaps in your locality, take photos of them. Write an essay on Making my Bharat Swacha, describing the problem and possible solutions.
- Take photographs/ collect photographs of local leaders and make a biographic. The biographic should have 5 images of which at least 1 should be an illustration (draw and take a photo).
- On your computer, you will find images of the water cycle (Venkat Reddy Sir to give images). Look at the images and add your story. Add your own illustrations (draw and take a photo)
- You will save your images for one topic in one folder. You can do a slide show of the images. By default the Image Viewer will show the images in the order you have saved. You can also change the display order by naming the images with numbers. You can present the slide show to the class and narrate the story as the images move. You can also do an automatic slide show
Portfolio
- Your collection of images (from camera, or drawn and digitized)
- Image albums organized into a slide show
- Your picture stories of images created
- Infographics of local habitat and water cycle
- Concept map of the story

