Difference between revisions of "Teachers' toolkit for creating and re-purposing OER using FOSS/Audio and Video OER"
| Line 78: | Line 78: | ||
|- | |- | ||
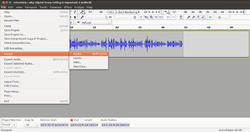
|style="width: 50%;|[[File:Adding a track in Audacity for background music.png|250px]] | |style="width: 50%;|[[File:Adding a track in Audacity for background music.png|250px]] | ||
| + | Adding a track in Audacity for background music | ||
|style="width: 50%;|[[File:Audacity_4_Add_New_track.png|250px]] | |style="width: 50%;|[[File:Audacity_4_Add_New_track.png|250px]] | ||
| + | Audacity_4_Add_New_track | ||
|style="width: 50%;|[[File:Audacity_5_Multipal_Track.png|250px]] | |style="width: 50%;|[[File:Audacity_5_Multipal_Track.png|250px]] | ||
| + | Audacity_5_Multipal_Track | ||
|} | |} | ||
Revision as of 21:13, 24 February 2017
In this chapter of the tool-kit, you will learn how to create and re-purpose audio and video OER. You will learn
- about popular repositories for accessing audio and video OER.
- how to create audio resources using your audio recorder (with your mobile phone)
- how to edit audio resources using audio editor (Audacity)
- how to create video resources using your video recorder (mobile phone)
- how to create simple video resource using a screen-casting tool (RecordMyDesktop)
- how to edit video resources using video editor (OpenShot).
- how to embed / insert links to audio and video resources in a text document (LibreOffice Writer)
- how to insert links to audio and video resources in a ‘slide presentation’ (LibreOffice Impress)
Accessing audio OER repositories
- Freesound (https://freesound.org) is an audio OER repository. You can search for sounds in this repository.
- http://Soundcloud.com is also an audio repository. You will need to check the copyright of the audio you want to re-use.
- You can use a search engine such as Google search engine or DuckDuckGo search engine, using a FOSS web browser such as Mozilla Firefox.
When you visit the site or check a specific resource, you need to look for copyright information to ascertain that the resource is OER and you can re-use it. If the resource is not explicitly declared to be an OER (allowing you to re-use), you should not use it in making your OER.
This can be made easier by providing OER as a criteria in your search itself. In Google search you need to select Settings → Advanced Search. In Advanced Search, you can select Usage Rights as ‘free to use, share or modify, even commercially’ to get OER that you can re-use with or without modification.
Accessing video OER repositories
- http://Youtube.com is a popular repository for videos, it contains both OER and non OER videos. It is the largest collection of videos in the world.
You can enter your topic name in the search bar in Youtube to search for videos on that topic. To get videos which you can re-use, you need to click on the ‘Filter’ link on the Youtube page and select ‘Creative Commons’, with this step you will see videos that have the CC license (are OER).
** Image showing selection of CC videos in Youtube
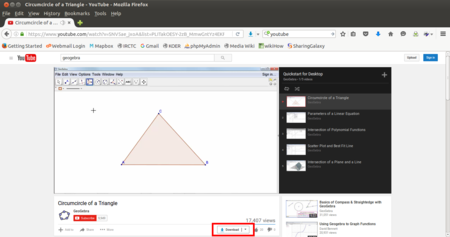
You can click on the video, this will open the video and it will begin playing. You can download the video by clicking on the download link below the video. You can download in different formats
Image showing downloading of videos in Youtube
- There are other OER video sources too, you can visit, such as Vimeo , https://en.wikipedia.org/wiki/List_of_educational_video_websites, http://libguides.tcc.edu/c.php?g=304199&p=2028121 etc. A google search on ‘OER Videos’ will also give you a list of sites to explore.
Creating image audio resources using your audio recorder (on your mobile phone)
You can record an audio clip using your mobile phone itself, using any audio recording app, such as ‘recorder’. You can copy the audio file from your phone to your computer for editing and re-mixing to create OER. While recording, make sure that no copyright music or sound is playing in the background.
We have recorded a short interview with a teacher on why Digital Storytelling is important, using a mobile phone and copied the clip to our computer as ‘Interview - why Digital Storytelling..’
Edit audio resources using audio editor (using Audacity)
You can use Audacity to edit your audio clips. Audacity is a simple yet powerful application for audio editing. You can also use it to record audio.
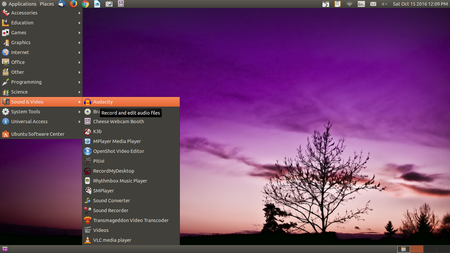
Open Audacity on your computer, through Applications → Sound and Video → Audacity
https://teacher-network.in/OER/images/thumb/b/bc/Audacity_1_Option_Menu_To_Open.png/450px-Audacity_1_Option_Menu_To_Open.png
We will need to ‘import’ the audio we have (of the teacher interview) into Audacity
Create a new track, choose Track → Add new → Stereo track
Import your audio into Audacity through File → Open and select your audio file
Image importing audio file into Audacity
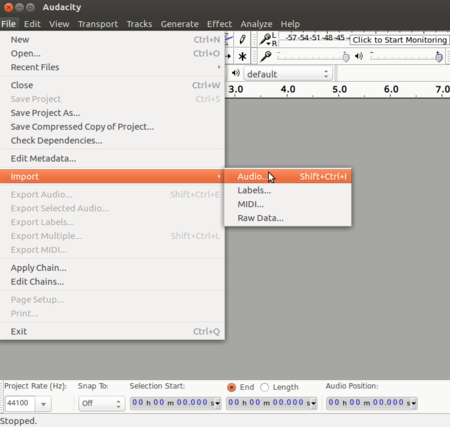
https://teacher-network.in/OER/images/thumb/9/96/Import_Audio.png/450px-Import_Audio.png
You should also import your audio clip which you want to edit. You can add tracks to the audacity file.
This software is very powerful with many sophisticated features (for advanced features, refer to the user manual on http://manual.audacityteam.org/ and tutorials on http://manual.audacityteam.org/man/tutorials.html) . However, we will learn a few commonly used functions, in audio editing, which are useful to teachers in creating and re-purposing OER:
- Moving a selection of audio
- Adding a background music track
- Reducing background noise levels
Moving a selection of audio
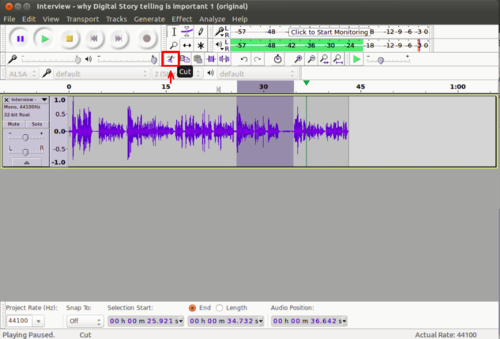
Just like you can cut (or copy) paste a selection of text in a text document, you can cut (copy) and paste a selection of audio in an audio file. You can use this function to remove any part of the audio clip you do not want. You can move a part of a clip from one place to another (for instance if you want to re-order responses in an interview). You can also delete a part of the clip also using the same functionality.
Original Audio file
Edited audio file
Adding a background music track
You may want to add background music to an audio recording. It is easy to do this with Audacity. We can add as many tracks as we want, with one audio file per track.
Adding a track in Audacity for background music |
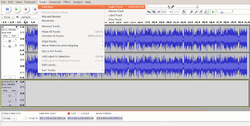
Audacity_4_Add_New_track |
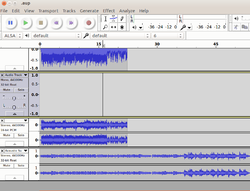
Audacity_5_Multipal_Track |
Amplifying sound
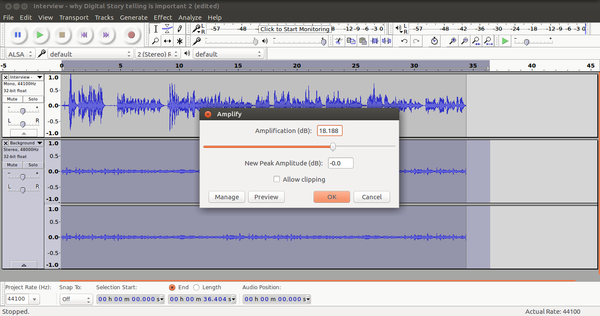
You may have an audio recording where there is some unwanted disturbance throughout, such as traffic sounds. You can use the ‘Noise Reduction’ function in Audacity to reduce the background noise. You can also use the ‘amplify’ function to increase or reduce the sound level in a track.
Select the track, Goto "Effect from the menu bar, select amplify and reduce the track pitch.
Exporting the Audacity project to create audio output file
After completing your editing tasks, select File → Export and select the file format as MP3 and click export, to create an output audio file in .mp3 format.
You can also save the Audacity project to continue editing, for this select File → Save.
Image exporting Audacity project to create audio output file
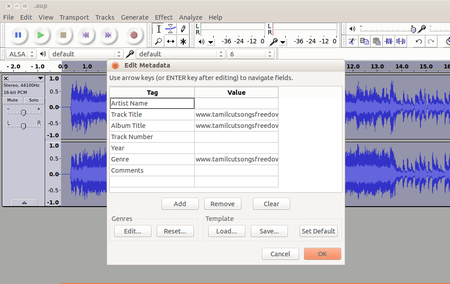
https://teacher-network.in/OER/images/thumb/5/50/Audacity_7_Export_Metadata_Edit.png/450px-Audacity_7_Export_Metadata_Edit.png
Audacity is particularly useful for a language teacher to create audio resources for language learning.
