Learn LibreOffice Impress

Introduction
Basic information
| ICT Competency | LibreOffice Impress is a free and open source application for creating generic resources, in the form of slide presentations. |
| Educational application and relevance | LibreOffice Impress can be used to create slides that contain many different elements including text, lists, tables, charts, audio and video links etc. Slides are often used in training programs and in teaching to quickly and simply communicate ideas through points. |
| Version | Version: 5.1.4.2 |
| Configuration | No specific configuration requirements |
| Other similar applications | Sozi, Apache OpenOffice Impress, Google Drive Slides are all presentation software applications |
| The application on mobiles and tablets | Collabora Office for Android and for iOS
You can use DeckDeckGo for creating and sharing presentations online. It is a FOSS alternative for Google Slides. Although there are similar full office-suite along with Google Drive storage service like NextCloud, this is simpler when we just want to use a clean presentation tool. It works on mobile too. |
| Development and community help | 1. Official Website |
Overview of Features
LibreOffice Impress lets you create professional slide shows that can include charts, drawing objects, text, multimedia and a variety of other items. We can import and modify Microsoft PowerPoint presentations. On-screen slide shows, animation, slide transitions are a few of the techniques you can use to make presentation more appealing. Impress also includes a spelling checker, text styles and background styles, to communicate information in simple and powerful ways.
Installation
For Windows
- Go to this click and click on libreoffic windows installer for windows
- It will start downloading "LibreOffice_..._Win_x64.msi" into your computer (by defulat browser will save the files in "Downloads" folder in your system
- Double-click on download "LibreOffice_..._Win_x64.msi" file to begin installation
- Click Yes if it ask your permission to allow this program make change to the computer, Keep clicking on "Next" button to continue and complete the installation.
If you are not able to install Libreoffice in your windows machine, follow this official website installation instructions
For Ubuntu
- The application is part of the Ubuntu custom distribution.
- In case you do not find it on your computer, you can install by choosing “LibreOffice” in Ubuntu Software Centre
- If you would like to install through the terminal follow these steps below:
- Open terminal by clicking (Ctrl+Alt+T),
- Once Window page is open, in front of dollar($) symbol just type below command.
- sudo apt-get install libreOffice-writer
For MAC OS
- Go to this click and click on libreoffic MAC OS for MAC laptops
- It will start downloading "LibreOffice_..._MacOS_x86-64.dmg" into your computer (by defulat browser will save the files in "Downloads" folder in your system
- Double-click on download "LibreOffice_..._MacOS_x86-64.dmg" file to begin installation
- An installation window appears: drag and drop the LibreOffice icon onto the Applications icon in the same window. You may be required to enter your administrator password.
- The files are copied over and a progress bar shows when the installation is complete.
If you are not able to install Libreoffice in your MAC machine, follow this official website installation instructions
Working with the application
Opening a presentation slide

LibreOffice Impress can be opened from Applications → Office → LibreOffice Impress. When you open the LibreOffice Impress application, it will show the window like this. You can click the cursor on "Click to add title" and type the title of the information you want to enter. And then you can click the cursor on "Click to add text" and type the information you want to present.
After completing the first slide, if you want take new slide, see the left side panel of the window and right click on slide, then choose new slide. Alternatively, you can also select any slide from from slide list and then press ENTER.
Formatting a presentation (Add new slide, Duplicate slide, select slide layout)
Adding new slide: A new slide can be inserted into a presentation as follows: Go to Slide on the top Menu bar and select New Slide. or, right click on a slide in the Slides bar , view and select New Slide from the menu. A new slide is inserted after the selecting slide in the presentation.


Watch this video to learn inserting slides and formatting slides
To duplicate/copy a slide:
- Select the slide you want to duplicate from the Slides Pane.
- Go to Slide on the Menu bar and select Duplicate Slide. Or, right-click on the slide in the Slides Sorter view and select Duplicate Slide from the menu.


When creating a presentation, the first slide is normally a title slide. You can use either a blank slide layout or one of the template.
Click on slide-----→ layout and select the layout
Adding and Formatting text

Add Text

Text Formatting


To add text to a slide that contains a text box, click on Click to add text in the text box and then type your text. To format added text go to sidebar settings and click on properties as shown in the image.
Organising text through bullets and number lists

To add the bullets and numbers to text information, choose Format - Bullets and Numbering. You can also select the different symbols of bullets and numbers here.
An important feature of Impress is to enable you present your information through simple and short points ('bullet points').
Inserting images

To add images - Go to the insert menu in menu bar and click on images and select the image which you want to add. Alternatively you can click on the image icon in text field. You can move the cursor around that, and it will show the option to 'Insert Image'. Here you can see the options to 'Insert Table' , 'Insert Audio and Video' and 'Insert Graph'. Thus you can insert files in other formats also in your slide and make it a comprehensive resource on a topic. You can also add additional 'text boxes' in the slide to format your text into different boxes on the slide.
Insert Hyperlinks

Insert Web link- Place the text cursor in the document at the point where you want to insert the hyperlink or select the text that you want to put the hyperlink on. Select Hyperlink command from the Insert menu. When you present your slides (using 'Slide Show' from the Menu), you will be able to click this web link and open the web page with that address (you will need internet connectivity for this). You can also use this to link a file on your own computer, which can be opened in the same manner.
Modifying the 'Master Page' template

Master Page - Impress comes with a collection of master pages. Click on the master pages section from task panel on right side of the working window, and click on master page you want to select for your presentation.
Insert Table and table formatting
Go to Table on the Menu bar and select the number of rows and columns required from the Insert Table dialog that opens.Alternatively, click on Table icon in toolbar and select the number of rows and columns by dragging the cursor.


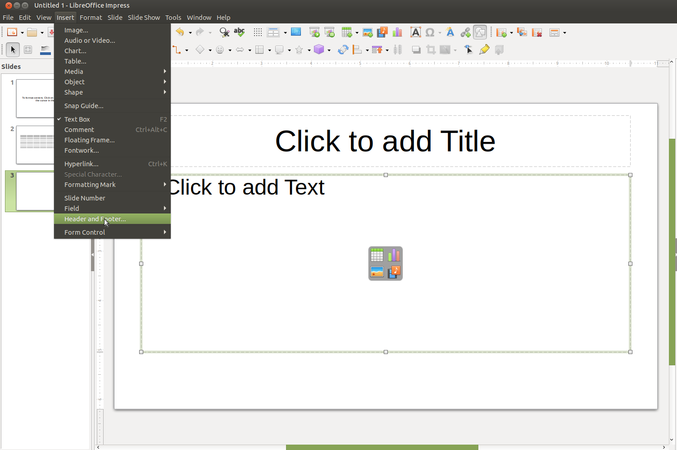
add header and footer
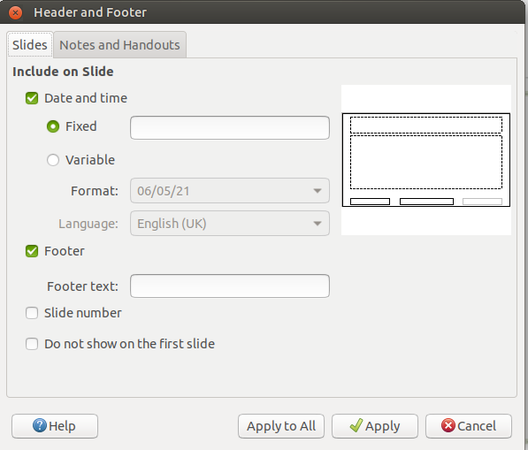
Options available


To add the header or footer go to insert menu from the top menu bar and click on header footer > Add the header or footer like fixed date , variable date , slide number etc
Inserting other objects
To add any objects to a slide, for example formula,QR code etc click on insert and go to object then select the object as per the requirement

Custom animation for presentation

Custom animation - Opens the Custom Animation from task panel on right side of the working window. Alternatively choose Slide from Menu Bar and then click on 'Custom Animation'. There will be varieties of styles to add, you can choose. Custom animation enables you to present your text in different styles. You can have the text come in different speeds, in different ways, this makes it interesting for the viewer by providing visual relief. Try different animation methods and have fun!
Slide Transitions

To add the slide transition wherein the transitions can be applied to the selected slide or to all slides, click on properties > Slide transitions OR Select the slide transition from the right side pane.
Running Sideshow

To run the slideshow go to the slideshow from the top menu bar and click on start from first slide or start from the current slide
Saving the files and formats
- Like in most applications, a file can be saved using the FILE – SAVE command, or by the shortcut key CTRL+S. Always give a meaningful file name, reading which you should get an idea of the file contents.
- The files will be saved as ".odp".
- The files can be exported to a PDF format (FILE - EXPORT as PDF). This is useful when you only need to print the file and do not want any changes to it. You can also save your file in the Microsoft ppt format (FILE - SAVE AS).
Advanced features
You can use custom animation in advanced ways to present text, audio, video and images in rich ways. You have different options to print your slides - only slides or as a handout.
Video tutorials
Click here to see the video tutorials to learn LibreOffice Impress
Ideas for resource creation
- You can organise and structure teaching ideas through slide presentations. You can animate your slides and combine text, image, audio and video elements for richer communication.
References
- The Document Foundation
- LibreOffice Impress Official Website