Learn Geogebra
ಕನ್ನಡದಲ್ಲಿ ನೋಡಿ हिंदी में देखें
Introduction
Basic information
| ICT Competency | This is a tool for creating resources for mathematics and is an interactive application that combines geometry and algebra to create visual representations of different concepts in algebra and geometry. |
| Educational application and relevance | It is possible to create drawings and animations using Geogebra to explain different concepts in geometry and algebra. It can be used by teachers as an interactive construction board in the classroom or as stand alone resource for demonstration and student learning. It is also possible to use Geogebra for assessments. |
| Version | Geogebra 5.0.180.0-3D |
| Other similar applications | Dr.Geo, CarMetal |
| The application on mobiles and tablets | Geogebra app is available for the Android platform as well as iPad. |
| Development and community help | Markus Hohenwarter et al, http://dev.geogebra.org/svn/ |
Overview of features
Geogebra allows you to make dynamic sketches of different geometric shapes and solids, with a 2D and 3D window. With its graphics view, spreadsheet view and algebra view it allows an interactive learning possibility for combining algebra, geometry and statistics. Geogebra allows export as image or GIF files and publishing as html pages.
Installation
- The application is part of the Ubuntu custom distribution.
- In case you do not find it on your computer, you can install by typing
Geogebraon top search bar in Software Centre. - If you would like to install through the terminal follow these steps below:
- Open terminal by clicking Applications->System Tools->Terminal or through Keyboard shortcut
Ctrl+Alt+T - In the terminal window, type below command and press enter to start the installation by providing your machine password:
sudo apt-get install geogebra
- Open terminal by clicking Applications->System Tools->Terminal or through Keyboard shortcut
For Microsoft Windows
- Download the GeoGebraGeometry-Windows-Installer-6-0-574-0.exe file from https://geogebra.org/download
- Locate and double-click the .exe file. (It will usually be in your Downloads folder.)
- A Installation dialog box will appear. Follow the instructions to install the software.
- The software will be installed. You can now open the Geogebra application by double clicking on geogebra icon on the desktop screen.
Working with the application
Getting familiar with the Geogebra interface
- Geogebra interface
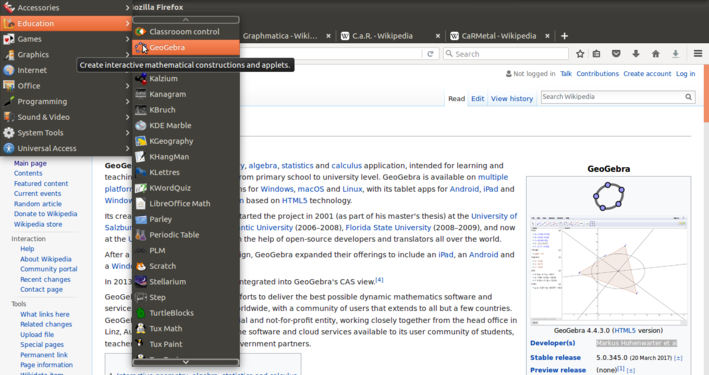
Opening Geogebra
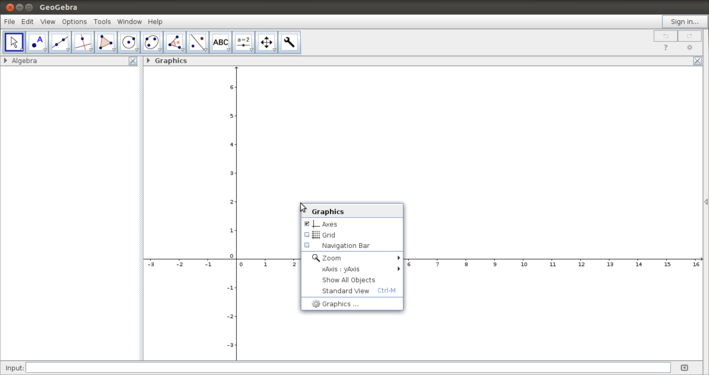
Defining the graphical interface
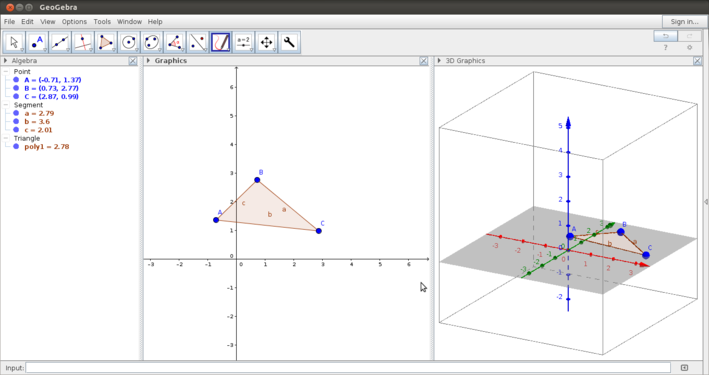
Three panes in Geogebra window


The above images show you the Geogebra window. After opening Geogebra, you will see the application window as in the second image. The user can define the graphics view in terms of the axes, the grid, scale of the axes, etc. From the View option you can define the number of views you want to see - in this third image, three views are shown - the algebra view, the graphics view and the 3D view. In this handbook, we will primarily discuss the 2D window.
Using the tool bar - basic
In this section you will be introduced to the basic constructions available on the tool bar. Moving, lines and segments, parallel, circles, polygons
- Introduction to the tool bar
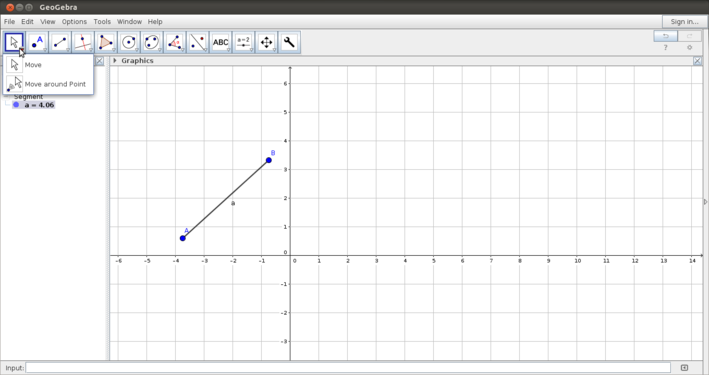
Moving objects

Moving by rotating around a point


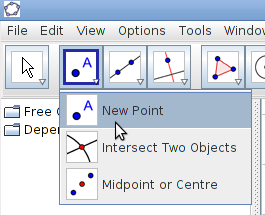
Plotting points menu
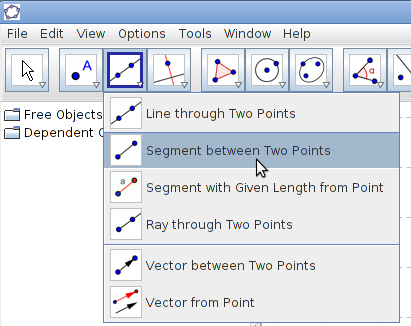
Lines and segment menu
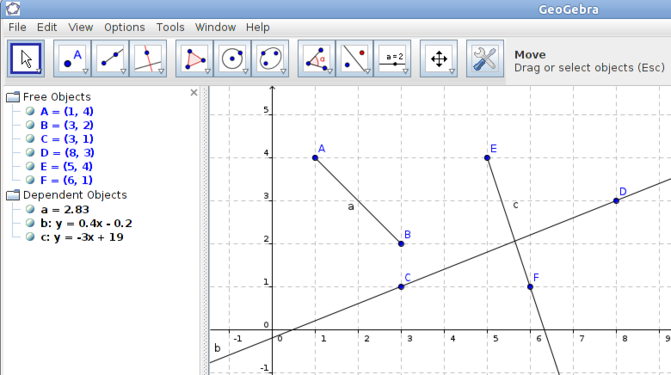
Drawing segments and lines


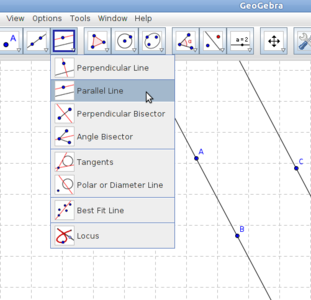
Drawing parallel lines
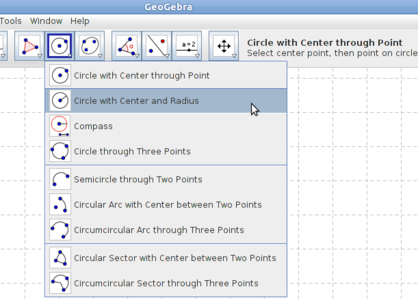
Circles
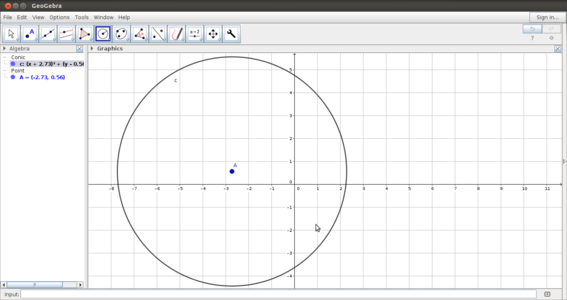
Circle with centre and given radius


The Geogebra tool bar is very versatile - the construction follows the processes that we would normally follow in paper and pen construction. Some six important categories in the tool bar are discussed below:
- Moving objects:Geogebra allows you to move object constructed freely by dragging the object. You can also select an object and move it by rotating aroung a point.
- Plotting points: There are different ways of plotting points on the Geogebra graphics pad. You can plot a point anywhere on the graphics view - this is a free point. You can also plot on an object or as an intersection of two objects; in both the cases the point is a dependent object.
- Drawing lines: The menu for lines and segments also allows multiple constructions - segments,lines, rays and vectors
- Drawing multiple lines: Multiple lines can also be drawn in Geogebra. Parallel lines, perpendicular lines, angle bisectors and perpendicular bisectors can be drawn.
- Drawing circles - You can draw circle, circular arcs and sectors using this tool.
Labelling and formatting objects in Geogebra
Once you have created objects, you can label them or format them as per your preferences. The following GIFs show you how to create a label, change the display style of an object you have created and change the labels. The following GIF animations will show how to use these features. NOTE : Click on each below animation files to play
- Labelling and formatting objects in Geogebra

Object labeling in Geogebra
Display options of objects - points
Display options of objects - angles and lines
Changing labels


Measuring objects in Geogebra
You can also measure the objects you have created in Geogebra - the following GIF animations will show you how to use these features.
- Measuring objects in Geogebra
Measuring angles

Measuring segments - by selecting two end points and by selecting the segment
Measuring area - after describing the given figure as a polygon
Measuring perimeter of a polygon or circle


Using the tool bar - advanced features
- More features of the tool bar
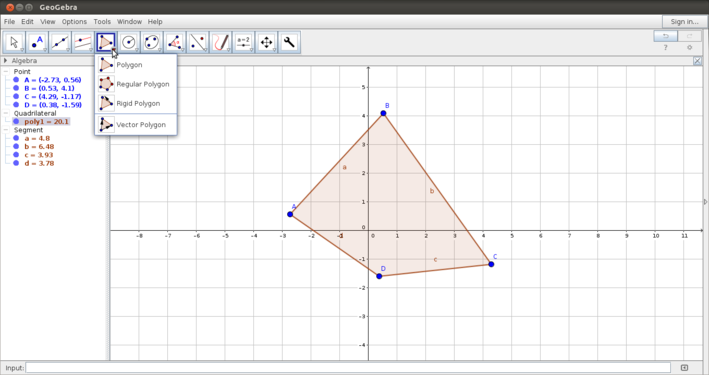
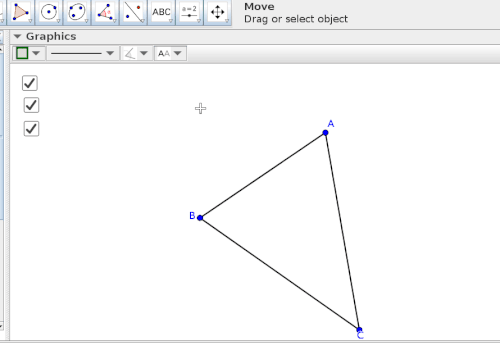
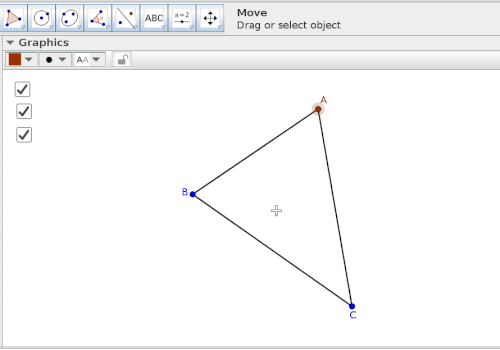
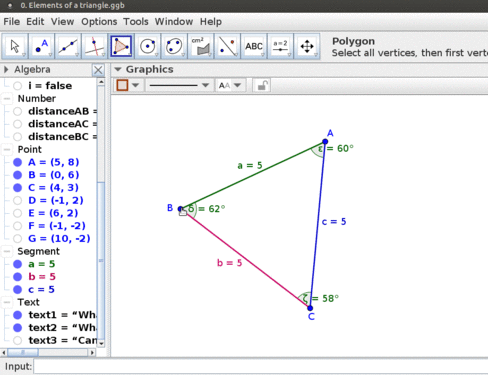
Creating a polygon
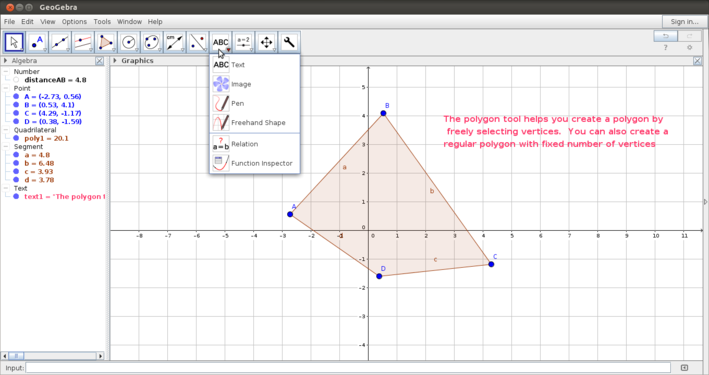
Adding a textbox
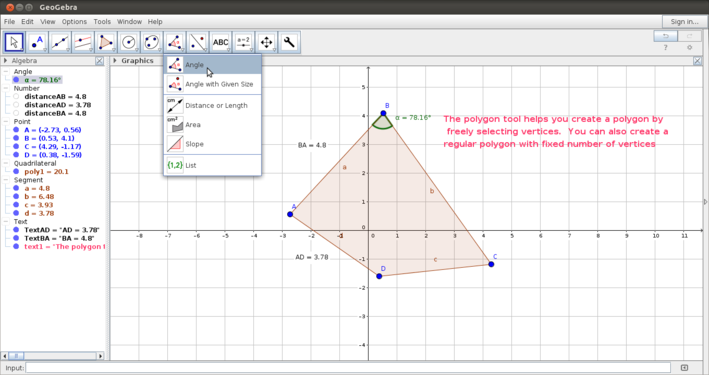
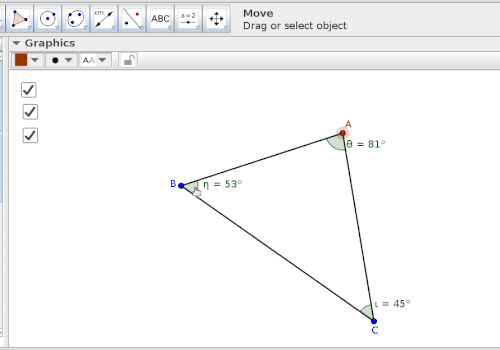
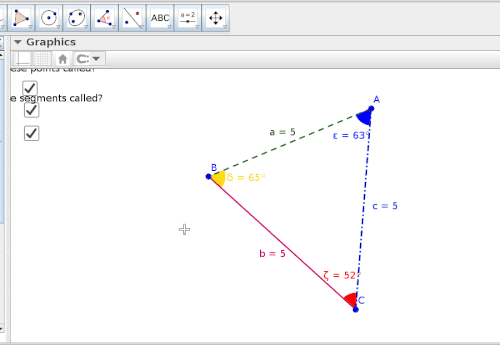
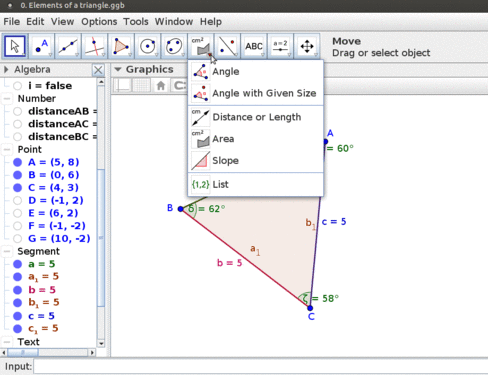
Measuring angles in a polygon
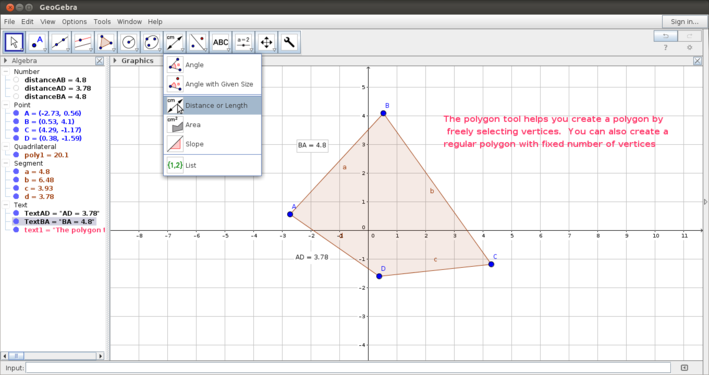
Measuring segment lengths
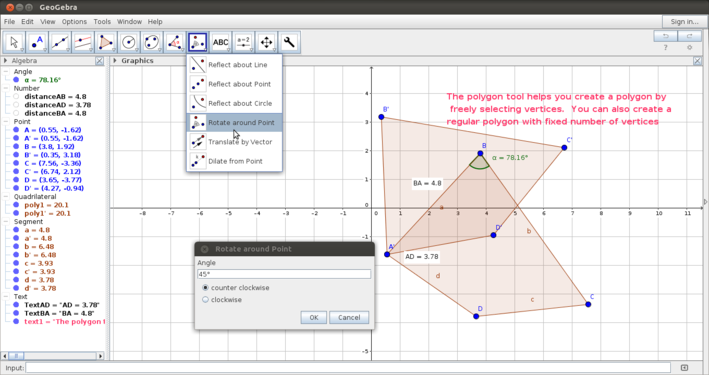
Rotating and reflecting -1
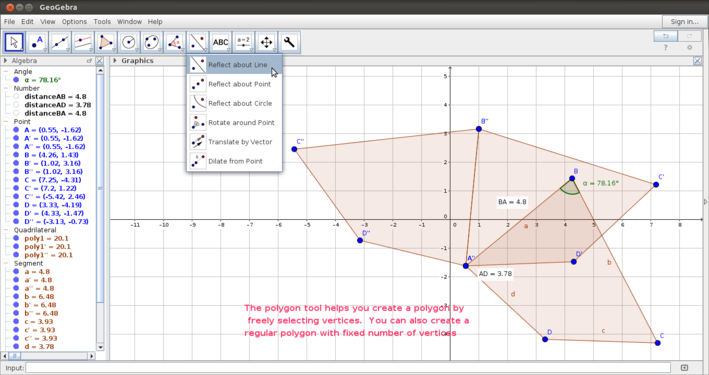
Rotating and reflecting - 2
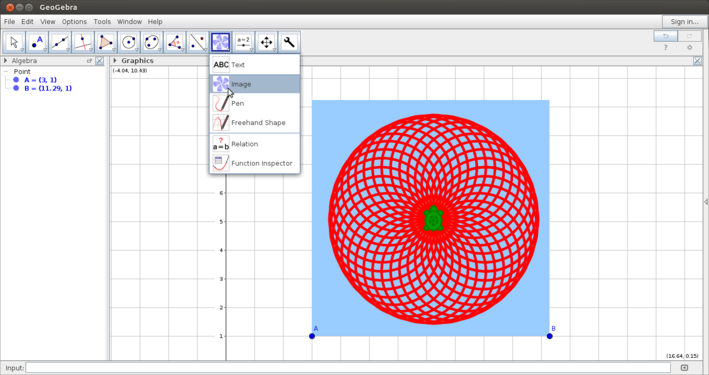
Inserting an image
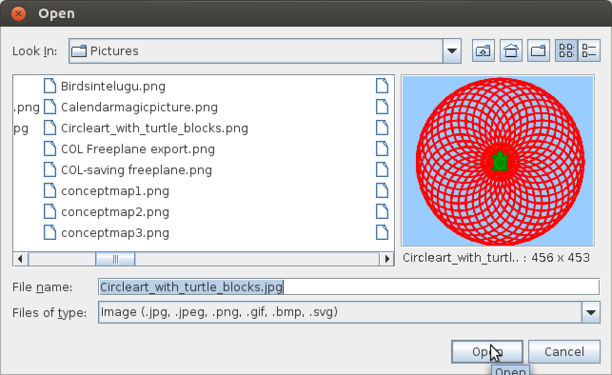
Choosing an image to insert


The above set of images show how to work with some advanced features in the Geogebra tool bar.
- Creating a polygon: The first image shows how to create a polygon by marking the vertices (by plotting points) and completing the polygon.
- Adding a textbox:You can add a text box in the Geogebra file as shown here by clicking on the textbox and clicking anywhere on the graphics view. You will get a box for typing the text you would like to add. Once the text is entered, as shown in the second image, you can right click on the text and after going into Object Properties,format it.
- Angle measurement: The third image shows you how to mark and measure angles. The Geogebra angle tool uses the convention of measuring angles counterclockwise. You can also construct angles with given measure.
- Length measurement: You can also measure sides and lengths as shown in the fourth image. Once you have measured angles and sides, you can drag and move the measurements and lebel to be shown where you would like them to be. This drop down menu also has an option to calculate area.
- Rotation and reflection: As you explore symmetry and congruence, rotating and reflecting an object will be useful to do. In the first of the set of two images, "Rotating and reflecting", the polygon has been rotated by 45 degrees counterclockwise, at a vertex. As in the case of angle measurement, the rotation can be specified to be clockwise or counter clockwise. In the second image the rotated polygon is reflected along a side.
- Inserting image: In the last set of images you see an image being inserted in the Geogebra graphics view. Once you click on insert image, you need to click anywhere on the graphics view to specify the point where the image is to be inserted. Once you click on that, a dialog box will open from where you can choose the image to be inserted.
Using the input bar
- Using the input bar


In Geogebra, all the constructions you can do using the tool bar can also be done with definitions on the input bar. The input bar also follows the same mathematical conventions used in the tool bar.
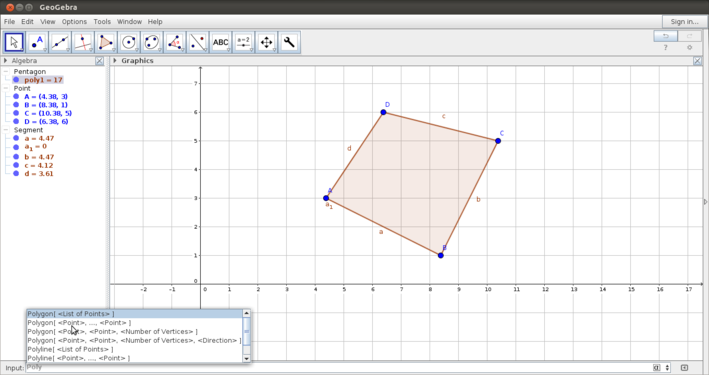
- Input bar for sketches: The first image shows defining polygon with a set of points
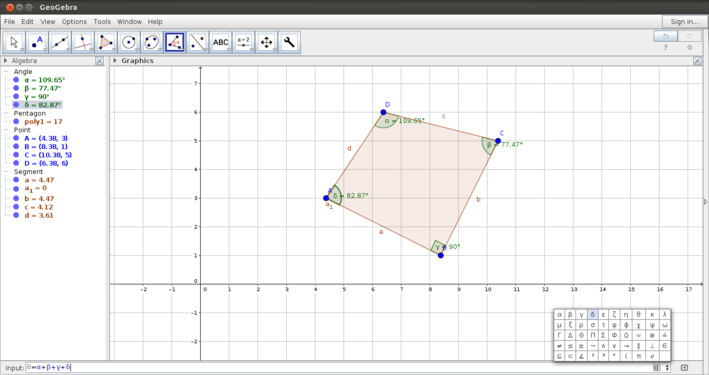
- Input bar for calculations: The second image shows how to use the input bar for defining variables and values for parameters. You can also use this space as a calculator for values and properties being shown in the construction. In this image the angle sum of the quadrilateral is being calculated in the input bar.
Using the tool bar - slider
One of the powerful features of Geogebra is the dynamic feature. You can vary parameters of the shape that you want to animate and see how properties change.
- Using the slider
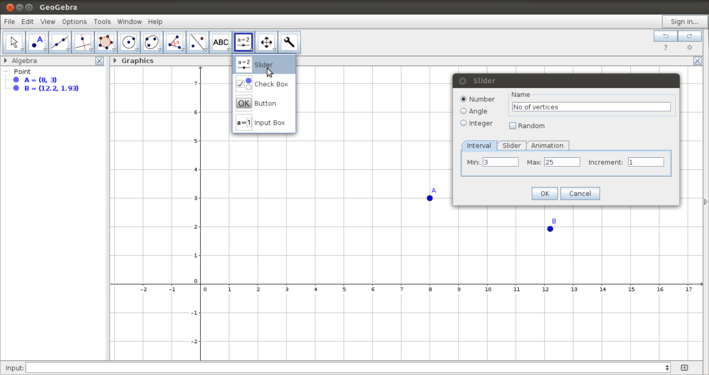
Defining the slider
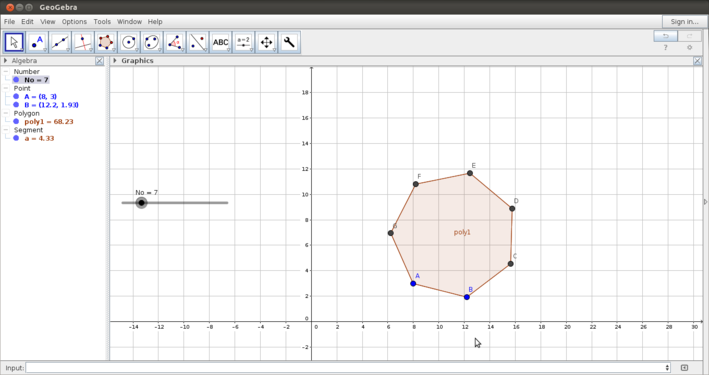
Polygon with a slider for number of sides


Using tool bar - Check Box
- Using the checkbox
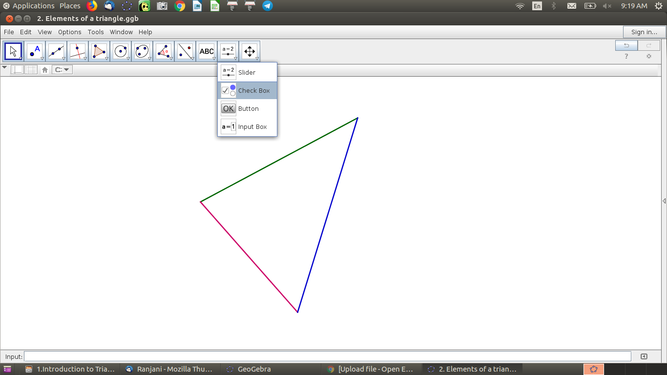
Inserting checkbox
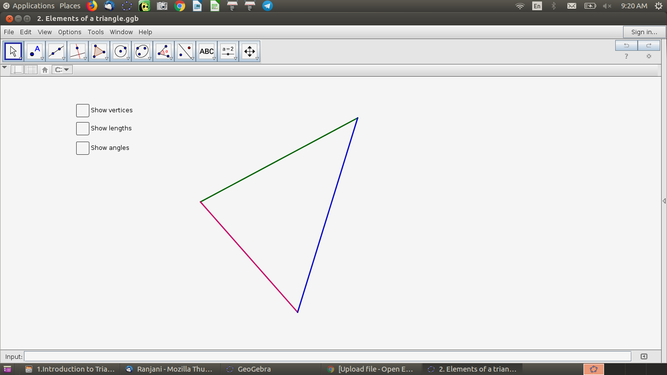
checkbox
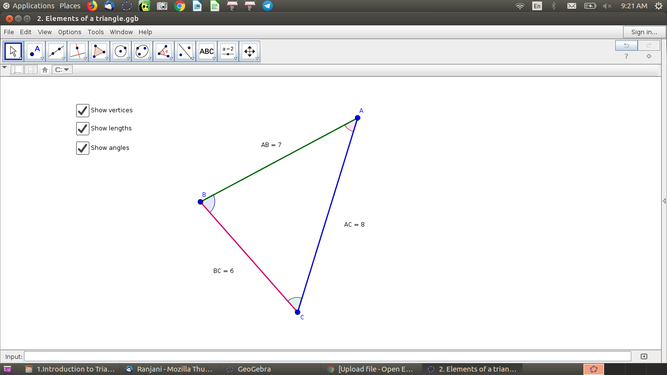
checkbox are selected


Check box is a tool in geogebra that shows objects when required. The objects are hidden when the check box is checked the related objects are revealed. Object properties
Use object properties tool bar to add label for the object, renaming, to change the color and many more. Follow below gifs file to to it in your geogebra.
3D view
- Using the 3D window

3D view
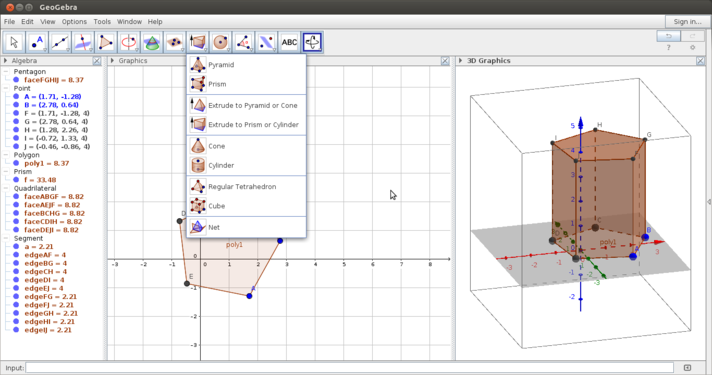
Extruding a prism from the polygon


- The 3D window allows you to visualize the geometry along 3-axes. You can rotate the graphics view using the same icon that you used for the Move graphics view. You can independently work on the 2D and 3D windows and the construction on one window will get reflected in the other.
- The 3D window allows you to construct solid figures by extruding from a 2-dimensional shapes. Other features include construction of a plane, rotation, reflection., etc. The slider defined in the 2D window will help animate in the 3D window also.
Construction Protocol
- Using the Construction Protocol
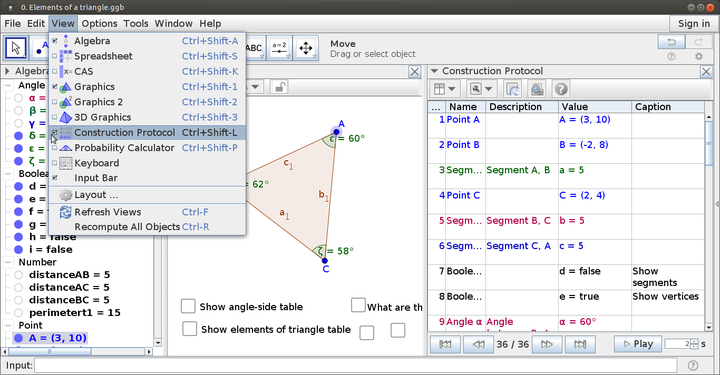
Construction Protocol

Navigation Bar


- You can access the Construction Protocol option in the View Menu.The Construction Protocol is a table that shows all construction steps,allowing you to redo a construction step by step.
- Using the Navigation Bar you can also animate the construction steps.Enable Navigation Bar on right click in the Graphics View, then select the Navigation bar option in the Context Menu displayed.You can use the keyboard and mouse to navigate and modify in the Construction Protocol.
Using Geogebra to make a given sketch
You have learnt many functionalities. An example of how to use these different tools to create a Geogebra construction can be found here.
Saving and exporting
- You can save Geogebra file from the File menu.
- You can also export the Geogebra file as an image (.png format) or as an animated graphic (.gif format).
- If you export the Geogebra file as html you can publish it on the repository for Geogebra files.
Advanced features
- Creating your own tool in Geogebra
- Making three dimensional animations
- Exporting Geogebra pages as html to add to the repository of Geogebra materials
Ideas for resource creation
- Geogebra sketches for demonstrating different problems in geometry
- Geogebra can be combined with screen cast recording to create a video recording of a lesson with a Geogebra file; this can be used for students' self learning as well.
ɤ̃ The Geogebra repository http://geogebra.org has millions of Geogebra resources, worksheets on almost every topic in Mathematics. This website is a real resource for all Maths teachers. Teachers can also upload their own creations on this repository since it is an Open Educational Resource (OER) repository. This will be specially useful for resources / Geogebra resources developed in Indian languages, which will be useful to students studying in those medium of instruction.