Learn Freeplane

Introduction
In this chapter, we will learn how to create a mind map using the tools necessary for creating a clear and tidy mind map. Therefore, it is very important to take into consideration all the recipes in this chapter, to avoid misleading information.
The recipes explained afterwards are given in order to avoid the most common mistakes while designing a mind map, thus they are the key elements to bear in mind before designing a mind map. Mind maps must communicate thoughts and try to speak by themselves, to convey the meaning easily. Considering these aspects, the mind map can greatly be improved from the start by taking into account how clear, effective, and impactful its content and design can be to the reader.
Mind mapping is considered a brainstorming technique out of which we obtain desired results or even extraordinary ones. This is why we must show our ideas to our mind map readers and help them understand what we were imagining while designing it. We can show the results in different ways, in order to make it look more appealing as well as profitable, according to the type of target audience that we are aiming at.
Educators consider mind mapping a good approach for supporting students with organizing ideas; they also find it a great asset for teaching. It is a great tool to organize the thought processes of their students when writing, due to the fact that the teacher only presents the basic content and it is the student who writes it in an organized way. However, the mind map should be comprehensive, well designed, and readable, in order to achieve its goal.
Educational application and relevance
Freeplane is an open source for educational use.
Version=
Freeplane Version - 0.9.0
Configuration
No need to configure
To Open from the desktop menu select Applications > Office > Freeplane.
Overview of Features
- New feature: font color combo box
- Re-developed lots of the attribute functionality.
- Search dialog on geographical maps accepts coordinates in the form "lat lon" or "lat lon;lat2 lon2;..."
- A reverse lookup is then performed unless you set do_reverse_lookup_on_lat_lon_search to false.
- New search&replace dialog shows tooltips of the node and note text.
- Enhanced the calendar widget to show 12 month at once.
- New feature: standalone map server created.
- new feature: icon toolbar can have multiple columns (see properties->appearance).
- New feature: on save, thumbnails are created and displayed as tool tip on mindmap links to other mm-files
- Added node statistics to the status bar (inclusive sums of node contents).
- New Export as html page with a single click able image containing only the links (URLs) or the map.
- Clones can be deactivated by menu
- Strike through
- Sorting in both directions by repeating the command
- Markings in calendars
Other similar applications
Freemind
Development and community help
Working with the application
Functionalities

|

|
| Step 1 - Once Freeplane is open you will see a window like this.
The new mind map is the root node and you can give it any name you want. The name of this root node will be the name of the mind map. Once you have given it a name, you can save the mind map. |
Step 2 - Once you click on save, you will see a window like this.
You can save the folder you want to select the folder you want to save it on. Here the mind map is named Food and is saved under home/ranjani/Documents |

|
|
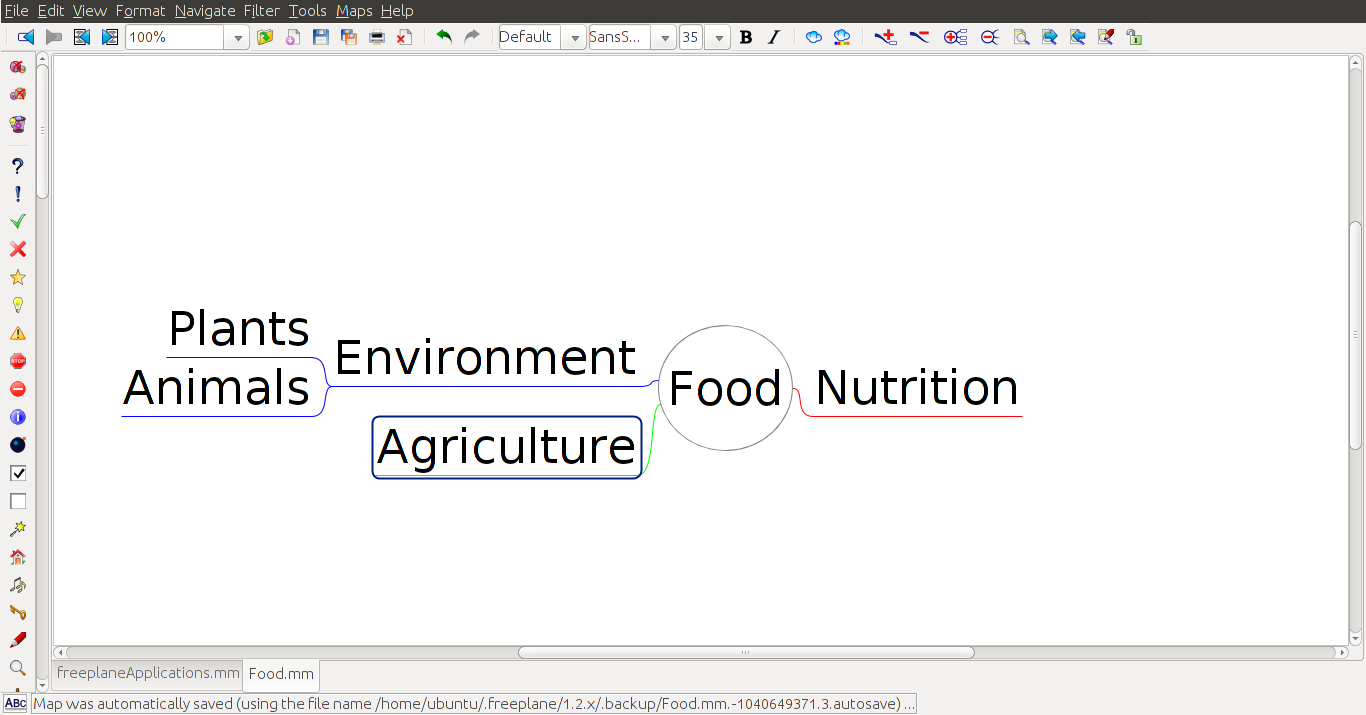
| Step 3 - Now you see that the mind map is named Food and the root node is called Food. To insert other words that are connected, you can enter them as child nodes. To enter these nodes, you can use the "Enter" key or "Insert" key after selecting the node to which the child nodes must be added. Here, the child nodes have been added after selecting the node "Food". The child nodes added are called sibling nodes and the main node is called parent node. | Step 4 - You can keep adding child nodes to any node. For example you can add child nodes to the node called environment by selecting and using "Insert" key. You can also add a sibling node to environment by selecting the node environment and using "Enter" key. "Plants" and "Animals" are child nodes for "environment" and "agriculture" is sibling node for "environment. |
|

|
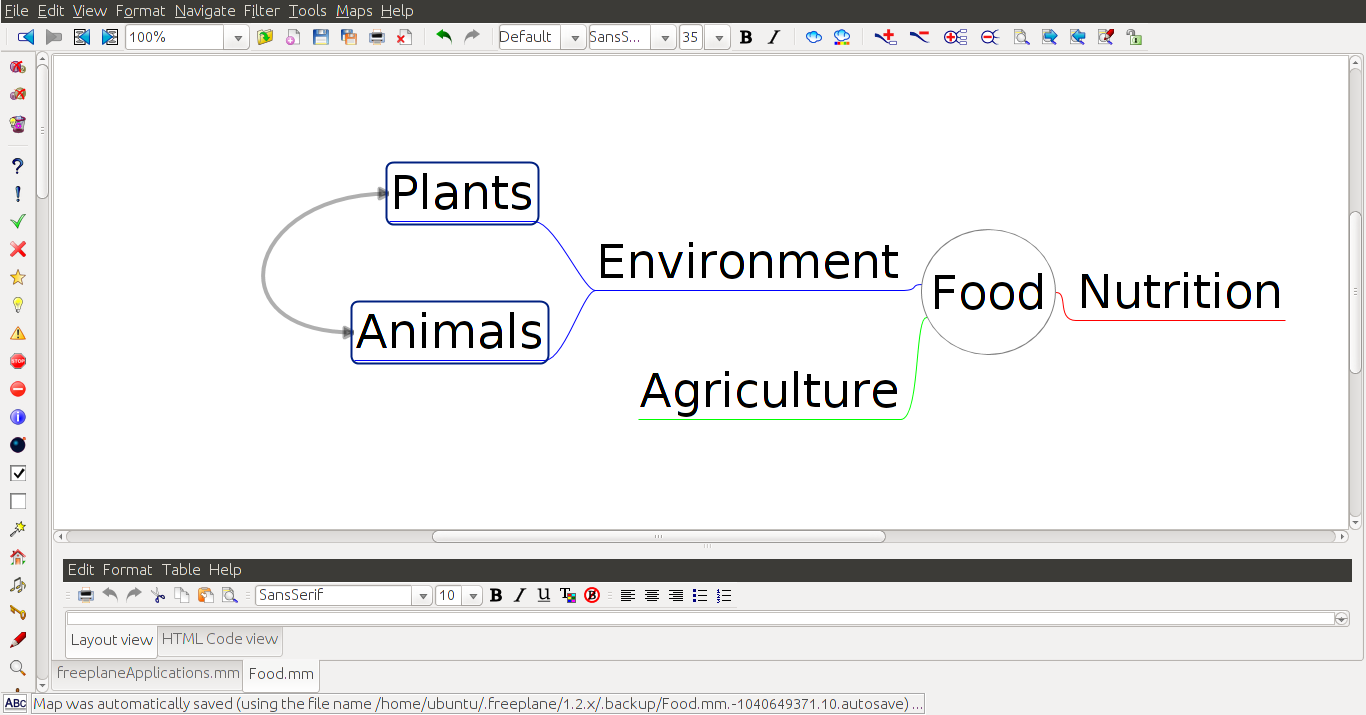
| Step 5 - When you discuss concepts, we notice that sometimes concepts are connected, and we want to link them to study in detail. For doing this we can add a graphical link (an arrow) to connect two nodes.
To do this select two nodes and select Insert Option from the menu bar, and add graphical link. You can click on the arrow and move it around. |
Step 6 - We will also see that sometimes these concepts are very large and we may want to create a new mind to study them. For example, in this mind map we may want to create a new mind map called agriculture to study. After we create a new mind map called agriculture, we can insert a "file link" to open the new mind map when the node "agriculture" is clicked. To do this, we click on node called agriculture and click on "Insert". Under Insert, click on "Hyperlink - File chooser". This will open a window from where you can select the document name to be opened. This can be a mind map. The file can be a picture or video also. |

|

|
| Step 7 - We can also insert weblinks to any node for additional information. To do this, you select the node to which additional information is to be added and click on "Insert". Under Insert, click on "Hyperlink - Text field". It will open a window in which you can enter the hyperlink manually. | Step 8 - You can also add notes to a node to add more description to a node. To to this, you need to go to "View" and select "Note Window".
This will open a box where you can enter text. You can adjust the size of this box. To enter a note, select a node and enter the notes below in the note window. |

| |
| Step 9 - The completed mind map with links and notes will look like this below.
You can select the Format and Navigate to change colours, layout and also to move the nodes around. You can also export your mind map to Image or Text Document using File → Export As. |
File formats for creation
Saving the file
Like in most applications, a file can be saved using the FILE – SAVE AS command, or by the shortcut key CTRL-S. Always give a meaningful file name, reading which you should get an idea of the file contents.
Export and publishing files
Like in most applications, a file can be exported to a PNG, JPEG and Libre office writer documents format.
Advanced features
1 Writing 2 Inserting Graphics 3 cloud 4 blinkinhg 5 colour
Installation
| Method of installation | Steps |
|---|---|
| From Ubuntu software Centre | Steps : Application - ubuntu software centre - search box select and type (Freeplane)- install |
| From Terminal | Steps - sudo apt-get install Freeplane enter password |
| From the web | Steps |
| Web based registration | Steps |
The application on mobiles and tablets
In Andorid Mobiles we can use this application through Freeplane reader
Ideas for resource creation
References
https://en.wikipedia.org/wiki/Freeplane
How to use template
{{subst:Explore_an_application}} on the page you create for your tool. Page Name should be "Learn ToolName"