Learn BigBlueButton
Introduction
Basic information
| ICT Competency | BigBlueButton is a Free and Open Source Software web conferencing system |
| Educational application and relevance | BigBlueButton supports multiple audio and video sharing, presentations with extended whiteboard capabilities. |
| Version | BigBlueButton version 2.2.3 |
| Other similar applications | Zoom, Google hangouts |
| The application on mobiles and tablets | There are many similar application are available in Android mobile phones. |
| Development and community help | BigBlueButton Inc.
|
Overview of features
BigBlueButton supports multiple audio and video sharing, presentations with extended whiteboard capabilities - such as a pointer, zooming and drawing - public and private chat, desktop sharing, and support for presentation of PDF documents and Microsoft Office documents. Moreover, users may enter the conference in one of two roles viewer or moderator.
Installation
BigBlueButton is a web based application. There is no need of software / app installation. You just need web browser to open it.
Working with application
Faculty/Instructor section
BigBlueButton enables faculties to share your audio, slides, chat, video, and desktop with students. Built-in polling makes it easy to engage students and recording your lectures means that you can make them available for later review.
Also, you can use whiteboard tool in BigBlueButton, annotations are automatically displayed back to the students in real-time. Presenters also have the ability to zoom, highlight, draw and write on presentations making your points clearer to remote students.
Webinar session through BBB website
Go to https://bigbluebutton.org/ to create BBB webinar session, click on teachers tab to go to teachers section. From here click on “TRY IT NOW“ button, to create your webinar session you need to sign-in to the BBB. Here if you do not want to create an account, you can sign in through your Gmail account.
- BigBlueButton webinar window

Using BigBlueButton website to create webinar session

Once you login, you will see the BBB screen as showing in the above image.
- Copy the invite participants link to share with your participants to join your main room. If you want to create new rooms for multiple sessions, click on Create Room button and you can configure all the settings.
- When you want to start the session click on the “Start“ button. Participants also will join by clicking on the link which you have shared with them.
- Also, you can access all your session recordings in the main window.

Webinar session through Moodle Course
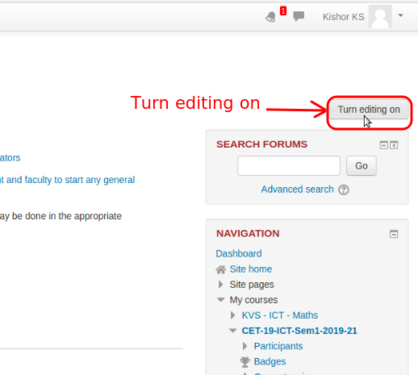
Go to your Moodle course page, click on the turn editing on button to create BBB webinar session with course participants. Go to the section where you want to create link, click on “Add an activity or resource“ and select BigBlueButton option from the list, fill all the required information, invite participants etc. After you enter the required information click on th Save and Display option.
- Login to Moodle access BBB webinar session
Moodle login page
- BBB- Adding BBB activity to Moodle.png
Adding BBB webinar session in course sections
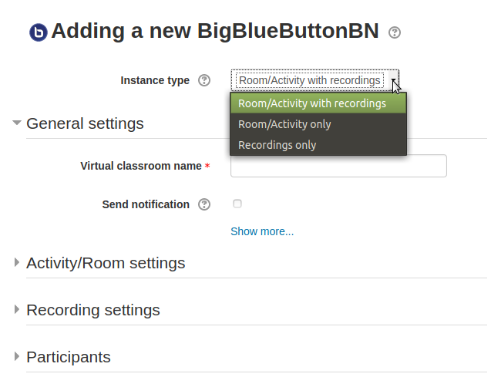
Adding basic information for the BBB session


Once you create this, the session link will add in the section. Click on the link to start the session, in the next screen it will ask you to click on join session, click that to start your session.
Familiar with BBB user interface
Once you start the session your session will ask you to connect your audio, select mic to speak in the session, select speaker only to listen others audio.
If you select mic option and Click yes, if are are able to listen echo sound.
Once you do this you will come to the main BBB webinar session screen as showing in the below screen.
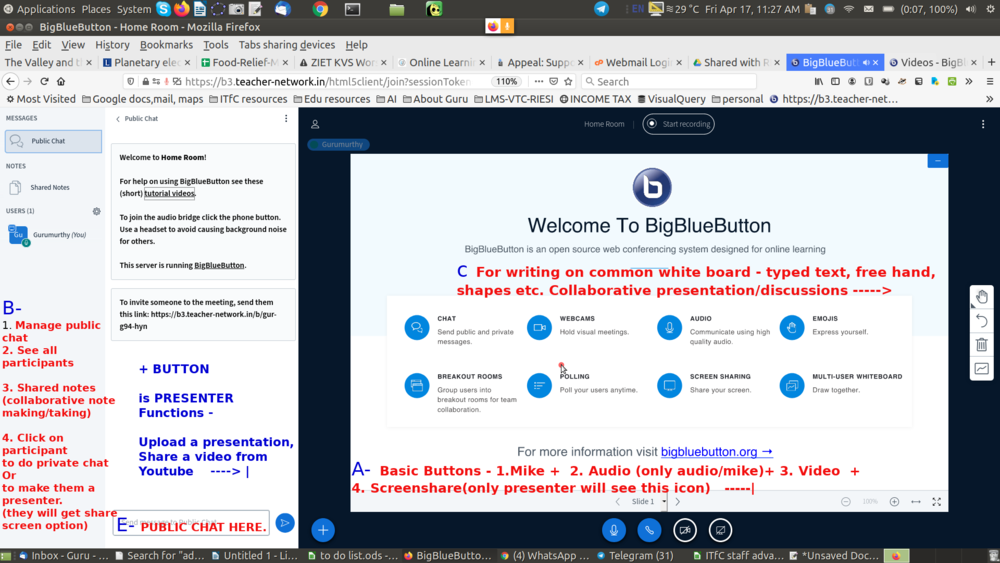
BigBlueButton main window

- In the bottom of the window you will get four buttons
- Mic : You can mute/unmute your audio to others (if you are not talking better to mute your mic, this will avoid disturbance to others in the sessions).
- Leave audio : here you can exit from the audio option like if you don't want to listen or speak in the sessions. Also you can change your audio connected type.
- Video : By using this button you can disable and enable your video.
- Share your screen : Here you can share your screen to all the participants – if you want to show something from your laptop, click here and choose the application window which you want show.
Select entire screen option to show all the windows which you opened in your computer.
At any time you can stop share screen option by clicking on this same button.
- Here in the left side bar, you can manage participants, chats and your session notes
- Public chat : Here you can chat with all the participants or participants can share their doubts, comments in a text.
- Shared notes : Faculties can share some notes, information with the participants.
- Users list : Here we can mute/unmute participants mic, remove participants, also by clicking on each users, you can do private chat with them.
As explained in the above as a faculty/instructor, You should able to see the „Share your screen“ option, if not ask other presentor to make you as presentor, Now you will able to see this option.

Share your screen for the participants

Click on this Share your screen button“ to share your presentation or any other your computer application window with participant, by simply selecting the applications window.
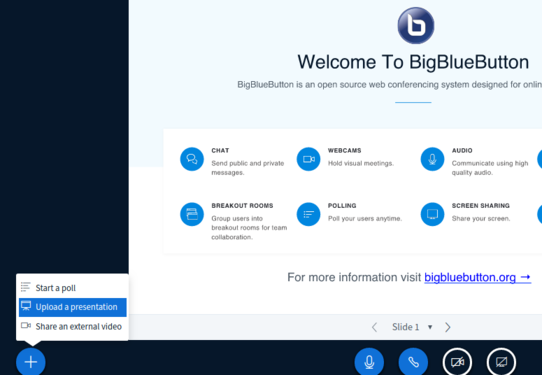
Upload presentation
Click on the plus (+) symbol and select upload a presentation, browse your presentation file from your computer, once it upload, select file and click on confirm to start presenting the file.
- Login to Moodle access BBB webinar session
Upload your presentations
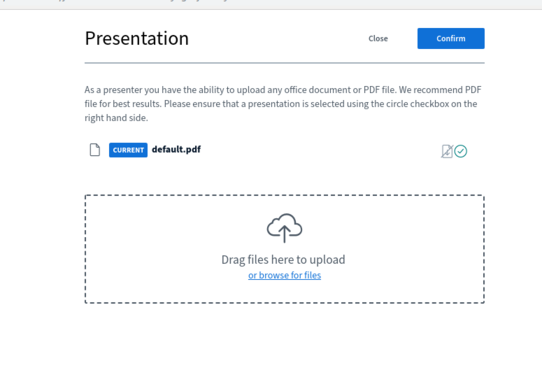
Upload your files here


Also for playing youtube videos to the participants, click on plus (+) symbol → share an external video option and paste your link ( along with YouTube, it will support Vimeo, Instructure Media, Twitch and Daily Motion URLs).
Control Users activity
On left side user list click one the setting icon, from here you can mute/unmute all the users, block users and Clear users status icons and etc., as showing in the below image.
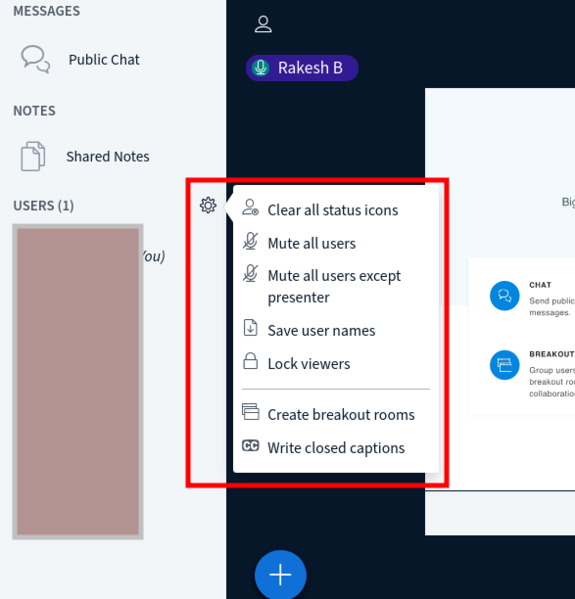
Userslist control

Whiteboard
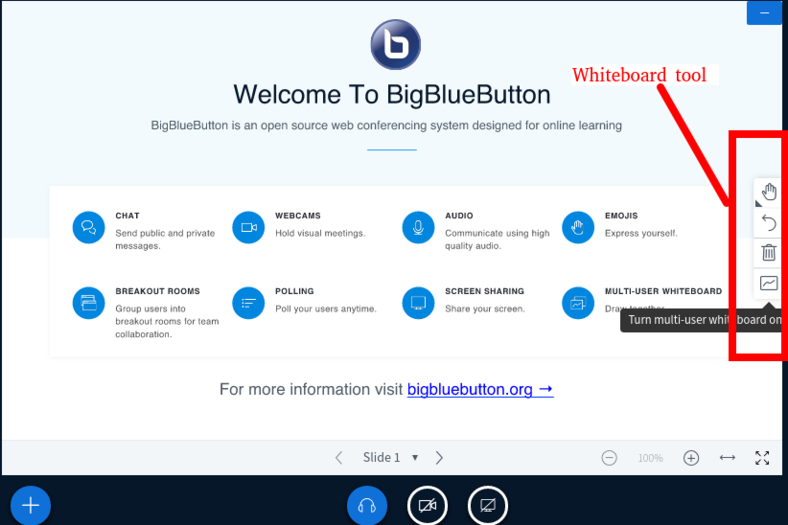
White board to write on your presentation file

You can enables the multi-user whiteboard, all users in the BigBlueButton session can annotate the whiteboard simultaneously.The whiteboard controls will appear to the right hand side in the presentation area.
By default the Pencil tool is enabled; you can use the other whiteboard controls to change the Thickness and Colour of the line.
Making another person a Presenter/Moderator
Click on the name from the left side users list to make that person as presenter or moderator and select make present/Moderator. Click on your name from the user list and select take presenter option to take back presenter feature from other.
(Note: A moderator can mute/unmute other viewers, lock down viewers (such as restrict them from using private chat), and make anyone the current presenter. There can be multiple moderators in a session.)
Create breakout room
Accessing/Download audio and video recordings of the sessions
After the session completes come back to the Join session window in Moodle and go to your home page in BigBlueButton website to access or playback sessions.
For downloading these videos from the Moodle course page, Copy paste below URL in browser address bar https://b3.teacher-network.in/download/presentation/<internal-id>/<internal-id>.mp4
Replace the <internal-id> with the video internal ID which you can find out while playing the video
Example :- Here the internal meeting id is the alphanumeric id that comes after meeting Id= https://b3.teacher-network.in/playback/presentation/2.0/playback.html?meetingId=267342479471d1f652b761709c419cb86396c3b3-1586767642299
Participants/Students section
Join BBB webinar session
There are two ways to join BigBlueButton webinar sessions,
- If you are faculty share a "BigBlueButton" direct link, you just need to click on the link which will take you to the webinar session.
- If you are part of any Moodle course, you have to login your Moodle course and click on the BigBlueButton webinar link as shown in the below steps.
- Login to Moodle access BBB webinar session
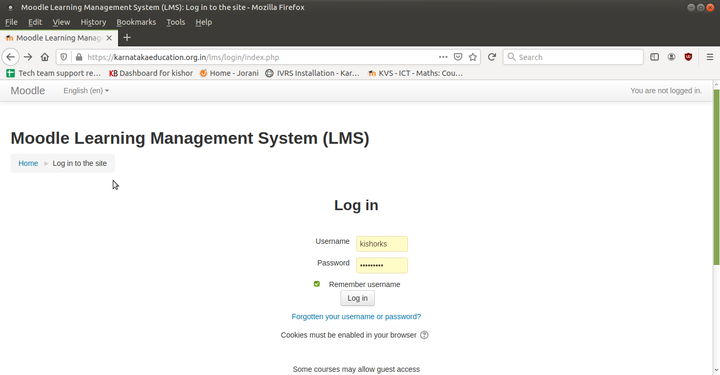
Image1 – Moodle course Login page
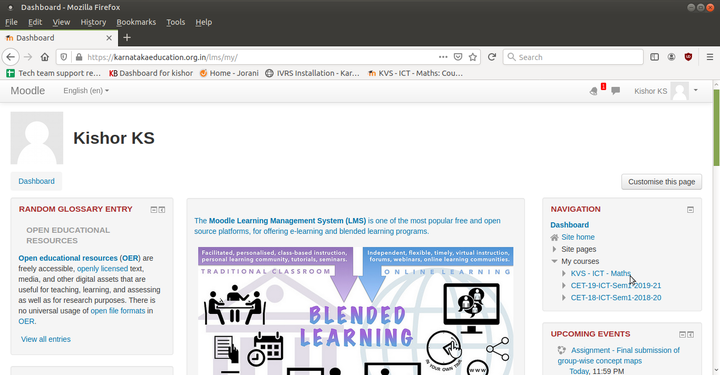
Image2 – Moodle main page
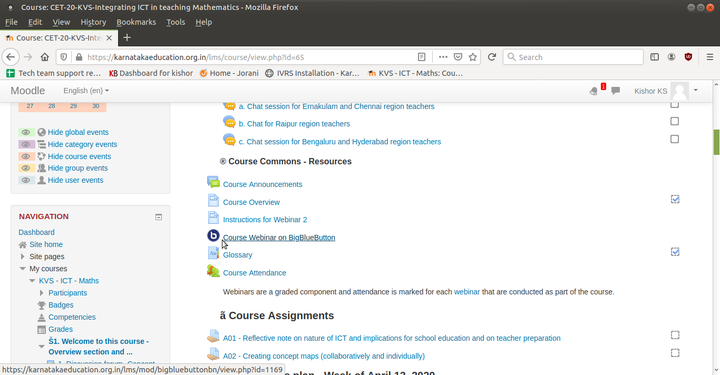
Image3 – Click on “Course Webinar on BigBlueButton”


- You have to go to your Moodle course page and use your Moodle login ID and password to login.
- Goto the course overview section or any other section as faculty instructed you.
- You need to click on Course Webinar on BigBlueButton link has shown in the image3.
Join session with audio
- Connecting your audio to the webinar
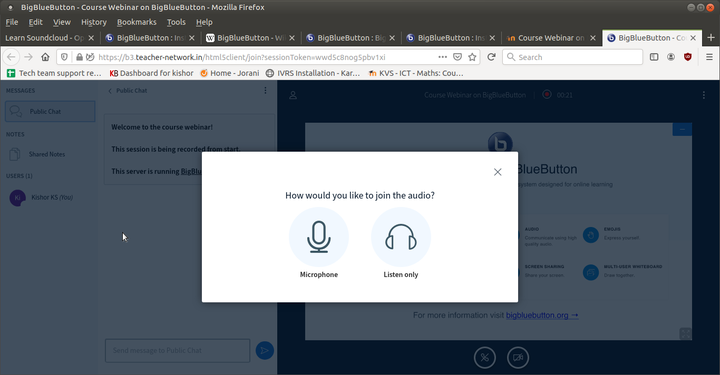
Image4- Prefer your audio connectivity
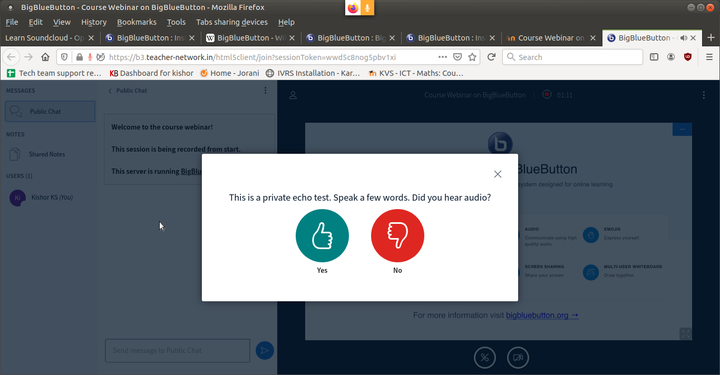
Image5 – Confirming your audio is connected
- BigBlueButton webinar main page.png
Image6 - BigBlueButton webinar main page


- After you joining the session, you will get pop-up notification has shown in image4. Here you have to select your audio preference as below:
- If you are not going to talk, only for listening others talk, choose “Listen only”
- In the webinar session, If you are going to talk than choose “microphone” option. By selecting Microphone option you can speak and also you can listen others speech.
- After you choose your audio preference, you will get “echo test” pop-up window has shown in image5. If you are able to listen the echo, then click on “Yes” option.
- Now you are logged into BigBlueButton(BBB) webinar session. Now you should see the screen as shown in the image6.
Configure Mic, video cam and the public chat
- BigBlueButton webinar window
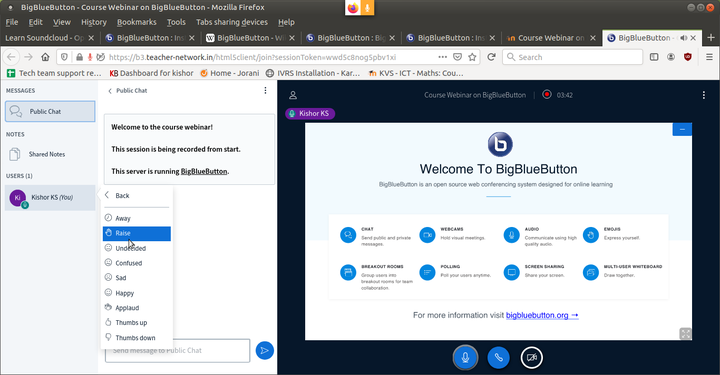
Image7 – how to select status

- In the previous step, if you have chosen Microphone and you don't want talk now, please click on the Microphone button on the bottom of the screen (by doing this others will not get your audio, when other are speaking). You can always unmute your audio by clicking on the same button.
- If you do not want to share your videos, click on video icon to disable/enable it.
- On the left side for the webinar window you will get three options which are: Messages, Notes and Users
- Messages : Here you can see all the text chats which participants can do the text chat with all the participants.
- Notes : Here If faculty wants to share any notes for the participants, they will use this place.
- Users : You can see the list of participants and faculties are in the session and if you click on each names, you can privately chat with them.
Also, If you click on you own name, you will get set of status which will visible to every one. If you have any doubts and if you want talk, you can choose “raise hand” status.
Raise hand
Under emoji option, you can use raise hand emoji status to ask questions to the faculty or if you want to talk in the session. Once you put raise hand emoji status, Faculty will give chance to talk.
Saving and sharing
Not applicable.
Frequently Asked Questions (FAQ)
Not able to connect my microphone (Blocked) in my phone chrome browser ?
On your Android device, open the Chrome app Chrome.
- To the right of the address bar, tap More Organize and then Settings.
- Tap Site Settings.
- Tap Microphone or Camera.
- Tap to turn the microphone or camera on or off.
- If you see the site you want to use under Blocked, tap the site and then Access your microphone and then Allow.
This will happen when in some point of time your network stopped working and connected back to webinar, it wont show the the live screen screen.
Please refresh your page or restart your browser to connect back to session and to she the faculty sharing screen.
Advanced features
As a viewer, a user may join the voice conference, share their webcam, raise their status, and chat with others.
References
- To know more how to use BigBlueButton refer the given link https://youtu.be/Q2tG2SS4gXA which gives simple instructions.
- Refer the link https://bigbluebutton.org/html5/ for some more Tutorial videos of BigBlueButton.