Difference between revisions of "Learn Peek"
| (10 intermediate revisions by 3 users not shown) | |||
| Line 40: | Line 40: | ||
=== Working with the application === | === Working with the application === | ||
| + | Please see this link to know how to create animated gifs on ubuntu - http://ubuntuhandbook.org/index.php/2016/11/record-animated-gif-ubuntu-16-04-peek | ||
| + | ==== Application Interface ==== | ||
| + | [[File:1. Open peek tool from menu.png|center|thumb]] | ||
| + | To open Peek application from Applications -> Sound & Video -> Peek | ||
| + | |||
| + | ===== Record your screen ===== | ||
| + | <gallery mode="packed" heights="270px"> | ||
| + | File:2. resizing peek recording area.png| ''resizing peek recording area'' | ||
| + | File:3. click on record as GIF button to start record.png|''Recording start'' | ||
| + | File:4. click on STOP button to stop gif recording.png|''Recording stop'' | ||
| + | </gallery> | ||
| + | This will open window with simple interface. This window can be resized to select a screen area by hold and dragging the screen to record over. After resizing Peek window to select a screen area, click the '''Record''' button to start recording. | ||
| + | |||
| + | Until you click on stop button, it will keep recording your selected screen area (before recording, you can configure whether you want to show mouse cursor actions in the gifs). | ||
| + | |||
| + | Once you stop the recording, a dialog pops-up and prompts you to give a name and select where to save the GIF image. | ||
| − | ==== | + | ===== Save gif image ===== |
| + | [[File:5. Give file name to save the gif files.png|500px|''Saving'']] <br> | ||
| + | After you save the GIF image, a dialog pops-up on the top right side of your screen, it will allow you to open the file folder quickly with the GIF image automatic highlighted. | ||
| + | |||
| + | ==== References ==== | ||
| + | http://ubuntuhandbook.org/index.php/2016/11/record-animated-gif-ubuntu-16-04-peek | ||
[[Category:Explore an application]] | [[Category:Explore an application]] | ||
Latest revision as of 12:56, 23 June 2020
Introduction
Basic information
| ICT Competency | Peek is a Free and open source software application that can be used for creating silent screencasts of an area of the screen for creating GIF animations.
Also, you can use this tool for screecasting and it will save silent WebM or MP4 formats. |
| Educational application and relevance | Animation(gif) files can be very helpful when you want to demonstrate something that would be difficult to explain in screenshots or videos. |
| Version | 1.2.1 version. |
| Configuration | No specific configuration requirements. |
| Other similar applications | |
| The application on mobiles and tablets | |
| Development and community help |
Overview of Features
Installation
- The application is not part of the Ubuntu custom distribution.
- You have to use terminal for installing this application.
- Open terminal by clicking Applications->System Tools->Terminal or through Keyboard shortcut
Ctrl+Alt+T - In the terminal window, run the below commands one by one.
sudo add-apt-repository ppa:peek-developers/stable- Just type your password(it will not display on your screen), press Enter
sudo apt update && sudo apt install peek
- Open terminal by clicking Applications->System Tools->Terminal or through Keyboard shortcut
Working with the application
Please see this link to know how to create animated gifs on ubuntu - http://ubuntuhandbook.org/index.php/2016/11/record-animated-gif-ubuntu-16-04-peek
Application Interface
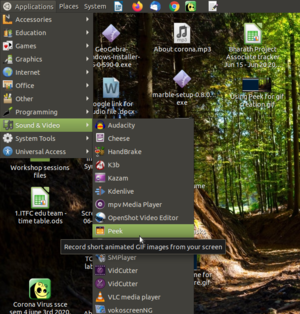
To open Peek application from Applications -> Sound & Video -> Peek
Record your screen
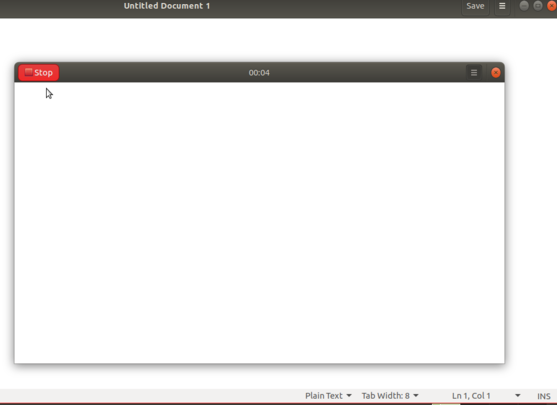
This will open window with simple interface. This window can be resized to select a screen area by hold and dragging the screen to record over. After resizing Peek window to select a screen area, click the Record button to start recording.
Until you click on stop button, it will keep recording your selected screen area (before recording, you can configure whether you want to show mouse cursor actions in the gifs).
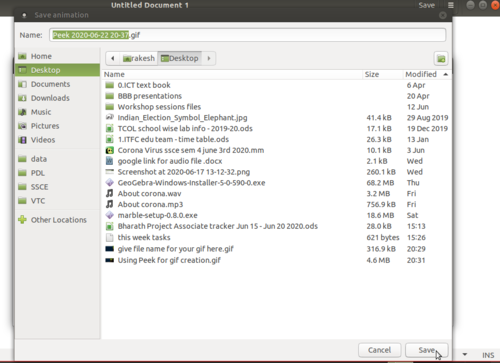
Once you stop the recording, a dialog pops-up and prompts you to give a name and select where to save the GIF image.
Save gif image

After you save the GIF image, a dialog pops-up on the top right side of your screen, it will allow you to open the file folder quickly with the GIF image automatic highlighted.
References
http://ubuntuhandbook.org/index.php/2016/11/record-animated-gif-ubuntu-16-04-peek


