Difference between revisions of "Learn wisemapping"
| (36 intermediate revisions by the same user not shown) | |||
| Line 1: | Line 1: | ||
| − | |||
| − | |||
| − | |||
<div class="noprint" style="float:right; border:1px solid blue;width:300px;background-color:#F5F5F5;padding:2px;"> | <div class="noprint" style="float:right; border:1px solid blue;width:300px;background-color:#F5F5F5;padding:2px;"> | ||
{| cellspacing="0" | {| cellspacing="0" | ||
| Line 185: | Line 182: | ||
</gallery> | </gallery> | ||
| − | ==== <big> | + | ==== <big>Bulk node styling</big> ==== |
Suppose you want to apply the same style, color, or font style to the child nodes. You need to first select the node (whether it's a root node or a sub node) and make the changes you need. These changes will reflect on all the child nodes of that particular node. | Suppose you want to apply the same style, color, or font style to the child nodes. You need to first select the node (whether it's a root node or a sub node) and make the changes you need. These changes will reflect on all the child nodes of that particular node. | ||
| Line 196: | Line 193: | ||
*If you want to make changes to the entire mindmap, you can perform the operation on the parent node. This will reflect on all sub nodes and child nodes. | *If you want to make changes to the entire mindmap, you can perform the operation on the parent node. This will reflect on all sub nodes and child nodes. | ||
| + | |||
| + | <gallery mode="packed" heights="450px"> | ||
| + | File:Step1wm.gif|Making changes to a sub-node without affecting its child nodes | ||
| + | <br> | ||
| + | File:Step5mp.gif|Making changes to a sub-node and all its child nodes | ||
| + | </gallery> | ||
| + | |||
| + | ==== Connection Style and Adding Icons ==== | ||
| + | |||
| + | In WiseMapping, you can customize the node connections and their colors for both sub nodes and parent nodes. You can also make your mind map more visually stunning by adding icons. | ||
| + | |||
| + | To Change Connection Style: | ||
| + | |||
| + | Choose the node you want to change => Go to the toolbar => Select the "Connection Style" section => You will see various connection styles, Choose the one you want => In the same section, you can find the color option => Choose the color you want | ||
| + | |||
| + | <gallery mode="packed" heights="450px"> | ||
| + | File:Connection style.gif|changing connection style | ||
| + | </gallery> | ||
| + | |||
| + | Adding Icons: | ||
| + | |||
| + | Choose the node you want to change => Go to the toolbar => Select the "Icon" section. Here, you will find a bunch of icons , Choose the one you want => to remove an icon, place the cursor on the icon in the node => It will show a ✘ icon => Click on it to remove the icon. | ||
| + | |||
| + | <gallery mode="packed" heights="450px"> | ||
| + | File:Adding icons.gif|adding icons to the nodes | ||
| + | </gallery> | ||
| + | |||
| + | {{note}} You can't add icons in bulk as we did with other features like changing colors and styles. | ||
| + | |||
| + | ==== Adding Notes ==== | ||
| + | |||
| + | If you have more information about a topic that can't fit well in a node without making it too wide, you can use the "Add Notes" feature in WiseMapping. This feature allows you to add brief information to a particular node. | ||
| + | |||
| + | To Add Notes: Choose the node you want to add notes to => Go to the toolbar section => Select the "Add Notes" option => Copy and paste the text you want to add, or type longer sentences directly => Once done, press "Create". | ||
| + | |||
| + | Now, whenever you place the cursor on that node, it will display the longer text you have added. | ||
| + | |||
| + | <gallery mode="packed" heights="450px"> | ||
| + | File:Adding note.gif|adding notes to the nodes | ||
| + | </gallery> | ||
| + | |||
| + | ==== Adding Links ==== | ||
| + | |||
| + | If you want to add or embed a reference link into a node to provide additional information or references from websites, you can do so easily in WiseMapping. You can add any website link or YouTube video link, and once you share your mind map, others can access the link directly. | ||
| + | |||
| + | To add the link => Choose the node you want to add the link to => Go to the toolbar section => Select the "Add Link" option => Copy the website or YouTube link you want to add => Paste the link into the provided field. | ||
| + | |||
| + | Now, whenever you place the cursor on that node, it will show an option to go to the link. | ||
| + | |||
| + | <gallery mode="packed" heights="450px"> | ||
| + | File:Adding links.gif|adding link to the nodes | ||
| + | </gallery> | ||
| + | ==== Adding Relationships Between Nodes ==== | ||
| + | |||
| + | If you want to show that two different nodes in your mind map are connected by the same topic or share a relationship indirectly, you can use the "Add Relationship" feature. | ||
| + | |||
| + | To Add a Relationship: | ||
| + | |||
| + | Choose the node you want to add a relationship to => Go to the toolbar section => Select the "Add Relationship" option =>An arrow line will appear. => Choose the other node you want to connect with => Press Enter. | ||
| + | |||
| + | To Make the Relationship a Curve: Click on the relationship line => Drag the line to create a curve. | ||
| + | |||
| + | <gallery mode="packed" heights="450px"> | ||
| + | File:Adding relationship2.gif|adding relationship between nodes | ||
| + | </gallery> | ||
| + | |||
| + | ==== Themes ==== | ||
| + | |||
| + | In WiseMapping, you can customize the theme of your map to make it more visually appealing. Currently, WiseMapping offers four themes: Classic, Summer, Dark, and Robot. You can choose the one that suits your preference. | ||
| + | |||
| + | To change the theme: | ||
| + | Go to the toolbar section => Select the "Themes" option => Choose from the available themes: Classic, Summer, Dark, or Robot. | ||
| + | |||
| + | This will change the overall look and feel of your mind map. | ||
| + | |||
| + | <gallery mode="packed" heights="450px"> | ||
| + | File:Themes1.png|Changing the Theme of the Mind Map | ||
| + | </gallery> | ||
| + | |||
| + | |||
| + | === Collaboration and Publishing === | ||
| + | |||
| + | In WiseMapping, multiple people can work on the same map collaboratively, allowing various ideas to be represented in a single map. You can also make your map publicly available using the publishing feature. | ||
| + | |||
| + | ==== Giving Collaboration Access: ==== | ||
| + | |||
| + | Go to the top right corner and click on the "Share" option => Enter the email ID of the person you want to collaborate with => Choose "Can Edit" to allow that person to make changes to your mind map => You can also use the "Add Message" option to input any important information, like where you have finished the mind map or from where they can continue working => Press the "Share" button => Once you share your mind map, a request will be sent to the person's email ID. If they click on the link in the email, it will take them to your shared mind map. | ||
| + | |||
| + | {{Note}} The collaborator must have a WiseMapping account to make changes to the mind map and Whenever you both are working simultaneously, you need to refresh to see the changes made by your collaborator. | ||
| + | |||
| + | <gallery mode="packed" heights="450px"> | ||
| + | File:Collobration.gif|Collobrating feature demonstration | ||
| + | </gallery> </br> | ||
| + | |||
| + | <gallery mode="packed" heights="450px"> | ||
| + | File:Collobrator.gif|Collaborator window with whom you shared the map | ||
| + | </gallery> | ||
| + | |||
| + | ==== Publishing your MindMap ==== | ||
| + | |||
| + | Suppose you have created a mind map that would serve as a resource for educational purposes or you want to make your map publicly available so anyone with the link can see it. For this, you can use a feature called publishing. | ||
| + | |||
| + | To publish your mind map: | ||
| + | |||
| + | Go to the top right corner of the window => and select the option named 'Publish'=> Enable the public sharing checkbox by clicking on it and then choose the 'Accept' option => Once you click 'Accept', a message named 'Public URL' will immediately pop up You can copy that URL and share it with the people you want to see it, or if you have a website, you can place your mind map URL there. | ||
| + | |||
| + | <gallery mode="packed" heights="450px"> | ||
| + | File:Publishing.gif|Collaborator window with whom you shared the map | ||
| + | </gallery> | ||
| + | |||
| + | === Exporting Your MindMap === | ||
| + | |||
| + | In WiseMapping, various exporting options are available, and you can export your map in three formats: image, document, and mind map (.mm) format. | ||
| + | |||
| + | ==== Exporting formats ==== | ||
| + | |||
| + | |||
| + | 1.'''Image:''' You can export your mind map as a high-quality image in JPEG, SVG, or PNG format. | ||
| + | |||
| + | 2.'''Document:''' Currently, WiseMapping supports exporting the mind map as a .txt file and in Markdown format. These are the only document formats supported at the moment. | ||
| + | |||
| + | 3.'''Mind Map Format:''' If you have application software like FreeMind or Freeplane on your system, you can export your mind map in the .mm format and continue working on it there. | ||
| + | |||
| + | To export your mind map => Go to the top right corner of the window => Click on the export options => A pop-up will appear with three formats => Choose the format you want and click 'Export' | ||
| + | |||
| + | <gallery mode="packed" heights="450px"> | ||
| + | File:Exporting.gif|exporting the map demonstration | ||
| + | </gallery> | ||
| + | |||
| + | ===Additional Feature=== | ||
| + | |||
| + | ====Labeling:==== | ||
| + | |||
| + | allows you to categorize your mind maps under the same topic or category. For example, if you’ve created lesson plans for each chapter of a subject like science, you can group all these mind maps under a label called "Science." This makes it easier to track and manage mind maps that belong to the same category in one place. | ||
| + | |||
| + | Go to the main window of WiseMapping => Select the mind maps you want to label => Once selected, you’ll see an "Add Label" option at the top => Click on it and name the label (e.g., "Science") => After labeling, go to the bottom left corner of the window and click on the label icon => Now, you can see all the labeled mind maps grouped together under that label. | ||
| + | |||
| + | <gallery mode="packed" heights="450px"> | ||
| + | File:Labelling update.gif|'''demonstration of labeling feature''' | ||
| + | </gallery> | ||
| + | |||
| + | ==== Bookmarking: Starred Feature ==== | ||
| + | |||
| + | Similar to bookmarking web pages in a browser, you can bookmark your mind maps in WiseMapping using the "Starred" feature. | ||
| + | |||
| + | Select the mind map you want to bookmark => Click on the start icon option located left side of your mindmap => Once bookmarked, click on the "Starred" option again at the left corner and you will see the mind map you’ve bookmarked listed there for quick access. | ||
| + | |||
| + | <gallery mode="packed" heights="450px"> | ||
| + | File:Book1mark.gif|'''demonstration of bookmarking feature''' | ||
| + | </gallery> | ||
| + | |||
| + | ==== History: ==== | ||
| + | In the collaboration feature of WiseMapping, multiple people can work on the same mind map. If you want to track who made specific edits or changes, you can use the History feature. | ||
| + | |||
| + | <gallery mode="packed" heights="450px"> | ||
| + | File:Histroy.gif|'''demonstration of histroy feature''' | ||
| + | </gallery> | ||
| + | |||
| + | ==== Embedding Feature ==== | ||
| + | |||
| + | The embedding feature in WiseMapping allows you to integrate your mind maps into various external platforms, such as websites and blogs. However, embedding is only possible if your blog or website supports '''iframe''' embedding, which is required to display your mind map. | ||
| + | |||
| + | If you're not familiar with iframe or embedding techniques, it's recommended to get help from someone with tech expertise. | ||
| + | |||
| + | For reference, we've embedded a sample mind map we created for this learning page. You can view the embedded mind map below to see how it looks in action. | ||
| + | |||
| + | |||
| + | |||
| + | {{#widget:Iframe | ||
| + | |url= https://app.wisemapping.com/c/maps/1761186/embed?zoom=1.0|''' Embedding our digital storytelling map into our webpage ''' | ||
| + | |width=2000 | ||
| + | |height=700 | ||
| + | |border=0 | ||
| + | |text=Embedding our digital storytelling map into our webpage. | ||
| + | }} | ||
| + | |||
| + | |||
| + | [[Category:Explore an application]] | ||
| + | |||
| + | |||
| + | If you have a question that is not listed here, please [https://teacher-network.in/OER/index.php?title=Learn_wisemapping&action=edit post your question on the FAQ discussion page]. | ||
Latest revision as of 11:18, 18 September 2024

Introduction
Basic information
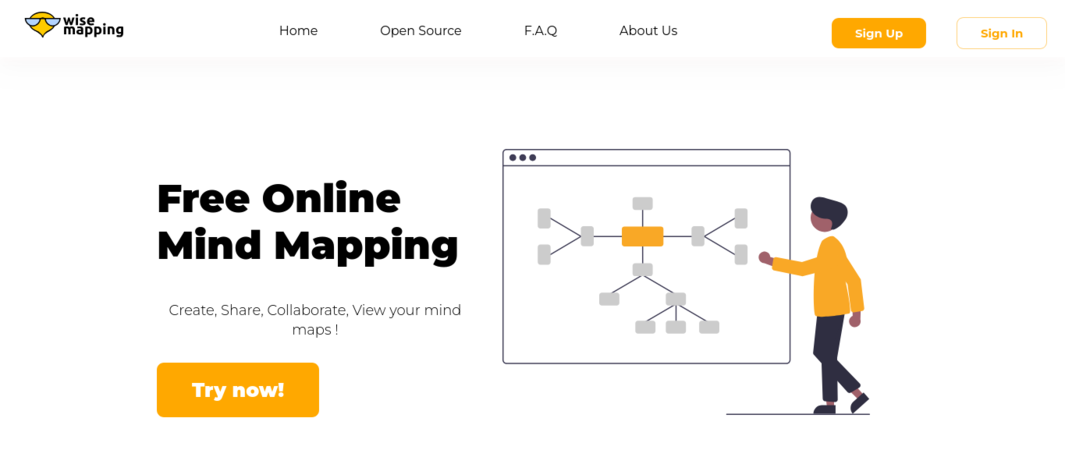
| ICT Competency | WiseMapping is a free, web-based mind mapping tool that allows users to create, share, and collaborate on mind maps online. This guide will help you understand how to use WiseMapping effectively for your projects'. |
| Educational application and relevance | Making concept maps can support thinking, brainstorming, sharing information and documenting meetings and group processes.
Educators consider that concept mapping is a good approach for building skills in students for ideating and organizing ideas; they also find it a great asset for teaching. It is a great tool for students to help them organize their thought processes when writing. Teachers and students can use this application to collaboratively or individually create concept maps on an idea or explore a problem. |
| Version | Version - 6.0 |
| Configuration | This tool has no specific configuration requirements. It is a web-based application accessible through any modern web browser. WiseMapping is available for use on all major operating systems, including Windows, Mac, Linux, and Android (not stable). |
| Other similar applications | teammapper |
| The application on mobiles and tablets | MiMind & teammapper |
| Development and community help | wisemapping |
Overview of Features
WiseMapping helps you create and manage mind maps with ease. It allows for the organization of ideas into a structured format that can be visually represented. The tool is entirely web-based, facilitating easy access and collaboration from any location without the need for installation. It offers features like:
- Mind Map Creation
- Linking Resources
- Annotations and Notes
- Rich Icons
- Hierarchical Organization
- Collaboration
- Embedding and Exporting
- Customizability
Setting Up a WiseMapping Account
Setting Up a WiseMapping Account

Creating an Account
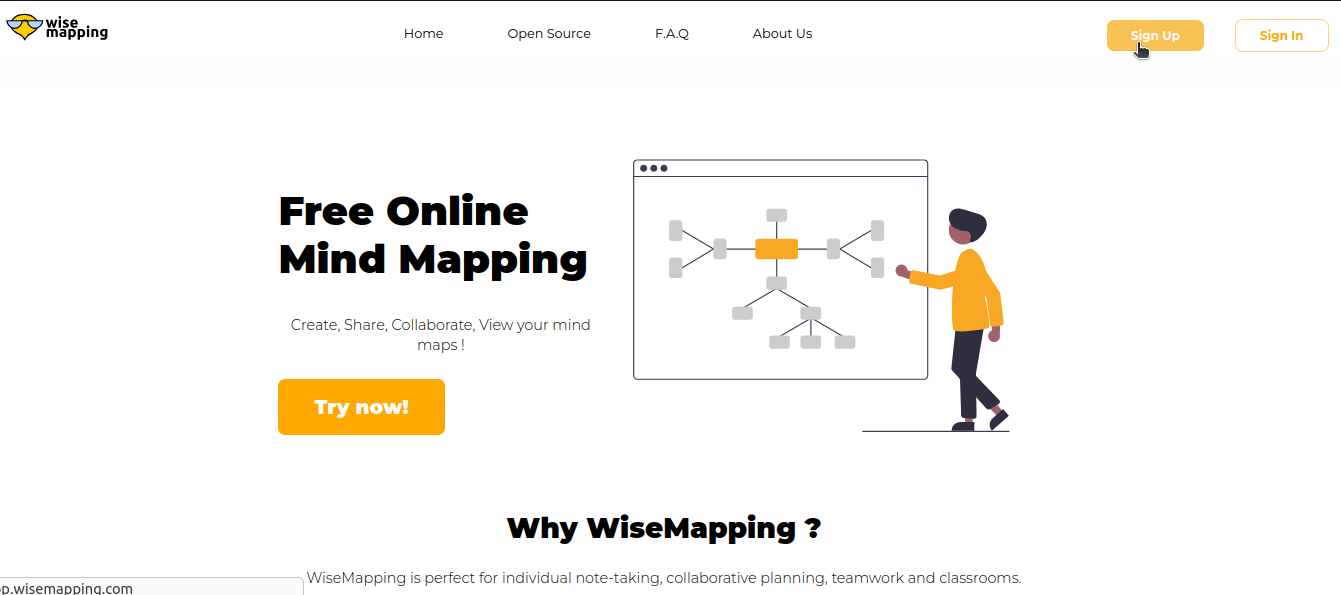
- Visit the WiseMapping Website
Sign Up
Click on the "Sign Up" button at the top right corner
signing up a wisemaping account

Choose a Sign-Up Method:
You will be provided with two options:
- Option 1: Fill in the required information (username, email, password) and complete the captcha.
- Option 2: Sign up with a Google account. This option will ask for permission to choose your email. Select your email ID and click Continue.

signing up a WiseMapping Account

Complete the Process
Once you click "Continue," your account will be created within a few seconds
![]() Note: Option 2, signing up with a Google account, is much easier than Option 1, the traditional sign-up method.
Note: Option 2, signing up with a Google account, is much easier than Option 1, the traditional sign-up method.
Working with the application
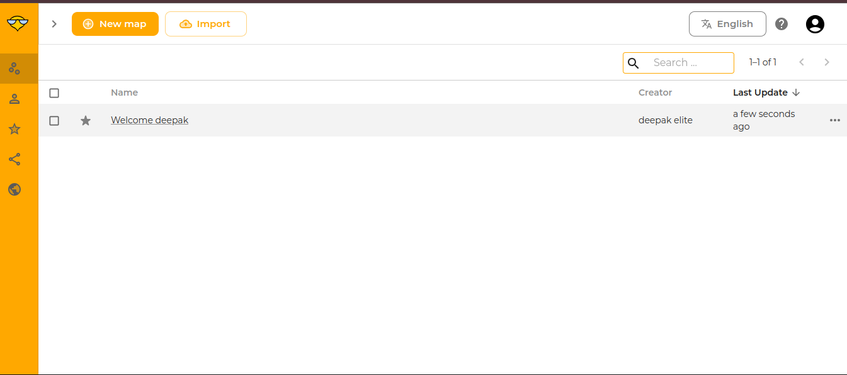
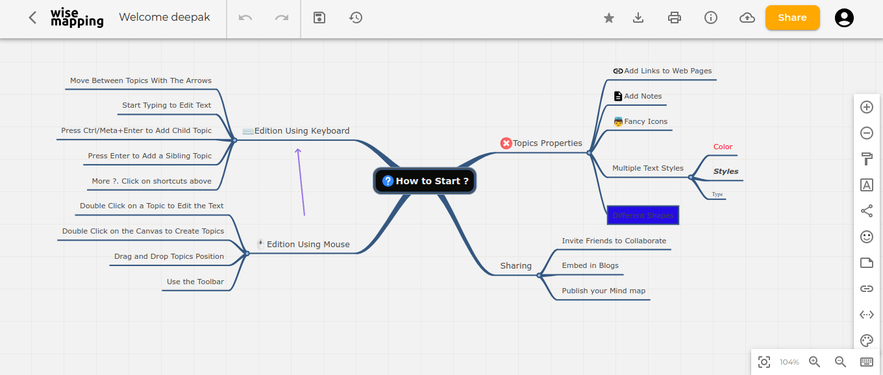
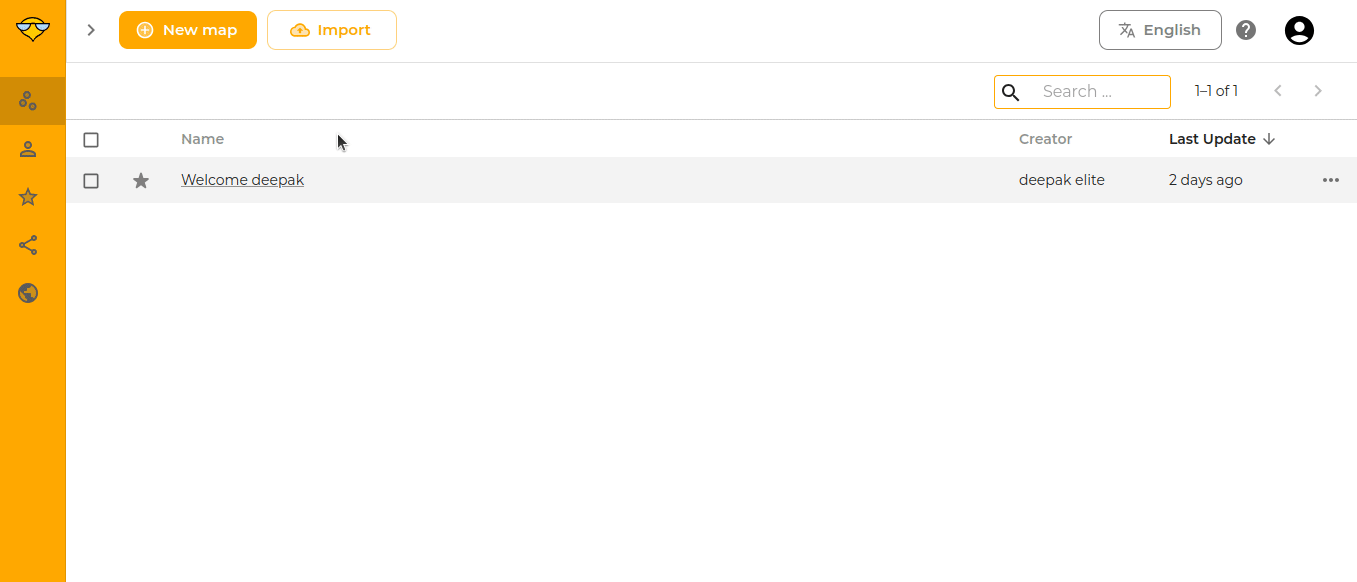
To learn working with WiseMapping, we will start by creating a concept map. Upon signing up or logging in to WiseMapping, you will see an interface similar to the one shown above. WiseMapping provides a demo mind map named "Welcome, [Your First Name]!" based on your Gmail account. This mind map is given by WiseMapping to help you understand its functionalities and features.
Main interface of wisemapping
Main window of wisemapping


Creating a map
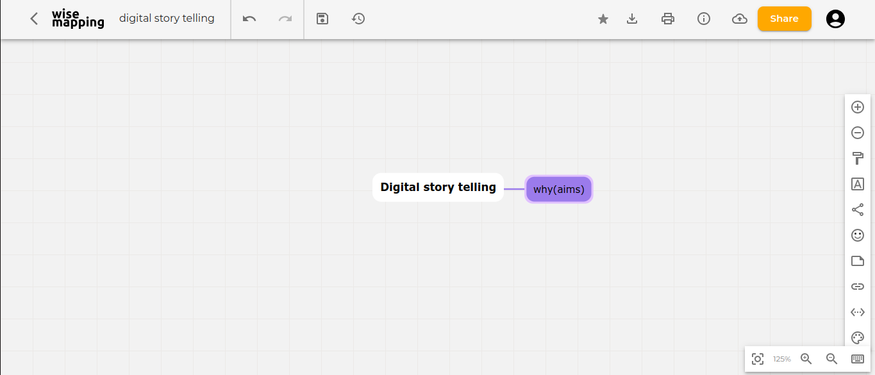
To create a mind map, go to the top left corner of the interface window and click on "New map." Once you click on "New map," it will ask for the map name. I will input "Digital Story Telling" as my map name. You will also need to fill in the description of the map to help others understand what your mind map is about when you share it. Once you click "Create," it will create the mind map.
Creating a mindmap

Toolbar Features
Once you create a map in WiseMapping, you'll see toolbar options on the right side. This toolbar helps you create a feature-rich mind map
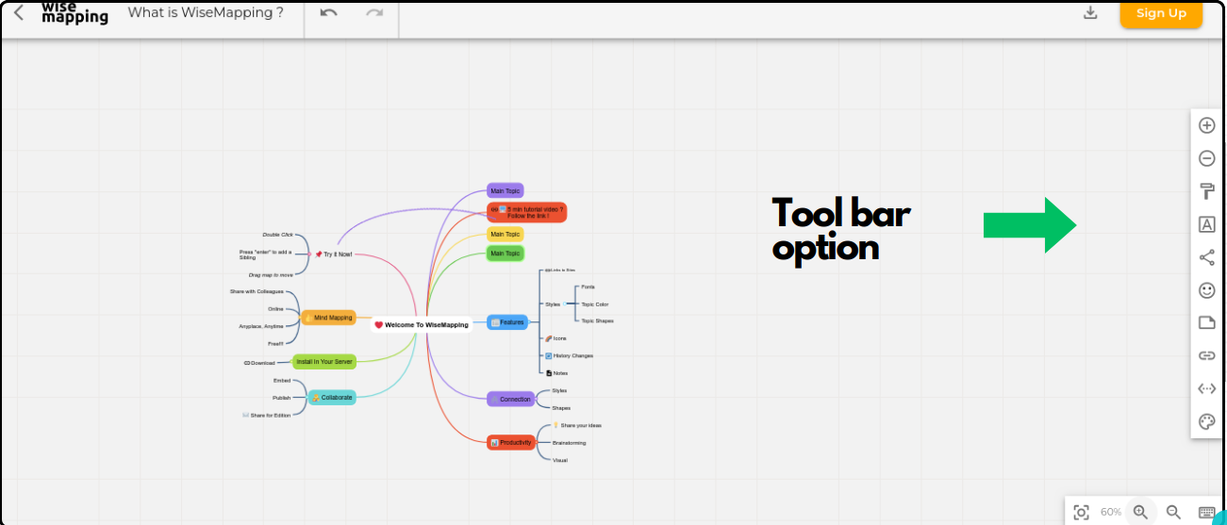
Toolbar options

The features includes:
- Add Topic: Insert new topics into your map.
- Delete Topic: Remove unwanted topics.
- Topic Style: Customize the appearance of topics.
- Font Style: Change the font of your text.
- Connection Style: Adjust the style of connections between topics.
- Icons: Add icons to topics.
- Notes: Attach notes to topics for additional information.
- Links: Insert hyperlinks into your map.
- Add Relationship: Create relationships between different topics.
Theme: Apply themes to your mind map for a cohesive look.
Inserting nodes
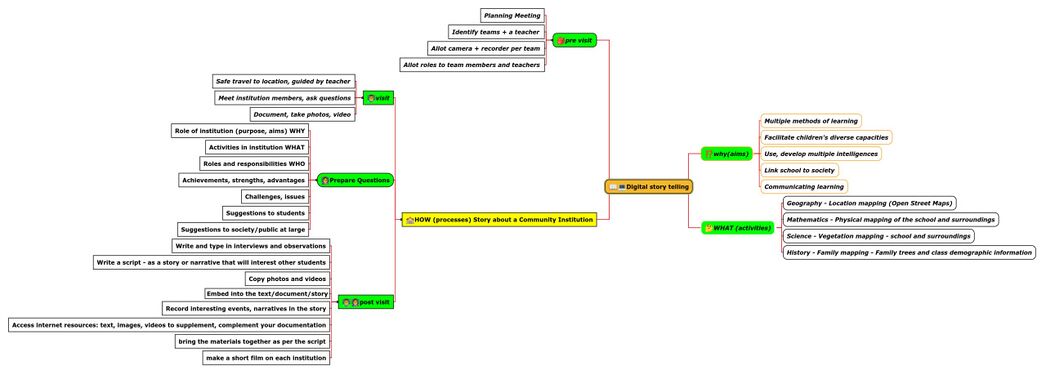
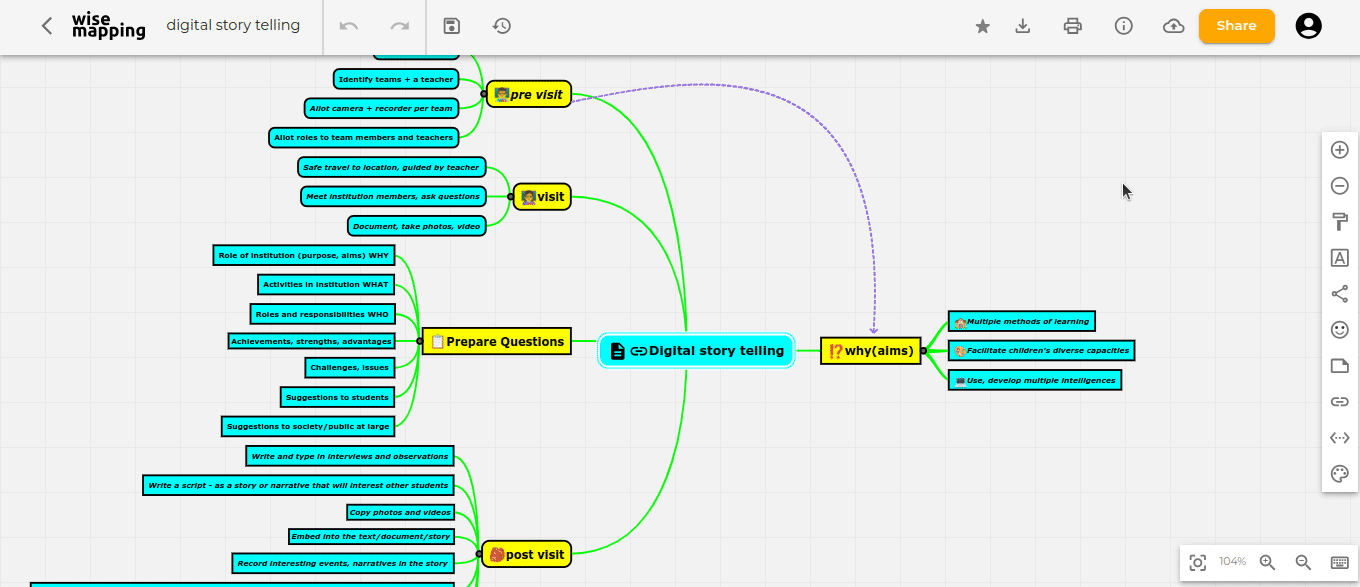
Here as an example, we have created a concept map called Learning Digital Story Telling. After the root node is created, additional ideas are added by adding more nodes, called child nodes. The concept map gets built by adding further child nodes, for topics and sub-topics. You can keep adding child nodes to any node.
- Use the ‘enter’ key to create a ‘sibling’ this is a parallel concept to your current concept.
- Use the ‘insert’ key to create a ‘child node’ this is a sub-concept of your current concept.
- To delete a node, use the backspace or delete key on your keyboard.
- If you want to use the toolbar to add or delete nodes, use the plus (+) icon to add a node and the minus (–) icon to remove a node.
Thus you can create a concept map with knowing just two functions – add child node (insert) and add sibling node (enter). In this manner, a concept map can be used to classify and categorize information.
- Child and sibling nodes
Child Node
Sibling Node


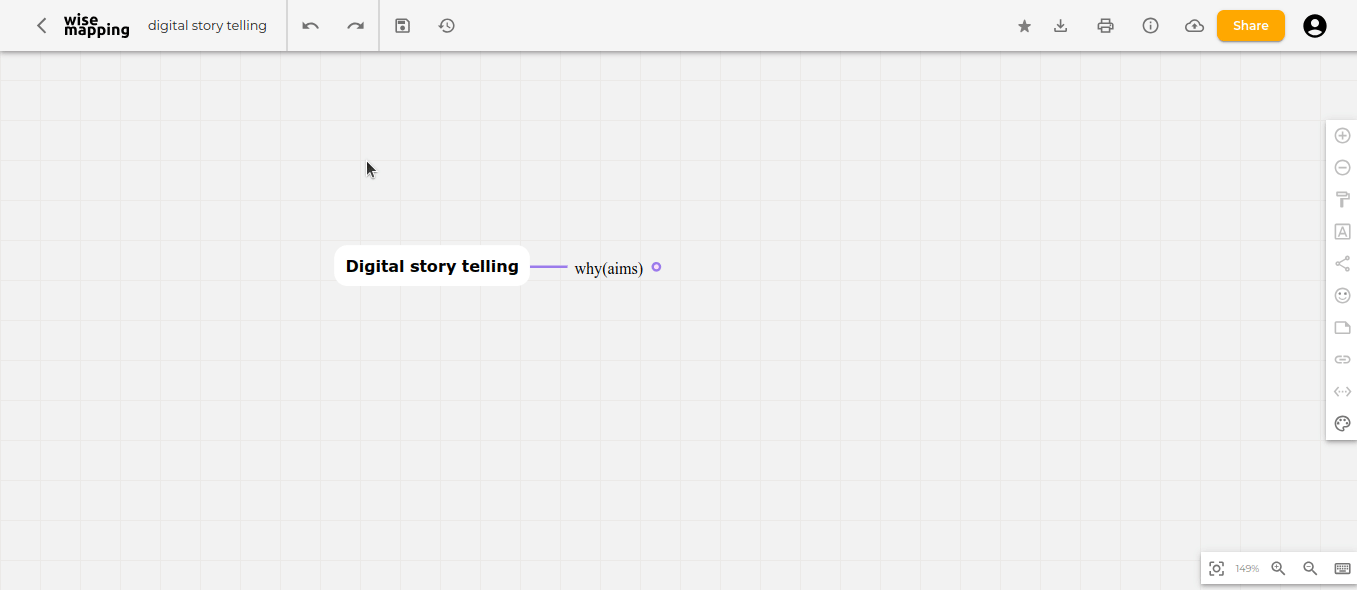
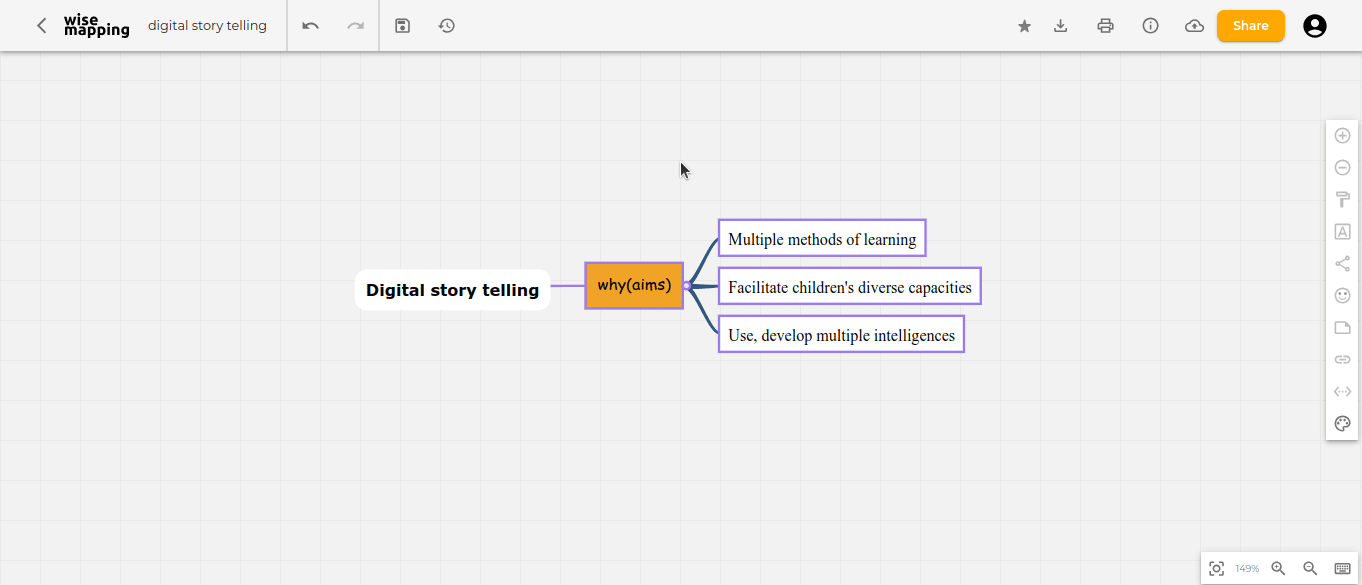
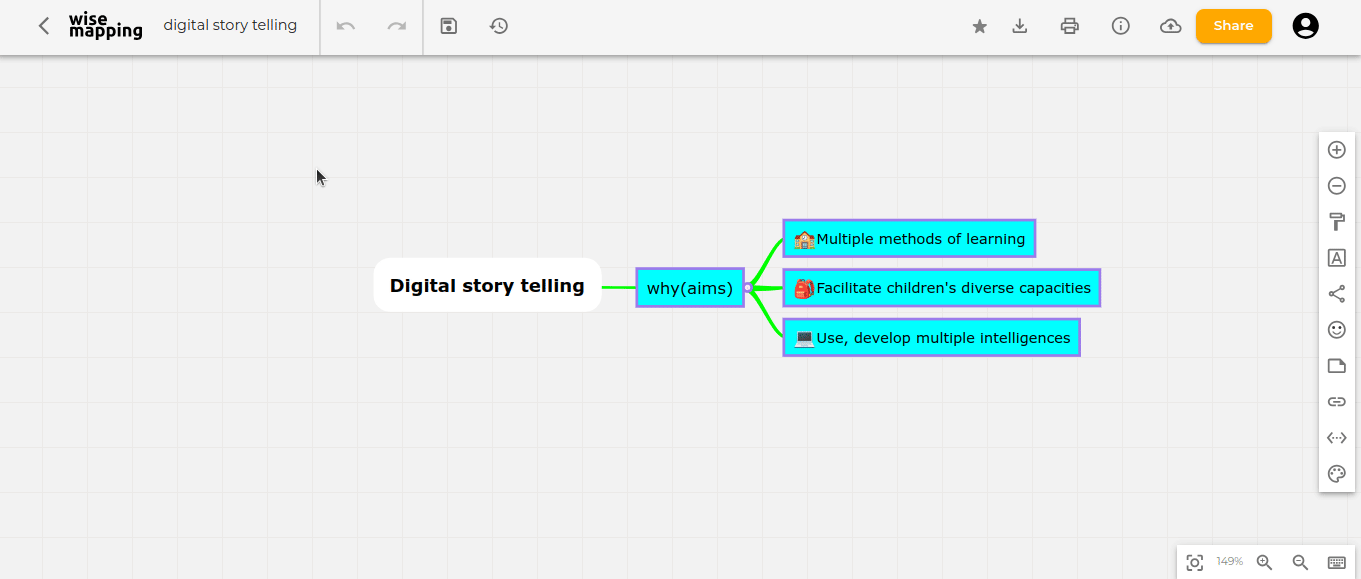
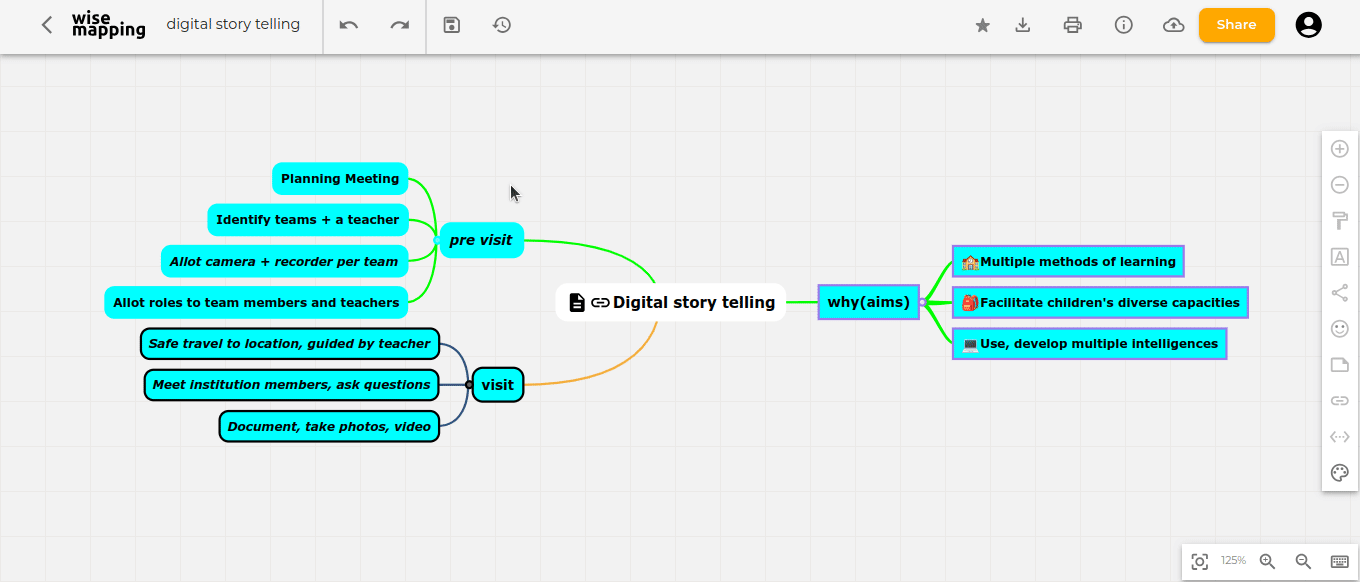
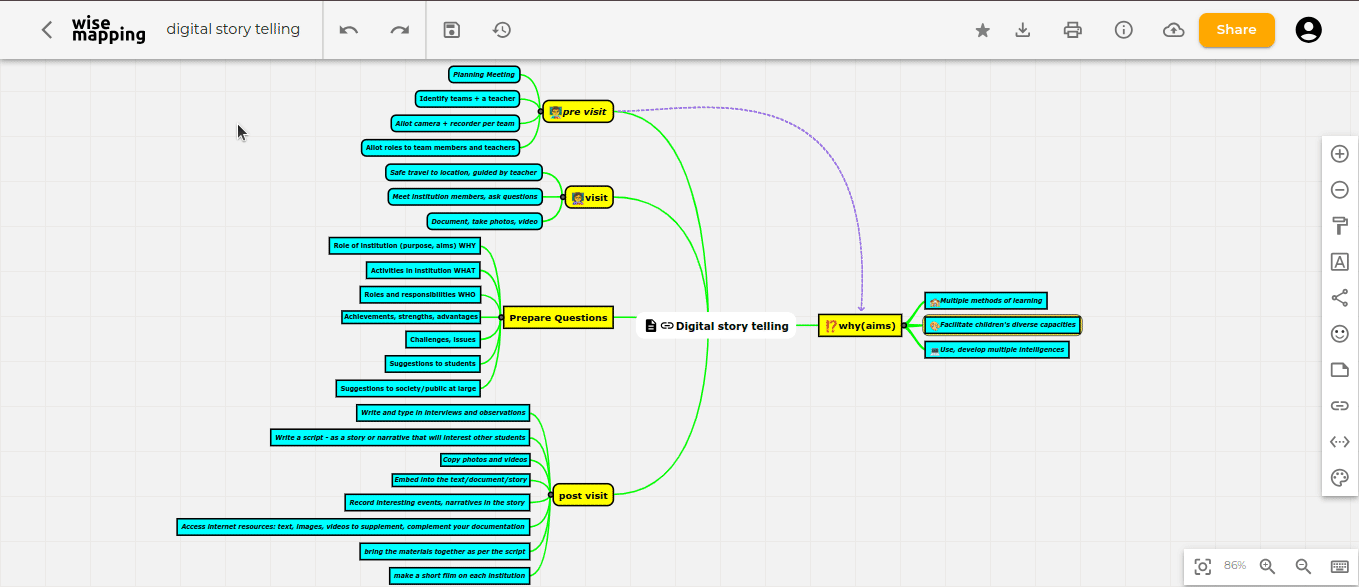
Our map has nodes for the ‘why’, ‘what’ and ‘how’ of DST, with sub-nodes.
- The first image shows the creation of a concept map with the first child node.
- The second image shows the completed concept map with child nodes and sibling nodes.
![]() Note: You can zoom in and zoom out the map as needed. To do this, click the zoom in and zoom out icons located in the bottom right corner of the interface.
Note: You can zoom in and zoom out the map as needed. To do this, click the zoom in and zoom out icons located in the bottom right corner of the interface.
Node Styling
In the Node Styling section, we can customize the appearance of our nodes and text, as well as the connection style and color.
There are two types of styling: Topic Styling and Font Styling.
Topic Styling
Whenever you want to style a node, you first need to give it a shape. Here are the steps to style a node in WiseMapping:
1.Selecting a Shape
- Go to "Topic Styling."
- On the left side, you will see various shapes. If you point the cursor at them, it will show the type of shape.
- I will choose the rectangle shape for my sub-node.
2.Changing the Color
- To change the color of the sub-node, go back to "Topic Styling."
- You will see the default color of the node. Click on the color.
- Choose the color you need.
You can also change the border of your particular node:
- In the "Topic Styling" section, locate the border settings, click on the border color, select the desired color, and adjust the border thickness if necessary.
Font Styling
As we did for Topic Styling, we can also customize the font style in WiseMapping. In Font Styling, we can change the size and style of the text in our nodes. We can change the text color, and we can make our node text bold or italic. Here are the steps:
1.Changing the Font Size
- To change the font size of any node (parent node, sub-node, or child node), go to the toolbar section and choose "Font Styling."
- On the left side, you will see options for text size.
- Click on "A+" to increase the text size of your node.
- Click on "A-" to decrease the text size of your node.
2.Changing Text Style To change text styles, go to the "Font Styling" section. On the left, you will see a drop-down option. If you choose that, various styles will appear. Select the style according to your need.
To make the text bold or italic, the options will be right there in the "Font Styling" toolbar. Click on B for bold and I for italic.
3.Changing Text Color
- To change the color of the text, choose the color option in the "Font Styling" toolbar.
- Select the color according to your needs.
Node Styling Demonstration

Bulk node styling
Suppose you want to apply the same style, color, or font style to the child nodes. You need to first select the node (whether it's a root node or a sub node) and make the changes you need. These changes will reflect on all the child nodes of that particular node.
Here are three important considerations when making bulk changes to subnodes:
- If you only want to make changes to the parent node or sub node and not the entire set of child nodes, click on the sub node's corner to hide the child nodes. This will prevent any changes from being reflected on the child nodes
- If you want the changes to reflect on both the parent node or sub node and its child nodes, unhide the child nodes and perform the operation. The changes will then be applied to the sub node and its child nodes.
- If you want to make changes to the entire mindmap, you can perform the operation on the parent node. This will reflect on all sub nodes and child nodes.
Making changes to a sub-node without affecting its child nodes
Making changes to a sub-node and all its child nodes


Connection Style and Adding Icons
In WiseMapping, you can customize the node connections and their colors for both sub nodes and parent nodes. You can also make your mind map more visually stunning by adding icons.
To Change Connection Style:
Choose the node you want to change => Go to the toolbar => Select the "Connection Style" section => You will see various connection styles, Choose the one you want => In the same section, you can find the color option => Choose the color you want
changing connection style

Adding Icons:
Choose the node you want to change => Go to the toolbar => Select the "Icon" section. Here, you will find a bunch of icons , Choose the one you want => to remove an icon, place the cursor on the icon in the node => It will show a ✘ icon => Click on it to remove the icon.

adding icons to the nodes
![]() Note: You can't add icons in bulk as we did with other features like changing colors and styles.
Note: You can't add icons in bulk as we did with other features like changing colors and styles.
Adding Notes
If you have more information about a topic that can't fit well in a node without making it too wide, you can use the "Add Notes" feature in WiseMapping. This feature allows you to add brief information to a particular node.
To Add Notes: Choose the node you want to add notes to => Go to the toolbar section => Select the "Add Notes" option => Copy and paste the text you want to add, or type longer sentences directly => Once done, press "Create".
Now, whenever you place the cursor on that node, it will display the longer text you have added.
adding notes to the nodes

Adding Links
If you want to add or embed a reference link into a node to provide additional information or references from websites, you can do so easily in WiseMapping. You can add any website link or YouTube video link, and once you share your mind map, others can access the link directly.
To add the link => Choose the node you want to add the link to => Go to the toolbar section => Select the "Add Link" option => Copy the website or YouTube link you want to add => Paste the link into the provided field.
Now, whenever you place the cursor on that node, it will show an option to go to the link.

adding link to the nodes

Adding Relationships Between Nodes
If you want to show that two different nodes in your mind map are connected by the same topic or share a relationship indirectly, you can use the "Add Relationship" feature.
To Add a Relationship:
Choose the node you want to add a relationship to => Go to the toolbar section => Select the "Add Relationship" option =>An arrow line will appear. => Choose the other node you want to connect with => Press Enter.
To Make the Relationship a Curve: Click on the relationship line => Drag the line to create a curve.
adding relationship between nodes

Themes
In WiseMapping, you can customize the theme of your map to make it more visually appealing. Currently, WiseMapping offers four themes: Classic, Summer, Dark, and Robot. You can choose the one that suits your preference.
To change the theme: Go to the toolbar section => Select the "Themes" option => Choose from the available themes: Classic, Summer, Dark, or Robot.
This will change the overall look and feel of your mind map.
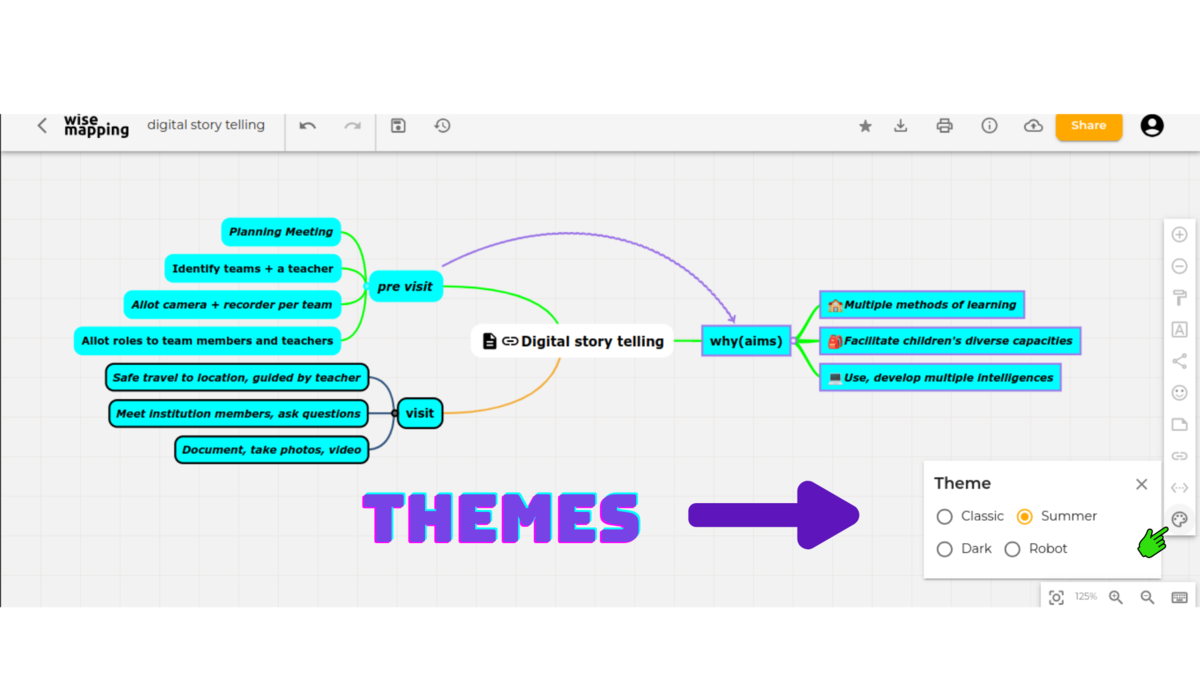
Changing the Theme of the Mind Map

Collaboration and Publishing
In WiseMapping, multiple people can work on the same map collaboratively, allowing various ideas to be represented in a single map. You can also make your map publicly available using the publishing feature.
Giving Collaboration Access:
Go to the top right corner and click on the "Share" option => Enter the email ID of the person you want to collaborate with => Choose "Can Edit" to allow that person to make changes to your mind map => You can also use the "Add Message" option to input any important information, like where you have finished the mind map or from where they can continue working => Press the "Share" button => Once you share your mind map, a request will be sent to the person's email ID. If they click on the link in the email, it will take them to your shared mind map.
![]() Note: The collaborator must have a WiseMapping account to make changes to the mind map and Whenever you both are working simultaneously, you need to refresh to see the changes made by your collaborator.
Note: The collaborator must have a WiseMapping account to make changes to the mind map and Whenever you both are working simultaneously, you need to refresh to see the changes made by your collaborator.
Collobrating feature demonstration

Collaborator window with whom you shared the map

Publishing your MindMap
Suppose you have created a mind map that would serve as a resource for educational purposes or you want to make your map publicly available so anyone with the link can see it. For this, you can use a feature called publishing.
To publish your mind map:
Go to the top right corner of the window => and select the option named 'Publish'=> Enable the public sharing checkbox by clicking on it and then choose the 'Accept' option => Once you click 'Accept', a message named 'Public URL' will immediately pop up You can copy that URL and share it with the people you want to see it, or if you have a website, you can place your mind map URL there.

Collaborator window with whom you shared the map

Exporting Your MindMap
In WiseMapping, various exporting options are available, and you can export your map in three formats: image, document, and mind map (.mm) format.
Exporting formats
1.Image: You can export your mind map as a high-quality image in JPEG, SVG, or PNG format.
2.Document: Currently, WiseMapping supports exporting the mind map as a .txt file and in Markdown format. These are the only document formats supported at the moment.
3.Mind Map Format: If you have application software like FreeMind or Freeplane on your system, you can export your mind map in the .mm format and continue working on it there.
To export your mind map => Go to the top right corner of the window => Click on the export options => A pop-up will appear with three formats => Choose the format you want and click 'Export'
exporting the map demonstration

Additional Feature
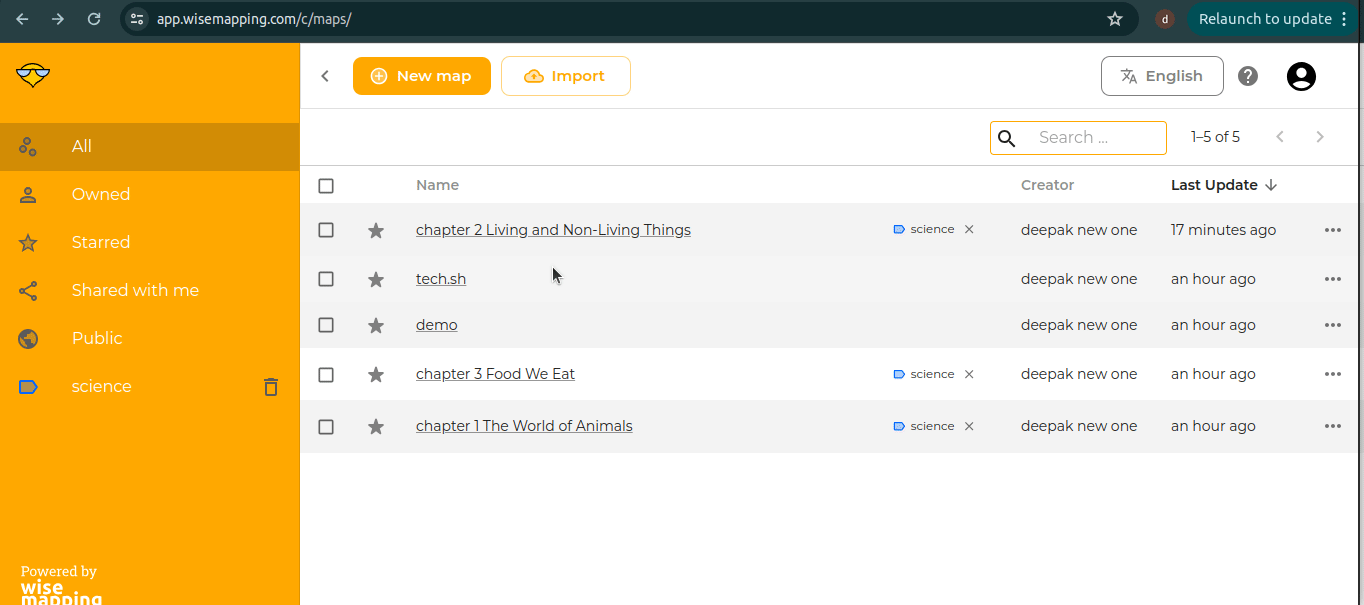
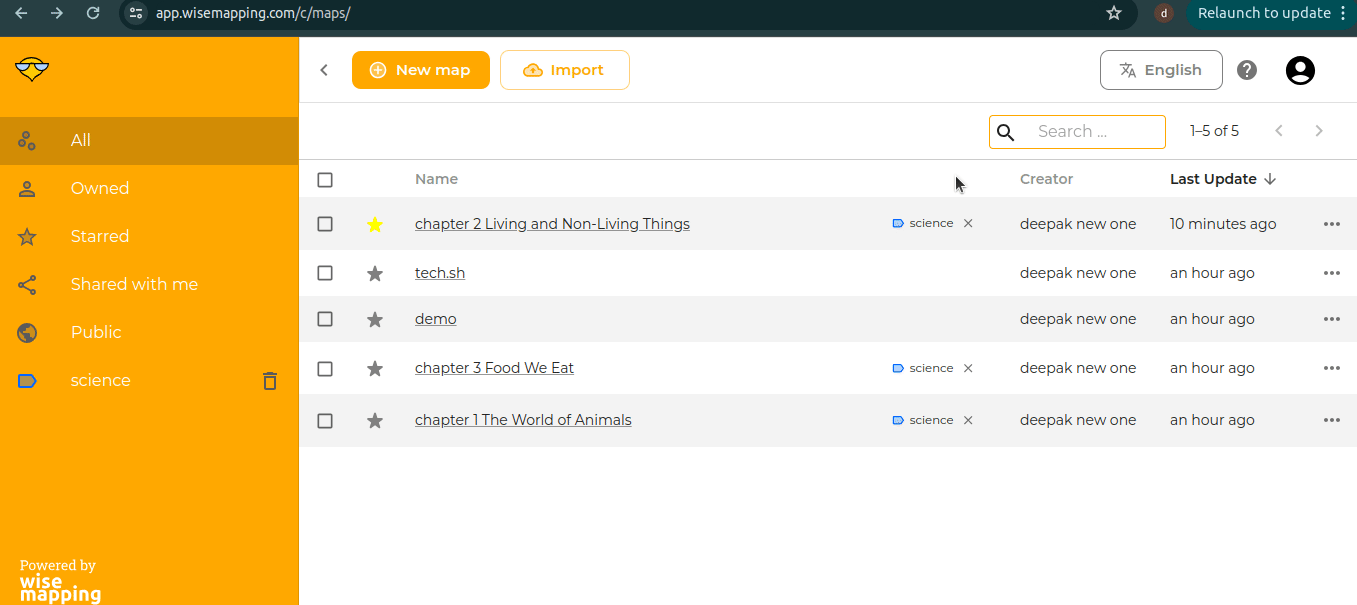
Labeling:
allows you to categorize your mind maps under the same topic or category. For example, if you’ve created lesson plans for each chapter of a subject like science, you can group all these mind maps under a label called "Science." This makes it easier to track and manage mind maps that belong to the same category in one place.
Go to the main window of WiseMapping => Select the mind maps you want to label => Once selected, you’ll see an "Add Label" option at the top => Click on it and name the label (e.g., "Science") => After labeling, go to the bottom left corner of the window and click on the label icon => Now, you can see all the labeled mind maps grouped together under that label.
demonstration of labeling feature

Bookmarking: Starred Feature
Similar to bookmarking web pages in a browser, you can bookmark your mind maps in WiseMapping using the "Starred" feature.
Select the mind map you want to bookmark => Click on the start icon option located left side of your mindmap => Once bookmarked, click on the "Starred" option again at the left corner and you will see the mind map you’ve bookmarked listed there for quick access.
demonstration of bookmarking feature

History:
In the collaboration feature of WiseMapping, multiple people can work on the same mind map. If you want to track who made specific edits or changes, you can use the History feature.
demonstration of histroy feature

Embedding Feature
The embedding feature in WiseMapping allows you to integrate your mind maps into various external platforms, such as websites and blogs. However, embedding is only possible if your blog or website supports iframe embedding, which is required to display your mind map.
If you're not familiar with iframe or embedding techniques, it's recommended to get help from someone with tech expertise.
For reference, we've embedded a sample mind map we created for this learning page. You can view the embedded mind map below to see how it looks in action.
If you have a question that is not listed here, please post your question on the FAQ discussion page.