"कज़म सीखिए" के अवतरणों में अंतर
('{| style="height:10px; float:right; align:center;" |<div style="width:150px;border:none; border-radius:10px;box-shadow: 5px 5px 5px #8...' के साथ नया पृष्ठ बनाया) |
|||
| पंक्ति १: | पंक्ति १: | ||
{| style="height:10px; float:right; align:center;" | {| style="height:10px; float:right; align:center;" | ||
|<div style="width:150px;border:none; border-radius:10px;box-shadow: 5px 5px 5px #888888; background:#ffffff; vertical-align:top; text-align:center; padding:5px;"> | |<div style="width:150px;border:none; border-radius:10px;box-shadow: 5px 5px 5px #888888; background:#ffffff; vertical-align:top; text-align:center; padding:5px;"> | ||
| − | ''[ | + | ''[https://teacher-network.in/OER/index.php/Learn_Kazam See in English]''</div> |
| − | + | ===परिचय=== | |
| − | === | + | |
| − | ==== | + | ==== '''मूलभूत जानकारी''' ==== |
{| class="wikitable" | {| class="wikitable" | ||
|- | |- | ||
| − | | | + | |आईसीटी सक्षमता |
| − | | | + | |कज़म एक स्वतंत्र और खुला स्रोत अनुप्रयोग है और यह टूल (साधन) इसे स्क्रीनकास्टिंग टूल और आपके कंप्यूटर स्क्रीन के स्क्रीनशॉट लेने, दोनों के लिए उपयोग में ले सकता है। |
| − | + | स्क्रीनकास्टिंग: कंप्यूटर स्क्रीन आउटपुट की डिजिटल रिकॉर्डिंग, जिसे वीडियो स्क्रीन कैप्चर भी कहते हैं, जिसमें अक्सर श्रव्य विवरण भी होता है। | |
| − | + | ||
| + | स्क्रीनशॉट : कंप्यूटर या मोबाइल के पर्दे पर आँकड़ों के प्रदर्शन की छवि | ||
|- | |- | ||
| − | | | + | |शैक्षिक अनुप्रयोग और प्रासंगिकता |
| − | | | + | |ऑडिओ (श्रव्य), टेक्स्ट, छवि, वीडियो और ऑडिओ डबिंग के संयोजन से वीडियो और छवि संसाधन बनाना। इसका उपयोग डिजिटल कहानी कहने की गतिविधियों में किया जा सकता है। |
|- | |- | ||
| − | | | + | |संस्करण |
| − | | | + | |कज़म 1.4.5 |
|- | |- | ||
| − | | | + | |अन्य समान अनुप्रयोग |
|[http://recordmydesktop.sourceforge.net/about.php RecordMyDesktop], [http://www.maartenbaert.be/simplescreenrecorder/ Simple screen recorder] | |[http://recordmydesktop.sourceforge.net/about.php RecordMyDesktop], [http://www.maartenbaert.be/simplescreenrecorder/ Simple screen recorder] | ||
|- | |- | ||
१६:१६, १० जुलाई २०१८ का अवतरण
परिचयमूलभूत जानकारी
Overview of featuresInstallation
Working with applicationUse Print ScreenThis is the most common method to take Screenshot. Pressing the “Print Screen” button will take the Screenshot of the “Entire Visible Screen”. Getting familiar with applicationWhen we open the Kazam we will see this main window. This main window contains the following sections. Open application from Applications--->Sound and Video--->Kazam.
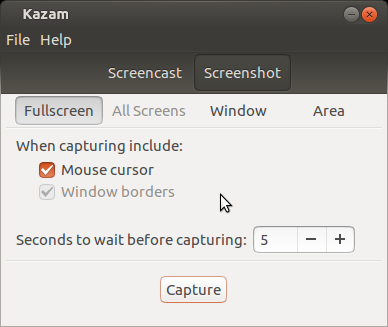
Getting start with simple screenshotWhen user launch the application, user will notice that in addition to recording screencast, user can also use the application to take screenshots, by switching to it at the top. After user opens kazam from menu, just click on the Screenshot option to take capture your computer screen as image. Here user can take screenshot in three modes like full screen, select window and select area. Users can choose
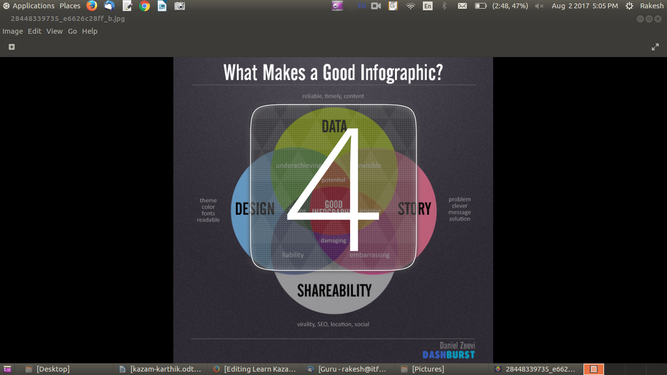
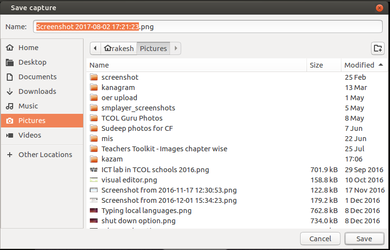
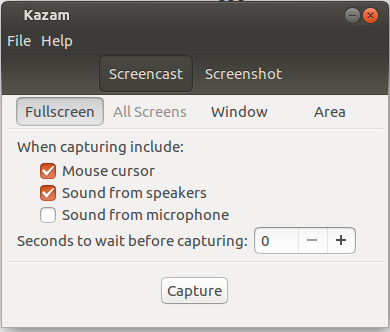
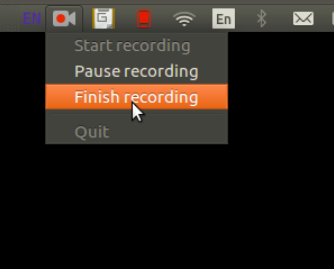
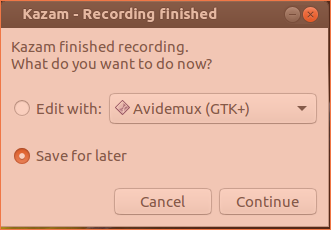
If users choose Area option, they have to drag cursor along particular area. Also users can choose whether to keep their Mouse cursor in their Screenshot and can choose to set capturing delay by few seconds before they actually start their Screenshot. NOTE:- These options are same for both Screenshot and Screencast. Saving screenshotAfter selecting above options users can click on Capture to take Screenshot. It will prompt users to choose location for save your screenshot. Users can also change the file name before saving. Getting start with Screen casting your computer screenThis works similar to Screenshot except that it helps users to record their computer screens along with audio and save them as videos. Here also users can choose whether to keep their Mouse cursor in their Screencast recording, also they can choose to record Sounds from speakers (computer audio output) and Sounds from microphone (record users input through microphone) in their recording which will help users to use their own voice or music from other sources. Also users can choose to set capturing delay by few seconds before they actually start their recording. After selecting above options users can click on Capture to begin Screencast. Saving/exporting screencastAfter recording a screen, users can click on Finish recording which will prompt users to choose edit it further using any video editing tools or to Save for later to save this video in computer. Ideas for resource creation
References |
