Learn Freeplane

Introduction
Basic information
| ICT Competency | Freeplane is a free and open source software application that helps you create and edit concept map, as a generic resource. For the purpose of this section, we can treat 'concept mapping' as nearly synonymous with 'mind mapping'. |
| Educational application and relevance | Making concept maps can support thinking, brainstorming, sharing information and documenting meetings and group processes.
Educators consider that concept mapping is a good approach for building skills in students for ideating and organizing ideas; they also find it a great asset for teaching. It is a great tool for students to help them organize their thought processes when writing. Teachers and students can use this application to collaboratively or individually create concept maps on an idea or explore a problem. |
| Version | Version - 1.10.2 |
| Configuration | This tool has no specific configuration requirements. It is available as a part of Ubuntu custom distribution.
Freeplane is part of the Ubuntu GNU/Linux operating system. It is also available for download on Windows and Mac operating systems as well. |
| Other similar applications | Freemind |
| The application on mobiles and tablets | MiMind |
| Development and community help | Freeplane website |
Overview of Features
Freeplane helps you to create a textual OER with possibilities for linking to additional resources (on your computer as well as on the web), adding annotations as well as images. It allows you to organize and order ideas into a hierarchy connected by lines (edges). Freeplane is a tool to create concept map that can be organized graphically, in the form of a map or tree of ideas. It provides a pictorial overview of the concepts, related concepts / sub-concepts for a topic. Nodes can also be linked with free lines (connectors) and labels. The concept map can be exported as an image as well as a text document.
Installation
For Ubuntu OS
- The application is part of the Ubuntu custom distribution.
- In case you do not find it on your computer, you can install by typing Freeplane on top search bar in Software Centre(App Grid).
- If you would like to install through the terminal follow these steps below:
- Open terminal by clicking Applications->System Tools->Terminal or through Keyboard shortcut
Ctrl+Alt+T - In the terminal window, type below command and press enter to start the installation by providing your machine password:
sudo apt-get install freeplane
- Open terminal by clicking Applications->System Tools->Terminal or through Keyboard shortcut
For Windows OS
To install and use Freeplane on your Windows computer, you need to install both Freeplane and Java runtime packages in your Windows computer.
- Download the Freeplane installable file from this link and download Java Runtime Environment from this link. You can save these two .exe files on your computer (preferably on Downloads folder).
- Now, go to the downloaded path on your computer and double click on "Freeplane-Setup-...exe" file to begin the installation.
- Click "Yes" if it ask your permission to allow this program make change to the computer, Keep clicking on "Next" button to continue and complete the installation.
- Install the downloaded Java runtime package using the same method described above.
![]() Note: To use Freeplane on your computer, Java runtime tool is compulsory, make sure you have installed both Freeplane and Java.
Note: To use Freeplane on your computer, Java runtime tool is compulsory, make sure you have installed both Freeplane and Java.
Watch this video tutorial for Freeplane installation steps
For MAC OS
- Download the installation file from this link.
- When the download is complete, find the downloaded .dmg file and double on click it.
Working with the application
- To download mindmap file click here (To download the example mindmap file, "Right click on 'click here' in the above line--> Click Save link as". Then give the path to save the file.)
Creating a map
- Creating a concept map

Opening Freeplane

Main window of Freeplane


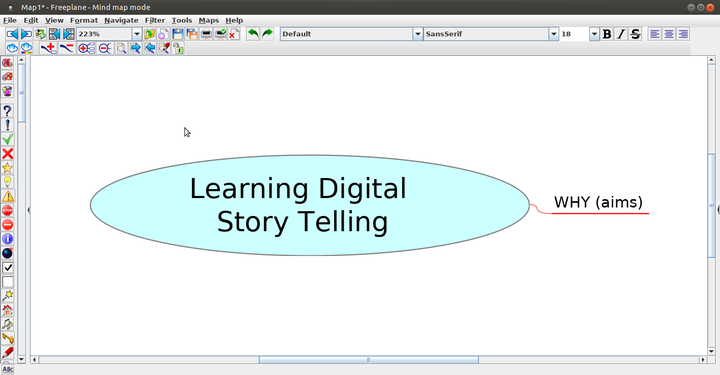
To learn working with Freeplane, we will start creating a concept map for Digital Story Telling; you will see above that Freeplane has opened a window with a box with text "New mindmap". This node, also called the "Root node" will contain the core idea/ theme to be discussed in the concept map. You can click on "File" option to "Save" this map; when the map is saved it will get saved with the name in the root node. Concept maps can be stored in your folders; they are saved with an extension ".mm".
Inserting nodes
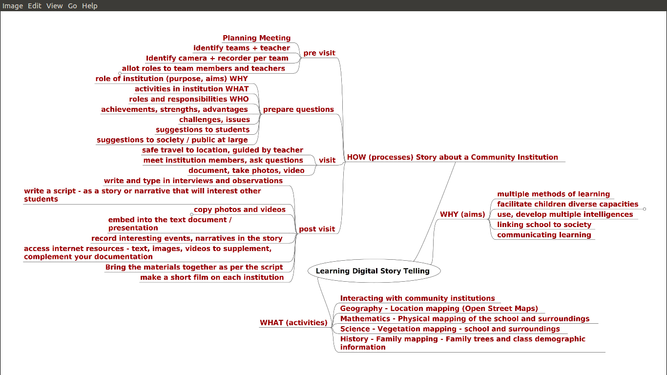
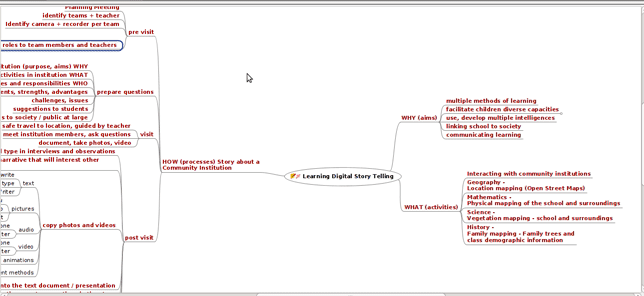
Here as an example, we have created a concept map called Learning Digital Story Telling. After the root node is created, additional ideas are added by adding more nodes, called child nodes. The concept map gets built by adding further child nodes, for topics and sub-topics. You can keep adding child nodes to any node.
- Use the ‘insert’ key to create a ‘child node’ this is a sub-concept of your current concept.
- Use the ‘enter’ key to create a ‘sibling’ this is a parallel concept to your current concept.
Thus you can create a concept map with knowing just two functions – add child node (insert) and add sibling node (enter). In this manner, a concept map can be used to classify and categorize information.
- Child and sibling nodes
Child Node
Sibling Node


Our map has nodes for the ‘why’, ‘what’ and ‘how’ of DST, with sub-nodes.
- The first image shows the creation of a concept map with the first child node.
- The second image shows the completed concept map with child nodes and sibling nodes.
You can go to the next line in a node for text by giving pressing SHIFT+ENTER. This command will make the cursor to go the next line.
![]() Note: You can Zoom in and Zoom out the map according to your requirement. To do this, Click on "View --> Zoom --> Zoom In/Out".
Note: You can Zoom in and Zoom out the map according to your requirement. To do this, Click on "View --> Zoom --> Zoom In/Out".
Linking nodes

Connect two nodes
Connector properties


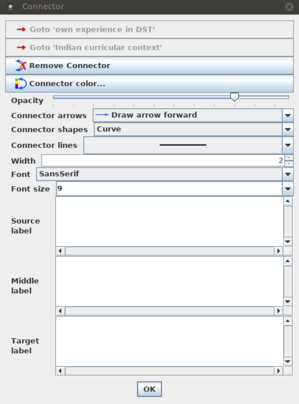
- When you discuss the concepts, you can notice that sometimes concepts are related, but not in a parent-child-sibling relationship and you want to link them to study in detail. For doing this you can add a graphical link (an arrow) to connect two nodes. To do this select two nodes, then go to Menu Bar and choose "Edit --> Connect" option. Then you can see graphical link which is connected to two nodes. You can click on the arrow and move it around.
- By right clicking on graphical link(connector) you will get the window as shown in second image. In that you can change connector color, shape, size and direction. You can also add or remove the source node label, middle node label, target node label.
![]() Note: If you want to select more than one node, you can press and hold Ctrl key and click on the the nodes. This process allows you to select multiple random things at a time.
Note: If you want to select more than one node, you can press and hold Ctrl key and click on the the nodes. This process allows you to select multiple random things at a time.
Adding notes
Node with a note added

How to add a note
Typing in the note window


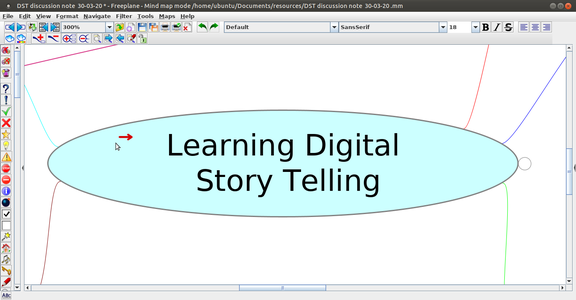
- In our Learning Digital Story Telling concept map, you will also see a yellow label beside the arrow and if you place your mouse over the yellow label, you will see a note description.
- To add a note, you can click on the node, as shown in the second image, go to "View--->Notes--->Display note panel". Alternatively, you can "right click on the node you want to add a note --> Click on Edit note in a dialogue"
- You can type your note in the note window which opens as shown in the third image. You can change the position and size of this note window.
Moving nodes
Moving nodes

To move nodes from one position to other position or to disconnect a node from its current parent and connect it to another parent you can simply click and drag it to its new location. Each node has two positions where you can drop another node. These positions are visible if the cursor is above it.
- If the cursor is near the top of the target node, the whole upper half lights up. If you drop a node here, the node will become a sibling above the target node.
- If the cursor is near the child side of the target node, the left or right side of the node lights up. If you drop the node here it will be connected as a child node.
Inserting Images to the Map

Inserting Image

- To insert an image to the map, you must have the image stored in your computer. You can insert the image to the map first by selecting the node under which the image should be displayed.
- To insert an image, You can go the menu "Insert-->Image-->Add Image". You can browse for the image you have on your system.
- Alternatively, you can right click on the "Node-->Add Image --> Add Image".
- Once image gets inserted onto the Map, you can resize it by moving the cursor to the right bottom of the image and then dragging it as per your requirement.
Hyperlinking files and web links
- Adding hyperlinks
Node with a hyperlink

Linking to resources on the internet


Linking to resources on the computer

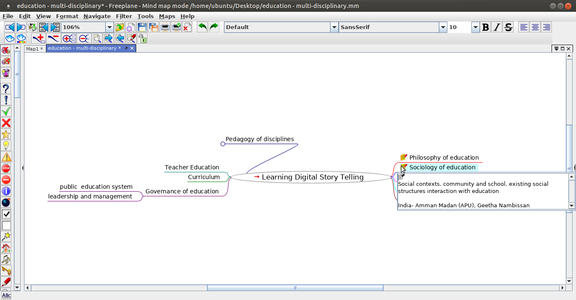
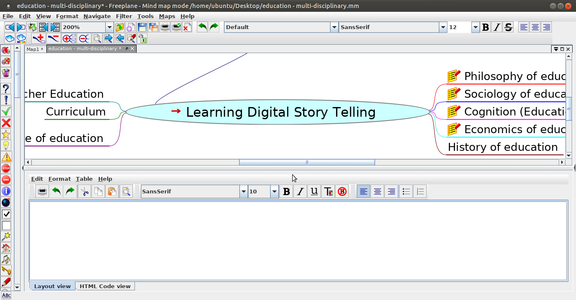
- In the first image, did you notice the red arrow in the root node of our concept map? This main node has a hyper-link which opens the Wikipedia page on digital story telling. You can embed a hyper-link on a node, such that clicking on the node can connect to related resources. In our Learning Digital Story Telling .mm concept map, we have inserted a hyper-link for the main node ‘Learning Digital Story Telling’.
- To do this Move your cursor to this node and select "Edit --> Link --> Add or Modify hyperlink" (type). You can also use the keyboard short cut CTRL-K. Freeplane will open an input bar as shown in the second image. We will type in our web page address https://en.wikipedia.org/wiki/Digital_storytelling into this input bar.
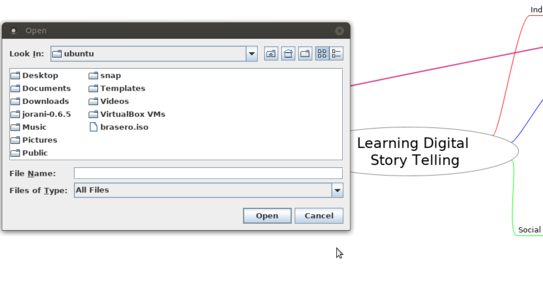
- You can also add a hyperlink to a local file on your computer. If you select When you click on "Edit-->Link-->Add Hyperlink" (choose) allows you to link to a file on a folder on your computer. The third image shows how to choose a file from your folders to link.
Adding different shapes to the node
In Freeplane node need not be a plain one. Node and its content can be well customized with different shapes. Generally we call it as Cloud. A cloud covers the entire area of a node and its contents and can take shape like Arc, Star, Rectangle etc.

Inserting cloud to the node

Node core properties


- The nodes can be designed in variety of attractive ways and we can also customize it according to our needs.
- To do that, Select the particular node for which the cloud properties need to be customized.
- Go to "Insert--> Cloud". Select the style of cloud you want.
- You can also change the cloud color.
- Some of the properties for a node can be changed in Format menu such as style, look etc. For this, Go to "Format--> Node core". Choose the various properties and make your map attractive.
Saving and exporting
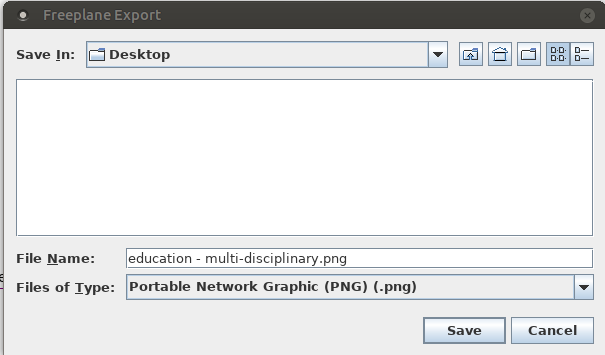
Like in most applications, a file can be saved using the "File --> Save" command, or by the shortcut key CTRL+S. Always give a meaningful file name, reading which you should get an idea of contents. Freeplane saves files with a .mm extension. You can also export a concept map to image (png or jpeg), text (odt and html) and pdf formats.

Saving the Map
Exporting the Map


- By default your concept map is saved by Freeplane as a '.mm' format file as shown in the first image. While saving the file, Freeplane will display the file browser, to allow you to select the folder in which you can save your file. By default, the file is saved in your home folder
![]() Note: If you save the Map in .odt format all the content in your map will appear as table of contents. The Main node will be the name of the chapter, sub nodes will be the sub points and so on. Whenever it is required to print the map as it is then better option will be to export it in .pdf extension.
Note: If you save the Map in .odt format all the content in your map will appear as table of contents. The Main node will be the name of the chapter, sub nodes will be the sub points and so on. Whenever it is required to print the map as it is then better option will be to export it in .pdf extension.
Like other softwares, Freeplane also contains keyboard shortcuts which makes our work much simpler. For such short Shortcut keys
Advanced Features
Typing in regional language in concept map
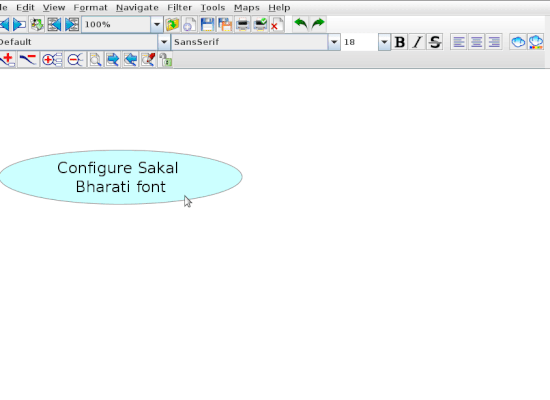
To type any Indian regional languages in your concept map, you need to download and install the Sakal Bharati font from this link (after your download, double click on the downloaded "SakalBharati.ttf" file, click on install font to install the font in your computer).
Now, configure SakalBharathi as the default font in your Freeplane tool.
Open a Freeplane tool, Goto "Format --> Manage styles --> Edit Styles". This will open a concept map standard template (like in below gif).
Configuring the Sakal Bharati font

- From the Menubar, Goto "Navigate -> click all visible nodes".
- Now on the right-side properties window go to "Font of whole core", Font family select "Sakal Bharati font".
- After you configure, click on the right mark (green colour) on the top left window.
- Now you just close and reopen concept map to see the Sakal Bharati is your default font.
Now, you should able to type regional languages in your concept map using Sakal Bharati font. ![]() Note: After installing the font in your computer, If you are not able to configure Sakal Bharati as a default font. You can follow below steps to type regional language at one time.
Note: After installing the font in your computer, If you are not able to configure Sakal Bharati as a default font. You can follow below steps to type regional language at one time.
Regional Language typing

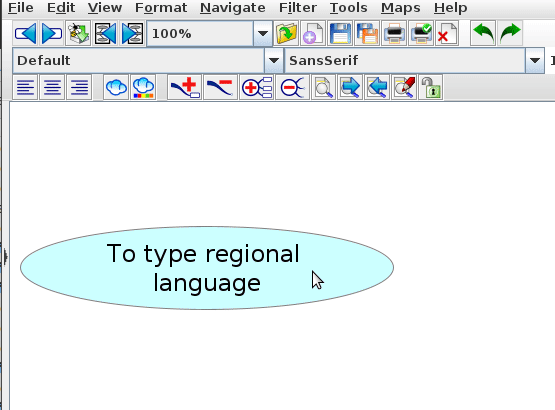
Open Freeplane, select the node where you want to type, change the font from sans serif to Sakal Bharati from the font list on top. Now, you can type any Indian regional language in the node. For every new node before typing, you have to select Sakal Bharati font and type.
Inserting Icons to the map
Icons are special symbols which makes the map more attractive and understanding. User can include variety of Icons to the Node or data just to give a hint to the viewer about its background. For example, you want to set a reminder for a particular item in the map. In this case you can put a symbol to make the viewer understand its status. To insert Icon to the map, click on node to which the Icon need to be placed --> Insert --> Icons --> Icons by Table.
Blinking nodes
You can make a particular node to blink in Freeplane. Blinking simply highlights the things with various colors. To do this, you can select any Node to which the effect should apply --> Format --> Node core --> Tick 'Blinking Node'.
Ideas for resource creation
Freeplane a good tool to start your resource creation work. You should develop a concept map for the topic you want to develop a resource on. The ideas you have about the topic, the sequencing of ideas and sub concepts, the specific points for each idea / sub-concept can be developed on the map. Links between nodes, with web pages, notes explaining concepts can all be inserted in the concept map. The power of the digital concept map is that you can keep revising the nodes, adding and deleting, moving and copying nodes as you want. This makes the process quite dynamic.
Once you have completed your concept map you can share it with your colleagues for feedback with which you can refine the concept map still further. Even it is easier to share when the map is exported as a PDF (.pdf) or an image (.png) file.
Exporting a concept map to a document for further fleshing out
The advantage of a concept map is that you can categorize and arrange your thinking the way you want to. You can enter detailed notes for any node. When you export it to a ODT, you can see this as a document, with the 'note' information being the text in the note, and all the nodes will become headings. This way you can even write a document using Freeplane. Use this whenever you are writing an essay or an article or a paper
![]() Note: Before exporting it into ODT you should format freeplane file to automatic layout for all nodes. To do this follow this step. "Go to Format-> Automatic Layout-> for all nodes" and select it. This will format nodes to headings, child nodes to sub headings and notes to text source.
Note: Before exporting it into ODT you should format freeplane file to automatic layout for all nodes. To do this follow this step. "Go to Format-> Automatic Layout-> for all nodes" and select it. This will format nodes to headings, child nodes to sub headings and notes to text source.
Frequently Asked Questions
I am unable to open Freeplane on my system
It is to be noted that Freeplane requires latest version of Java to be present in your system. Sometimes the issue can also be because you are trying to install Freeplane with a latest version but Java is obsolete or even vice versa. So make sure that you have the latest version of Java in your system. If not, click on this link to download the latest version of Java. To check the version of Java installed on your system, Open Command prompt or Terminal and type "java -version" and press Enter.
After upload/share my concept map on the Internet, inserted Images are not displaying
When you insert an image into your concept map, you do not actually 'save' the image inside the concept map. Freeplane will only store the 'path' information, that is the location of the image file on your computer. Now when you mail the concept map to someone else or upload it on a web page, the image is not shared along with the concept map. When the map is opened by another person, Freeplane will try to locate the image again in the same location as it is in your computer, and will fail to find it. Hence, the image will not appear.
One way of not facing this problem would be to hyperlink to an image on the web/internet. In which case when you click on the link, Freeplane will try to get the image from the web, and if there is connectivity you will be able to access the image. Hence, the images not appearing subsequently is not a problem.
I am unable to edit the map in any way, what can I do?
When you unable to do anything on the map, you will be inside the 'View Mode'. Kindly change it to 'Edit mode', so that you can edit the map. To do this, Click on "Maps-->Edit Mode".
I am getting a pop window with some version ?
Click on OK to get the new concept map, The standard version is 1.6 mm.
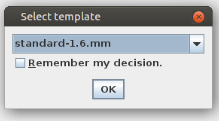
Standerd template version is 1.6 mm
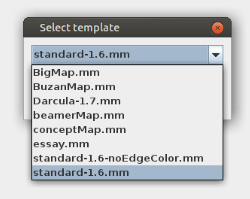
Other template options


I am getting the example/another concept map when I open Freenplane to create a map?
Click on File→New map to create new file.

How to move node or sub-child Left/Right, Up/Down?
Select and use Ctrl+left/right keys to move node left/right and Ctrl+up/down to move nodes up/down.

How to move sub-child Up/Down?
Select and use Ctrl+up/down to move nodes.

When I Hit Insert key not able to create sub-child (sub-node or child node) node?
Tab key is another option to create sub-child (sub-node or child node) node.
I am not finding the Note window, hyperlink,node?
In new version of Freeplane you need to Right click and you will get edit option in which you find the option Note window, hyperlink, link node.
How to zoom in/out the concept map?
Click on white space in the map and then use Ctrl+scroll on mouse (or) you will find the percentage icon on the top menu bar you can click on this and increase or decrease the value .

I am not getting the Emoji where do I get?
You will have a arrow icon on the left side of your freeplane window, click on it you will get the Emoji.

I am not finding the Tool or Menu bar?
Right click on the white space you will get option where Menu and Tool bar is unticked you need to tick it to enable.

I am not able to click on the link/note which I have inserted after the export to PDF or Image?
Exporting to PDF or Image is not Dynamic, its a Static page/Image so you will not be able to click the link or see the note window
Which version of java need to be installed to run freeplane?
Freeplane need requires Java 11 to 17 to be installed.
Where can I get all the shortcut keys?
Click on Help(menu bar)→Key-reference to know the shortcut keys.

Can I resize the embedded images size?
Yes you can resize your Image, when you take your cursor on the bottom right of the image the arrow cursor get changes , now click and drag up(smaller size) and down(Large size) to resize the image according to your need.

How to update/remove inserted hyperlinks?
You need to right click on the link, go to link→ Add or modify the link →delete the link. This will remove your inserted hyperlink.
Can I embed video and audio files to the concept map?
No we can’t embed Video or audio files to concept map, But you can hyperlink the local file path so that you can open it by clicking the link when presenting it.